Sourdough Focaccia with Soft Airy Texture
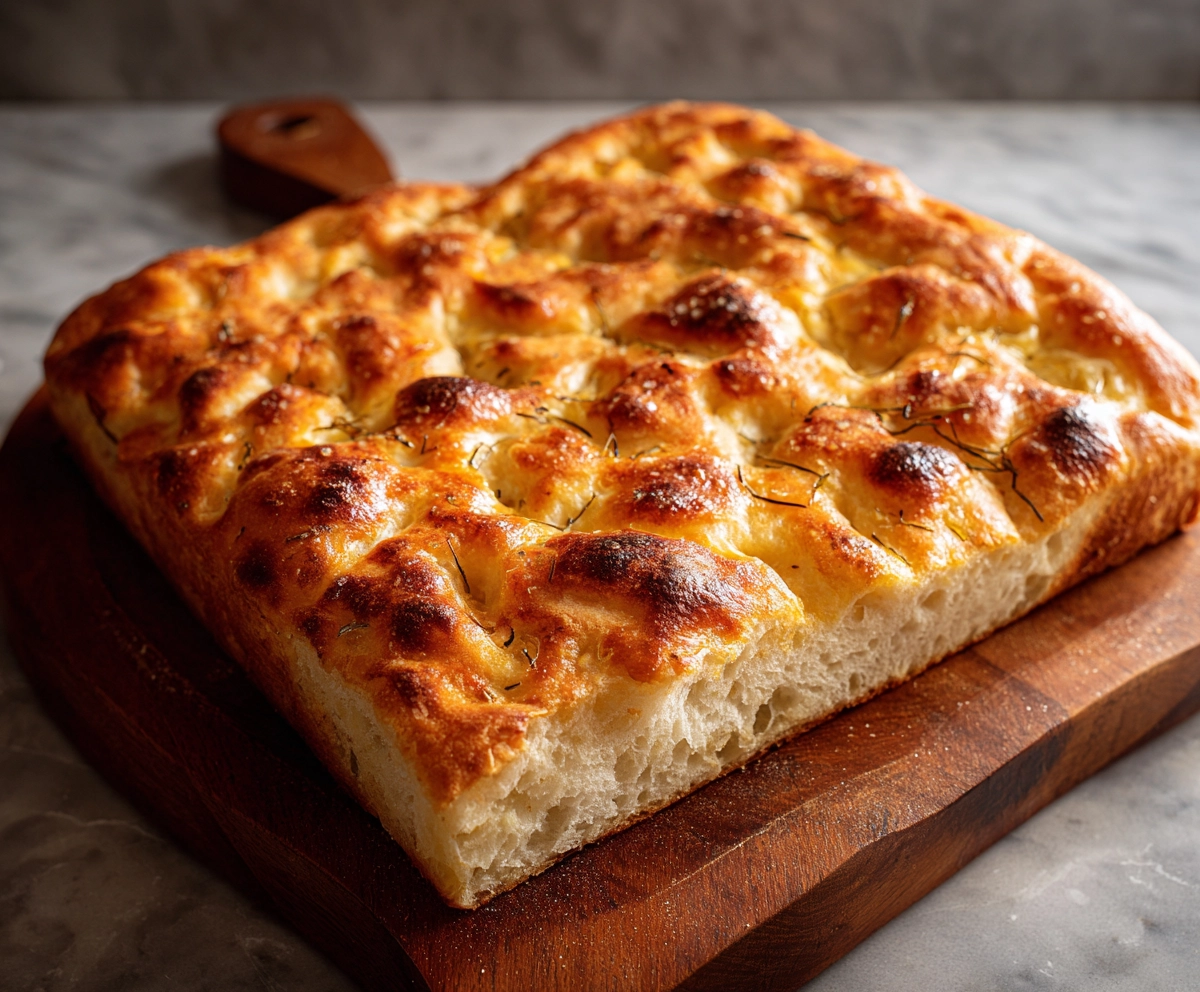
Over time, I have realized that breads like sourdough focaccia demand more attention than complexity. The process itself is simple, yet every small decision shapes the final result. When I prepare focaccia, my focus stays on structure, not speed. The dough should feel alive, holding air within while staying soft and elastic. Many versions fall short because they rush fermentation or handle the dough too aggressively. I approach it differently. I control hydration, guide fermentation carefully, and treat the dough with patience at every stage. The goal is not just a risen bread, but one that carries a light interior with a balanced crust. When done properly, sourdough focaccia becomes consistent, refined, and deeply satisfying, reflecting technique rather than effort.
When Structure Breaks Before Baking
In my experience, most failures begin during fermentation. I often see dough pushed too far, where it looks airy but lacks strength. Overproofed dough cannot hold its structure, so instead of rising in the oven, it collapses. Another issue I notice is rough handling. Pressing or stretching the dough too forcefully removes the air that has already developed. Hydration mistakes also play a role. Too much water without proper folding creates a weak dough that spreads instead of rising. Temperature adds another layer of difficulty. Warm conditions accelerate fermentation, making timing harder to control. Without careful observation, the dough passes its ideal stage quickly. These mistakes may seem small, but they directly affect texture. Without structure, the focaccia loses its defining soft and airy quality.
How I Maintain a Light and Stable Crumb
When I make sourdough focaccia, I focus on balance from the beginning. I allow the dough to ferment until it shows life, but not to the point where it weakens. Instead of relying on time, I watch how it feels and moves. A properly fermented dough should be soft, slightly jiggly, and still hold its shape. I use gentle folding to build strength without removing air. During shaping, I avoid forcing the dough into place. If it resists, I let it rest and relax. This keeps the internal structure intact. I also prefer controlled fermentation, sometimes using cooler conditions to slow the process and improve texture. By respecting the dough at every stage, I achieve a focaccia that rises well and stays light throughout.
Ingredients List
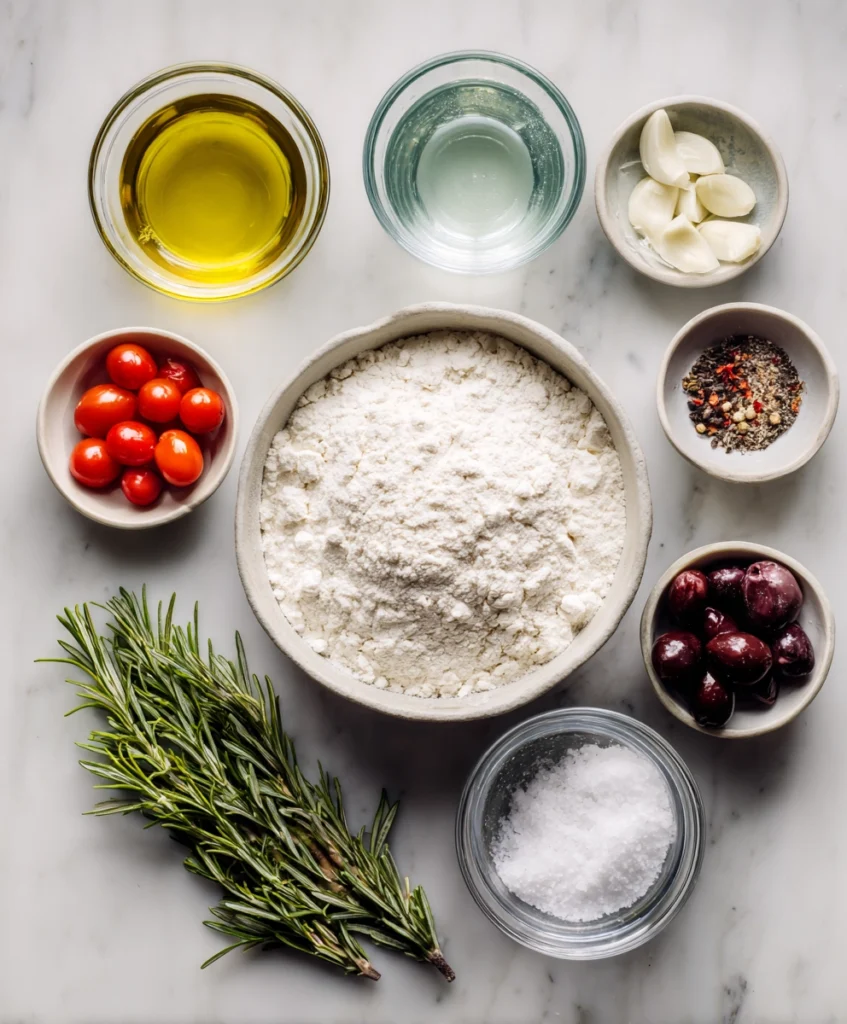
Base Ingredients:
- Bread flour
- Active sourdough starter
- Water
- Salt
- Olive oil
Optional Add-ins:
- Fresh rosemary
- Cherry tomatoes
- Garlic slices
- Sea salt flakes
- Olives
Step-by-Step Instructions
Prepare the Dough
I begin by mixing flour and water until the mixture comes together without dry patches. I let it rest so the flour absorbs moisture fully, which helps create a better structure later. After that, I add the sourdough starter and salt, mixing gently until the dough forms. At this stage, the dough feels soft and slightly sticky, which is what I expect. I cover it and allow it to rest, giving it time to develop naturally. Over the next couple of hours, I perform gentle folds. Each fold strengthens the dough while keeping the air inside. I never rush this stage because it builds the foundation. As the dough develops, it becomes smoother and more elastic, showing clear signs that it is ready for fermentation.
Bulk Fermentation
Once the dough is developed, I transfer it into a lightly oiled container. I allow it to ferment while observing its behavior rather than relying only on time. The dough should expand gradually and develop small air pockets. I avoid letting it rise excessively because that weakens its structure. During the early stage, I may fold it once or twice more to maintain strength. I keep the environment steady, adjusting based on temperature. Warm conditions require more attention, while cooler ones allow slower development. When the dough feels soft yet stable, I know it is ready. I handle it carefully when moving it to the tray, ensuring the air inside remains undisturbed. That careful handling makes a clear difference in the final texture.
Shaping and Final Proof
In the tray, I guide the dough gently toward the edges without forcing it. If it resists, I let it rest before continuing. This keeps the structure relaxed and prevents tightening. Once positioned, I allow it to proof again until it spreads naturally. The dough should look airy and feel light to the touch. I create dimples across the surface using my fingertips, pressing just enough without collapsing the dough. Then I add olive oil and any toppings I prefer. Each step is done with control, because too much pressure removes the air. I let it rest briefly again so it regains volume before baking. This final stage ensures the focaccia holds its softness.
Baking Process
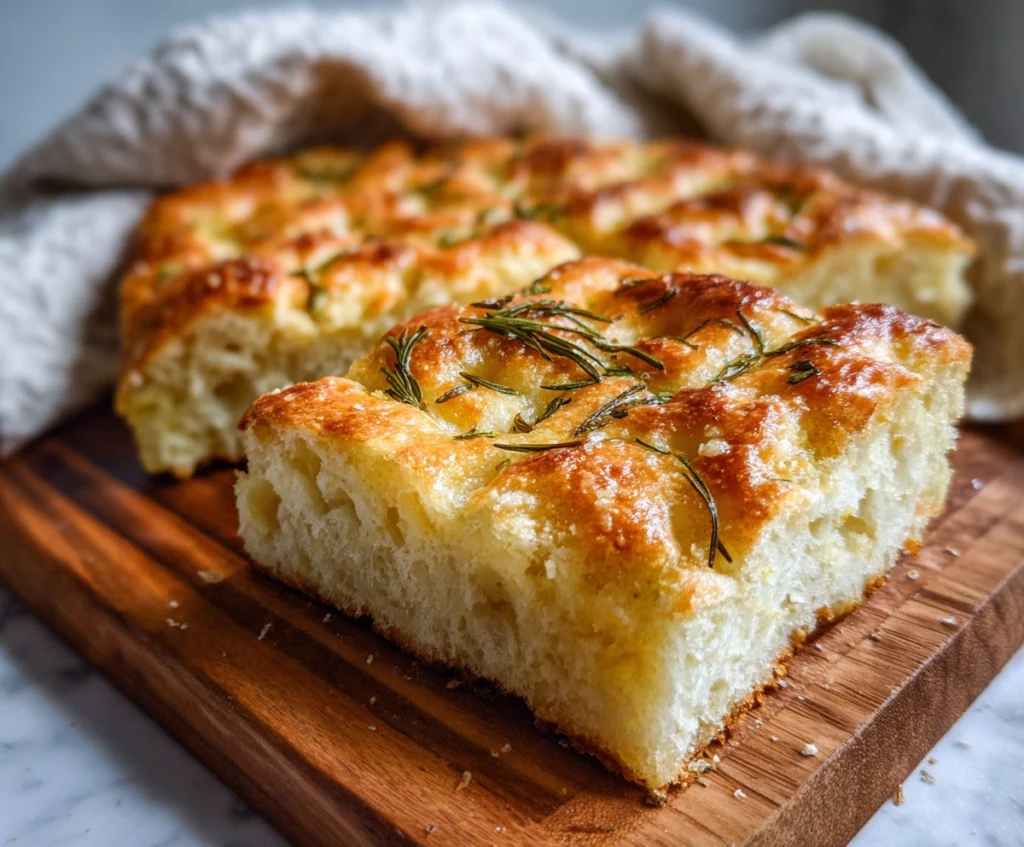
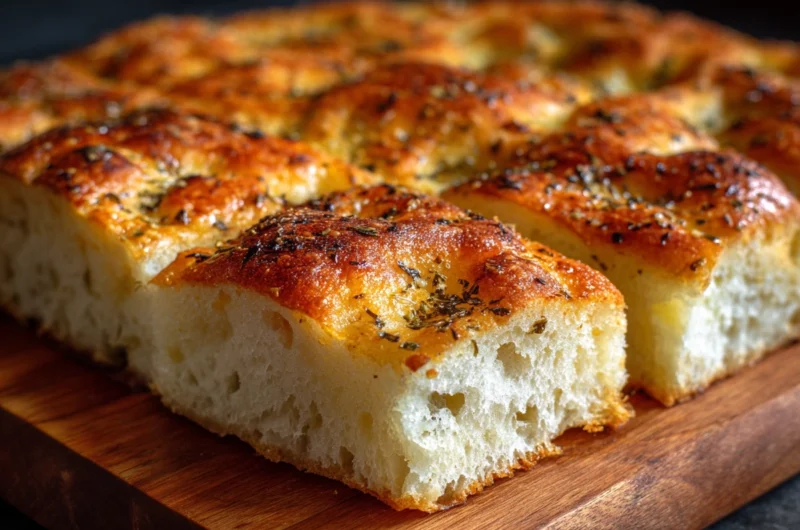
Before baking, I make sure the oven is fully heated. A strong initial heat helps the dough rise properly. Once inside, I avoid opening the oven, allowing stable heat to do its work. The focaccia begins to lift and develop a golden surface. I watch for a crisp edge and even color across the top. When it is ready, I remove it and let it cool slightly before slicing. That short rest allows the crumb to settle and prevents a dense texture. I sometimes brush a little olive oil over the top to maintain softness. When cut, the bread reveals a light interior, which is always my goal.
Cook Time
Total: 6 hours
Prep: 30 minutes
Bake: 25 minutes
Servings
When I prepare sourdough focaccia, I aim for portions that feel balanced and consistent. One tray usually serves eight to ten people comfortably, depending on how it is cut. I make sure each piece holds a similar thickness so the texture remains even throughout. Thicker slices work well for meals, while thinner ones suit lighter servings. I also pay attention to presentation, arranging pieces neatly so they look clean and structured. Serving it warm enhances both texture and aroma. With proper portioning, each serving delivers the same softness and structure. That consistency is what I focus on every time I prepare this bread.
Makes approximately 8 to 10 servings
Nutritional Information (approx. per serving)
- Calories: 220 to 260 kcal
- Carbohydrates: 30 grams
- Protein: 5 grams
- Fat: 8 grams
- Fiber: 2 grams
- Sodium: Moderate
From my perspective, sourdough focaccia offers a balanced approach to bread. Natural fermentation supports digestion and makes it easier to process compared to regular breads. Olive oil provides healthy fats that improve texture while adding nutritional value. The moderate carbohydrate content delivers steady energy, making it suitable for daily meals when consumed in balance. When paired with fresh toppings, it becomes even more nourishing. I always focus on quality ingredients and proper preparation, which makes a noticeable difference in both taste and overall benefit.
Storage Instructions
I store sourdough focaccia only after it has cooled completely. Trapping heat creates moisture, which affects texture. I wrap it lightly and keep it in an airtight container at room temperature for short term storage. Refrigeration is something I avoid because it dries the bread quickly. For longer storage, I slice it and freeze it in portions. When reheating, I use the oven to bring back its softness and light crispness. Microwaving changes the texture, so I do not rely on it. With proper storage, the bread maintains much of its original quality and remains enjoyable even after a few days.
Suggestions
When serving sourdough focaccia, I prefer keeping things simple. A light drizzle of olive oil with herbs allows the bread to stand out. It pairs well with soups, salads, and even as a base for sandwiches. I sometimes toast slices slightly to add a crisp layer, depending on the meal. I also experiment with toppings based on what is available, but I avoid overloading it. Balance is always my focus. Presentation also matters, so I arrange it neatly for a clean look. With small adjustments, the bread fits easily into both casual meals and more refined settings.
Seasonal Relevance
Sourdough focaccia adapts easily across seasons, which is why I keep it in regular rotation. In warmer months, I lean toward lighter toppings such as herbs and vegetables. During cooler periods, I prefer richer additions that complement warm meals. Fermentation timing also changes with temperature, so I adjust accordingly. Warmer environments require closer attention, while cooler ones allow longer resting. Seasonal ingredients add variety without changing the core method. No matter the time of year, I maintain the same approach. Control the process, preserve the structure, and keep the texture consistent.
Conclusion
Sourdough focaccia may appear simple, but it reflects precision in every step. From fermentation to baking, each stage requires attention and control. I focus on balance rather than excess, allowing the dough to develop naturally. When handled properly, the result is a bread that feels light, structured, and consistent. Over time, the process becomes more intuitive, and the results improve. It is a recipe I return to often because it remains reliable and adaptable. With practice, it becomes less about following steps and more about understanding the dough itself.
Frequently Asked Questions
How do I know if my dough is properly fermented?
I look for a dough that feels soft and slightly airy while still holding its structure. It should show small air bubbles and a gentle rise. If it feels too loose or overly fragile, it has likely gone too far and will not perform well in the oven.
Can I make focaccia with a weak starter?
A weak starter will struggle to develop proper fermentation, leading to a dense result. I always use a well fed and active starter that shows clear signs of activity. Strong fermentation is essential for achieving a light texture.
Why does my focaccia turn out flat?
Flat focaccia usually results from overproofing or weak gluten development. Handling the dough too much can also remove air. I focus on controlled fermentation and gentle shaping to maintain structure and achieve proper rise.
Is high hydration necessary for airy focaccia?
Higher hydration helps create an open crumb, but it must be balanced with proper technique. Without folding and structure, the dough becomes difficult to manage. I maintain hydration while building strength through gentle handling.
Can I bake focaccia in advance for serving later?
Yes, I often bake it earlier and reheat it before serving. Using the oven helps restore its texture. I avoid reheating methods that make it chewy, as maintaining softness and structure is always the priority.
Sourdough Focaccia with Soft Airy Texture
8-10
servings30
minutes25
minutes2000
kcal3
minutesA carefully prepared sourdough focaccia built on controlled fermentation and gentle handling. The result is a soft airy interior with a lightly crisp surface and balanced richness from olive oil. Each stage focuses on structure, allowing the dough to develop naturally without being rushed. A reliable bread that reflects technique, patience, and consistency.
Ingredients
500 grams bread flour
100 grams active sourdough starter
400 ml water
10 grams salt
30 ml olive oil
1 tablespoon olive oil for topping
- Optional:
1 tablespoon fresh rosemary
½ cup cherry tomatoes
2 cloves garlic sliced
Sea salt flakes
¼ cup olives
Directions
- Mix flour and water and let it rest for 30 minutes.
- Add sourdough starter and salt, then mix until dough forms.
- Perform stretch and folds every 30 minutes for 2 hours.
- Let the dough ferment until slightly risen and airy.
- Transfer to an oiled tray and gently spread.
- Allow final proof until dough looks light and soft.
- Dimple the surface, add olive oil and toppings.
- Bake at 220°C for 20 to 25 minutes until golden.
- Cool slightly before slicing and serving.
Recipe Video
Notes
- Use active sourdough starter for proper rise.
- Avoid overproofing as it weakens the structure.
- Handle dough gently to keep air pockets intact. Adjust fermentation time based on room temperature.
- Always preheat oven properly for best texture.