Lemon Meringue Pie Recipe
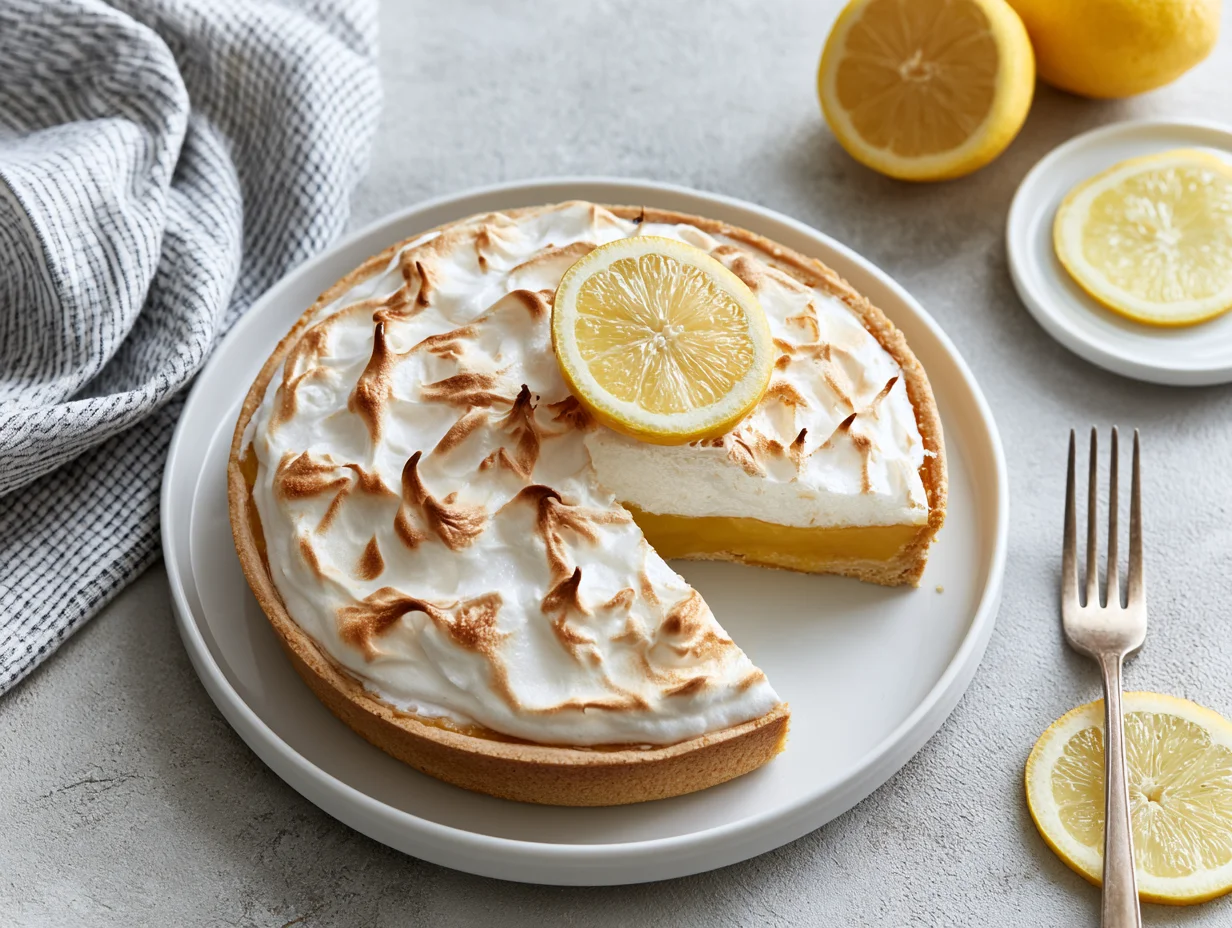
Lemon meringue pie is one of those desserts that commands attention the moment it arrives at the table. The contrast alone — a billowing, toasted meringue crown sitting over a filling that is simultaneously tart, sweet, and silky — is enough to make anyone stop mid-conversation and take notice. It is a showpiece that tastes exactly as dramatic as it looks.
What makes this pie genuinely exceptional is the balance. The lemon curd filling is bright and assertive without being harsh. The meringue is light, marshmallow-soft inside with just enough toasted exterior to add a subtle depth. And the crust is buttery, short, and sturdy enough to hold everything together without turning soggy.
This is not a quick weeknight recipe. It has three distinct components, each of which deserves your full attention. But it is also not as intimidating as its reputation suggests — if you understand what you are doing and why, every step becomes straightforward.
Made properly, this lemon meringue pie is the kind of dessert people remember. It earns compliments at dinner parties, it becomes a family tradition, and once you have made it from scratch, the store-bought version will never satisfy you again.
Ingredients You’ll Need
Every element of this pie earns its place — from the buttery base that holds its shape under the filling to the fresh lemon juice that gives the curd its unmistakable sharpness and life.
One of the things I love about this recipe is that it uses simple pantry ingredients. You probably already have most of them in your kitchen.
Base Ingredients:
- 1 pre-baked 9-inch pie shell (homemade or store-bought shortcrust pastry)
- 1 cup granulated sugar (for lemon filling)
- 3 tbsp cornstarch
- 1.5 cups water
- 3 large egg yolks (reserve whites for meringue)
- 1/2 cup fresh lemon juice (approximately 3 to 4 lemons)
- 1 tbsp lemon zest, finely grated
- 2 tbsp unsalted butter
- 1 pinch of salt (for filling)
- 3 large egg whites (room temperature)
- 1/4 tsp cream of tartar
- 6 tbsp granulated sugar (for meringue)
- 1/2 tsp pure vanilla extract
Optional Add-ins:
- 1 tsp lemon extract (intensifies citrus flavor in the curd)
- 1 tbsp limoncello (adds a gentle complexity to the filling)
- 1/4 tsp almond extract (subtle warmth in the meringue)
- 1 tbsp powdered sugar (added to meringue for extra stability)
- 1 tsp cornstarch (mixed into meringue to prevent weeping)
- 1/2 tsp orange zest (combined with lemon zest for a citrus blend)
Step-by-Step Instructions
Step 1: Prepare and Blind Bake the Crust
If making your crust from scratch, combine flour, cold butter, salt, and ice water to form a short pastry dough. Chill for 30 minutes before rolling. Press into a 9-inch pie dish, trim the edges, and dock the base with a fork. Line with parchment paper, fill with pie weights or dried beans, and blind bake at 375°F for 15 minutes. Remove weights and bake a further 10 minutes until golden and fully set. Allow to cool completely before adding the filling. A fully baked, cooled crust is essential — a warm or underbaked shell will turn soggy under the lemon curd.
Step 2: Make the Lemon Curd Filling
In a medium saucepan, whisk together the granulated sugar, cornstarch, and salt. Gradually whisk in the water until smooth and no lumps remain. Cook over medium heat, stirring constantly, until the mixture begins to thicken and bubble — about 7 to 8 minutes. In a separate bowl, lightly whisk the egg yolks. Slowly ladle a small amount of the hot mixture into the yolks while whisking continuously to temper them — this prevents scrambling. Pour the tempered yolks back into the saucepan, return to medium heat, and cook for another 2 minutes. Remove from heat and stir in lemon juice, lemon zest, and butter until fully incorporated and glossy.
Step 3: Fill the Crust and Keep It Hot
Pour the hot lemon curd filling directly into the pre-baked pie crust immediately after cooking. The filling must be hot — not warm, not cooled — when you add the meringue on top. This is one of the most critical steps in the entire recipe. Hot filling from underneath helps cook the base of the meringue, which is what prevents the dreaded liquid layer that forms between the curd and meringue. Spread the filling evenly with a spatula and work quickly. Do not allow it to sit and cool before the meringue goes on — timing matters here more than in any other step.
Step 4: Whip the Meringue to Stiff Peaks
In a perfectly clean, grease-free bowl, beat the room-temperature egg whites with cream of tartar using a hand or stand mixer on medium speed until soft peaks form. Increase the speed to high and gradually add the granulated sugar one tablespoon at a time, beating continuously. Add the vanilla extract. Continue beating until the meringue holds stiff, glossy peaks — when you lift the beater, the peak should stand upright without drooping. This typically takes 4 to 6 minutes total. Do not over-beat into dry, grainy peaks and do not under-beat into a loose, flat foam. Stiff and glossy is the goal.
Step 5: Top, Seal, and Bake
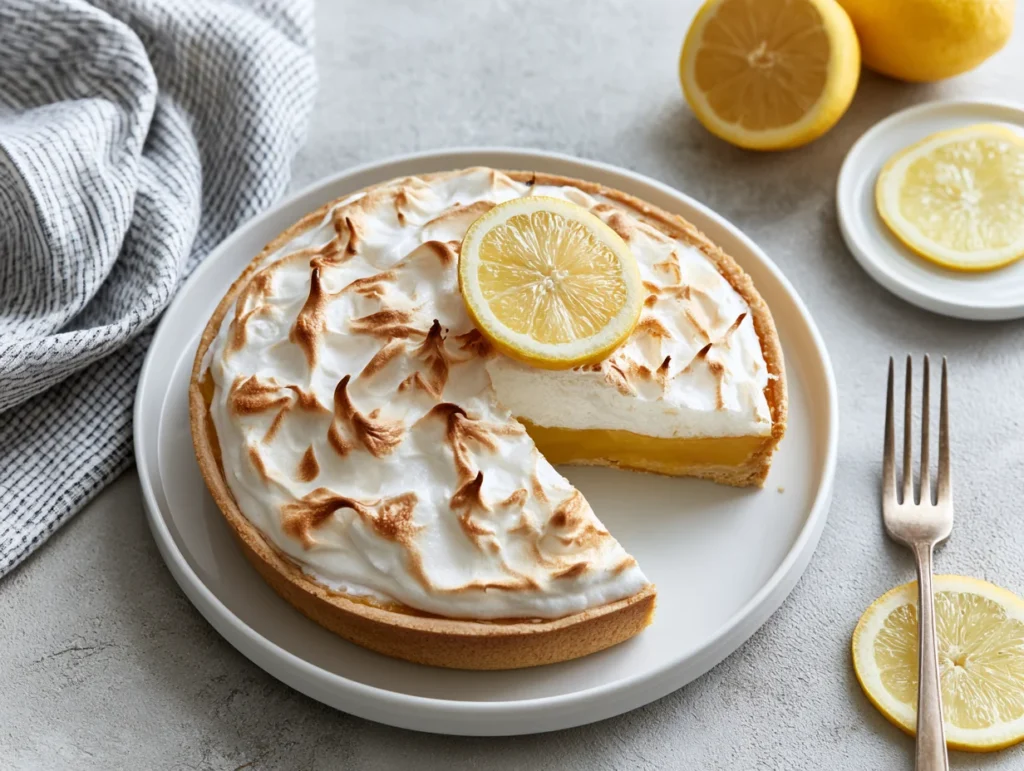
Spoon the meringue over the hot lemon filling, starting from the edges and working inward. This edge-first approach is deliberate — sealing the meringue to the crust around the entire perimeter prevents it from shrinking away from the edges during baking, which is one of the most common meringue failures. Use the back of a spoon to create soft peaks and swirls across the surface. Place the pie in a preheated 350°F oven and bake for 15 to 18 minutes until the meringue is golden across the top and lightly browned at the peaks. Cool at room temperature for one hour before refrigerating for at least two hours before slicing.
Cook Time
Total:
Approximately 3 hours 30 minutes (including cooling and chilling time)
Prep:
25 minutes active prep + 30 minutes crust chilling
Bake:
25 minutes for crust + 15 to 18 minutes for finished pie
Servings
This recipe is designed for a standard 9-inch pie dish and produces a generously filled pie with a tall meringue crown. Sliced into traditional wedges, it serves eight people comfortably as a dessert course. If you are serving it alongside other desserts at a gathering, it can stretch to ten slices without feeling sparse.
The filling quantity in this recipe is intentionally generous — it produces a thick, substantial curd layer rather than a thin base that disappears under the meringue. That ratio of filling to meringue is what makes each slice feel satisfying rather than mostly air and pastry.
Makes approximately 8 servings.
Common Mistakes in This Recipe
The most common mistake is adding the meringue to cooled or lukewarm lemon filling. Many bakers prepare each component in stages, letting the filling set before they whip the meringue. This creates the weeping layer — that watery pool between the curd and the meringue — because the bottom of the meringue never gets cooked through. Hot filling is non-negotiable.
Underbeating the egg whites is another frequent error. Meringue that has not reached stiff peaks will spread, flatten, and weep as it bakes. It will look acceptable going into the oven but will collapse and shrink as it cools, leaving a deflated, wet layer on top of the pie.
Not sealing the meringue to the crust edge causes dramatic shrinkage during baking. The meringue pulls inward as the proteins contract under heat, and if it is not anchored to the crust, it slides toward the center, leaving exposed filling around the perimeter.
Over-refrigerating before serving also causes problems. Extended refrigeration — particularly beyond 24 hours — causes the meringue to weep and the crust to soften. This pie is best eaten the day it is made or within 24 hours for the best texture across all three components.
Solutions to Common Mistakes
Coordinate your timing so the meringue is whipped and ready to go the moment the lemon curd finishes cooking. Have your egg whites at room temperature before you start the filling so you can begin whipping immediately. The two steps should be nearly simultaneous — filling on the stove, whites ready to beat.
Invest the time in beating the whites properly. Use a clean, completely grease-free bowl — even a trace of fat from egg yolk or residual butter will prevent the whites from whipping. Beat until you can hold the bowl upside down without the meringue moving and the peaks stand fully upright when the beater is removed.
Always begin spreading the meringue from the outer edge inward. Use a spatula or the back of a spoon to press the meringue gently against the inner wall of the crust before building upward and inward toward the center. That contact point between meringue and crust is your anchor — it holds the meringue in place during baking and cooling.
Plan to serve the pie within the same day or by the following day at the latest. If you need to prepare ahead, make the crust and lemon curd up to one day in advance and store them separately. Whip and apply the meringue on the day of serving, then bake and cool just before the meal.
Nutritional Information (approx. per serving)
- Calories: 320 kcal
- Protein: 4g
- Total Fat: 11g
- Saturated Fat: 5g
- Carbohydrates: 52g
- Sugar: 38g
- Fiber: 0.5g
- Sodium: 140mg
- Cholesterol: 90mg
- Vitamin C: 15% DV
- Calcium: 4% DV
- Iron: 6% DV
Fresh lemon juice is central to this recipe and brings genuine nutritional value beyond flavor. Lemons are a meaningful source of vitamin C, an antioxidant that supports immune function, collagen synthesis, and iron absorption. A single serving of this pie contributes approximately 15 percent of the recommended daily vitamin C intake.
Egg whites, which form the meringue in this recipe, are essentially pure protein with virtually no fat. While the quantity per slice is modest, egg whites are one of the most bioavailable protein sources available — meaning the body utilizes them efficiently, with minimal waste.
Lemon zest, used in the filling, contains concentrated amounts of flavonoids and limonene, compounds that have been studied for their antioxidant and anti-inflammatory properties. Most of the lemon’s beneficial plant compounds reside in the zest rather than the juice, making its inclusion here both a flavor and nutritional decision.
The butter and egg yolks in the lemon curd provide fat-soluble vitamins, particularly vitamin A and vitamin E. While this is certainly a dessert and should be enjoyed as such, it is worth noting that its core ingredients — eggs, fresh citrus, and real butter — carry more nutritional integrity than most processed sweets.
Storage Instructions
Lemon meringue pie is at its absolute best the day it is baked. The meringue is at peak texture — light, marshmallow-soft inside, lightly toasted outside — and the crust retains its crispness before the moisture from the filling has a chance to migrate into it. If you can, serve it the same day.
For short-term storage, loosely tent the cooled pie with plastic wrap or a pie cover and refrigerate for up to 24 hours. Avoid pressing the wrap directly onto the meringue as it will stick and tear the surface. The meringue will begin to weep slightly after the first night, which is normal — it is a natural consequence of the sugar drawing moisture from the air.
Do not freeze lemon meringue pie. The meringue does not survive freezing and thawing — it becomes watery, grainy, and collapses entirely upon thawing. The lemon curd filling also changes texture when frozen, becoming less smooth and more separated. This is a make-fresh dessert by nature.
If you want to prepare components in advance, store the baked and cooled crust at room temperature under a light cover for up to two days, and prepare the lemon curd up to 48 hours ahead, keeping it covered in the refrigerator. Reheat the curd gently before pouring into the crust, then top with freshly whipped meringue and bake.
Suggestions
Lemon meringue pie is a dessert that pairs beautifully with simplicity. A cup of strong black tea or a freshly brewed espresso alongside a clean slice of this pie is one of the most satisfying combinations in all of afternoon dining. The bitterness of the coffee or tea cuts through the sweetness of the meringue and amplifies the tartness of the lemon curd.
For a dinner party presentation, consider individual lemon meringue tarts rather than a whole pie. Use the same recipe scaled proportionally across four to six small tart shells. Individual portions are easier to plate elegantly, they bake in less time, and every guest gets a perfect ratio of crust to curd to meringue in each piece.
If you want to experiment with the flavor profile, try substituting half the lemon juice with fresh lime juice and adding lime zest alongside the lemon zest. The result is a citrus curd with more complexity and a slightly more tropical edge — visually identical but noticeably different on the palate.
For a winter variation, a blood orange meringue pie made using the exact same method delivers a visually stunning deep pink curd with a flavor that is rounder, slightly less sharp, and beautifully suited to the season. Blood oranges are naturally sweeter than lemons, so reduce the added sugar in the filling by two tablespoons to maintain balance.
Seasonal Relevance
Lemon meringue pie belongs most naturally to spring and early summer. The sharp brightness of fresh lemon curd feels inherently seasonal — it mirrors the clean, fresh quality of the season itself. Easter tables, Mother’s Day brunches, spring garden parties, and end-of-school celebrations all feel complete with this pie as the centerpiece dessert.
In summer, this pie transitions seamlessly to outdoor entertaining. Its visual drama — that tall, toasted meringue crown — makes it a natural showpiece at picnics and backyard gatherings. The tartness of the lemon filling is also particularly refreshing in warmer temperatures, offering a brightness that heavier summer desserts like chocolate cake cannot provide.
Autumn and winter are less traditional seasons for this pie, but the recipe adapts well with seasonal citrus variations. Meyer lemons, which peak in late winter and early spring, produce an exceptionally floral and less aggressive curd that suits cooler months beautifully. Blood orange, as mentioned earlier, fits winter tables with both its flavor and its dramatic color.
The deeper truth is that lemon meringue pie is a year-round dessert for anyone who appreciates the craft behind it. It is less about the season and more about the occasion — and any occasion that calls for something genuinely impressive, made entirely from scratch, is the right time to make it.
Final Words
Lemon meringue pie sits in a category of recipes that reward patience and punish shortcuts. Every element matters — the fully baked crust, the properly tempered curd, the hot filling beneath the meringue, the stiff peaks, the sealed edge. There is no single step you can rush or skip without consequences showing up somewhere in the finished pie.
But that precision is also what makes it so satisfying to execute well. When you pull this pie from the oven, golden and billowing, and the filling sets clean when you slice it — that result is entirely yours. You built each component with your own hands and your own attention, and it shows.
This is the kind of recipe that becomes a signature. The pie you bring to the holiday table. The one your family requests by name. The dessert that defines your reputation as a home baker among the people who matter to you. That is not an accident — it is the direct result of a recipe that has been tested, refined, and made with real ingredients and real technique.
Take your time with it. Read the recipe fully before you begin. Prepare your components in the right order. And trust the process — it has been earning its place on the best tables for well over a century for very good reason.
Frequently Asked Questions
Can I use bottled lemon juice instead of fresh lemons for the curd filling?
Fresh lemon juice is strongly recommended and makes a noticeable difference in flavor. Bottled juice is more acidic, flatter in flavor, and lacks the aromatic compounds that fresh juice provides. It also does not carry the essential oils found in fresh zest, which contribute significantly to the brightness and complexity of the finished curd.
Why did my meringue turn brown too quickly in the oven before the full baking time was up?
Your oven temperature is likely running hot. Use an oven thermometer to verify accuracy — most home ovens vary by 15 to 25 degrees. If the meringue is browning within the first 5 minutes, reduce the temperature to 325°F and extend baking time by 5 minutes. Tent loosely with foil if needed to slow surface browning while the interior sets.
Is cream of tartar necessary in the meringue, or can it be left out?
Cream of tartar stabilizes the egg white foam by lowering its pH, which strengthens the protein network and helps the meringue hold its volume and glossiness. Leaving it out is possible but not recommended — without it, the meringue is more prone to deflating, weeping, and collapsing during baking. If unavailable, a small amount of fresh lemon juice is a functional substitute.
Lemon Meringue Pie Recipe
8
servings25
minutes40
minutes320
kcal1
hour5
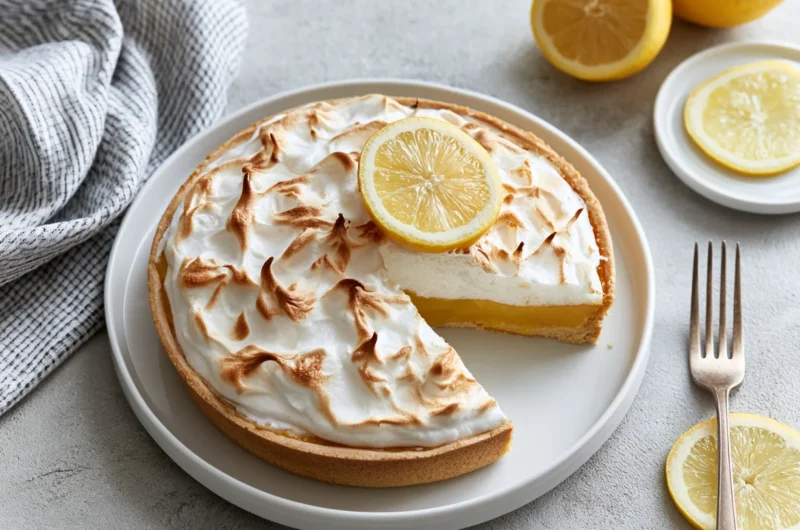
minutesA stunning homemade lemon meringue pie with a silky, tart lemon curd filling, buttery baked crust, and a toasted meringue crown. Three simple components, one extraordinary dessert that earns its place on any table.
Ingredients
Base Ingredients:
1 pre-baked 9-inch pie shell (homemade or store-bought shortcrust pastry)
1 cup granulated sugar (for lemon filling)
3 tbsp cornstarch
1.5 cups water
3 large egg yolks (room temperature)
1/2 cup fresh lemon juice (approximately 3 to 4 lemons)
1 tbsp lemon zest, finely grated
2 tbsp unsalted butter
1 pinch of salt
3 large egg whites (room temperature)
1/4 tsp cream of tartar
6 tbsp granulated sugar (for meringue)
1/2 tsp pure vanilla extract
Optional Add-ins:
1 tsp lemon extract
1 tbsp limoncello
1/4 tsp almond extract
1 tbsp powdered sugar (for meringue stability)
1 tsp cornstarch (mixed into meringue to prevent weeping)
1/2 tsp orange zest
Directions
- Prepare shortcrust pastry dough, chill for 30 minutes, then press into a 9-inch pie dish. Dock the base with a fork, line with parchment and pie weights, and blind bake at 375°F for 15 minutes. Remove weights and bake a further 10 minutes until golden. Cool completely before filling.
- In a medium saucepan, whisk together granulated sugar, cornstarch, and salt. Gradually whisk in water until smooth. Cook over medium heat, stirring constantly, until the mixture thickens and bubbles — about 7 to 8 minutes.
- Lightly whisk egg yolks in a separate bowl. Slowly ladle a small amount of the hot mixture into the yolks while whisking continuously to temper them. Pour tempered yolks back into the saucepan and cook for 2 more minutes over medium heat.
- Remove saucepan from heat. Stir in fresh lemon juice, lemon zest, and butter until fully incorporated and the filling is smooth and glossy. Pour immediately into the cooled pie crust.
- In a clean, grease-free bowl, beat room-temperature egg whites with cream of tartar on medium speed until soft peaks form. Increase to high speed, gradually adding granulated sugar one tablespoon at a time. Add vanilla extract and beat until stiff, glossy peaks form.
- Spoon meringue over the hot lemon filling, starting from the outer edges and pressing gently against the crust to seal. Work inward, building peaks and swirls with the back of a spoon.
- Bake at 350°F for 15 to 18 minutes until the meringue is golden across the top and lightly browned at the peaks. Cool at room temperature for 1 hour, then refrigerate for at least 2 hours before slicing and serving.
Recipe Video
Notes
- The lemon filling must be hot — not warm or cooled — when the meringue is applied on top. This cooks the base of the meringue and prevents the weeping layer between filling and meringue.
- Always spread meringue from the outer edge inward, sealing it firmly against the crust to prevent shrinkage during baking.
- Use a completely clean, grease-free bowl for whipping egg whites — even a trace of fat will prevent them from reaching stiff peaks.
- Egg whites must be at room temperature before whipping; cold whites take significantly longer and produce less stable foam.
- Do not freeze this pie — meringue does not survive freezing and thawing, and the lemon curd filling will separate.
- Store loosely tented in the refrigerator for up to 24 hours. Best served the same day it is baked.
- If preparing ahead, make the crust and lemon curd up to 48 hours in advance. Whip and apply meringue on the day of serving only.
- Use fresh lemon juice only — bottled juice produces a flat, harsh curd that lacks the brightness of freshly squeezed lemons.