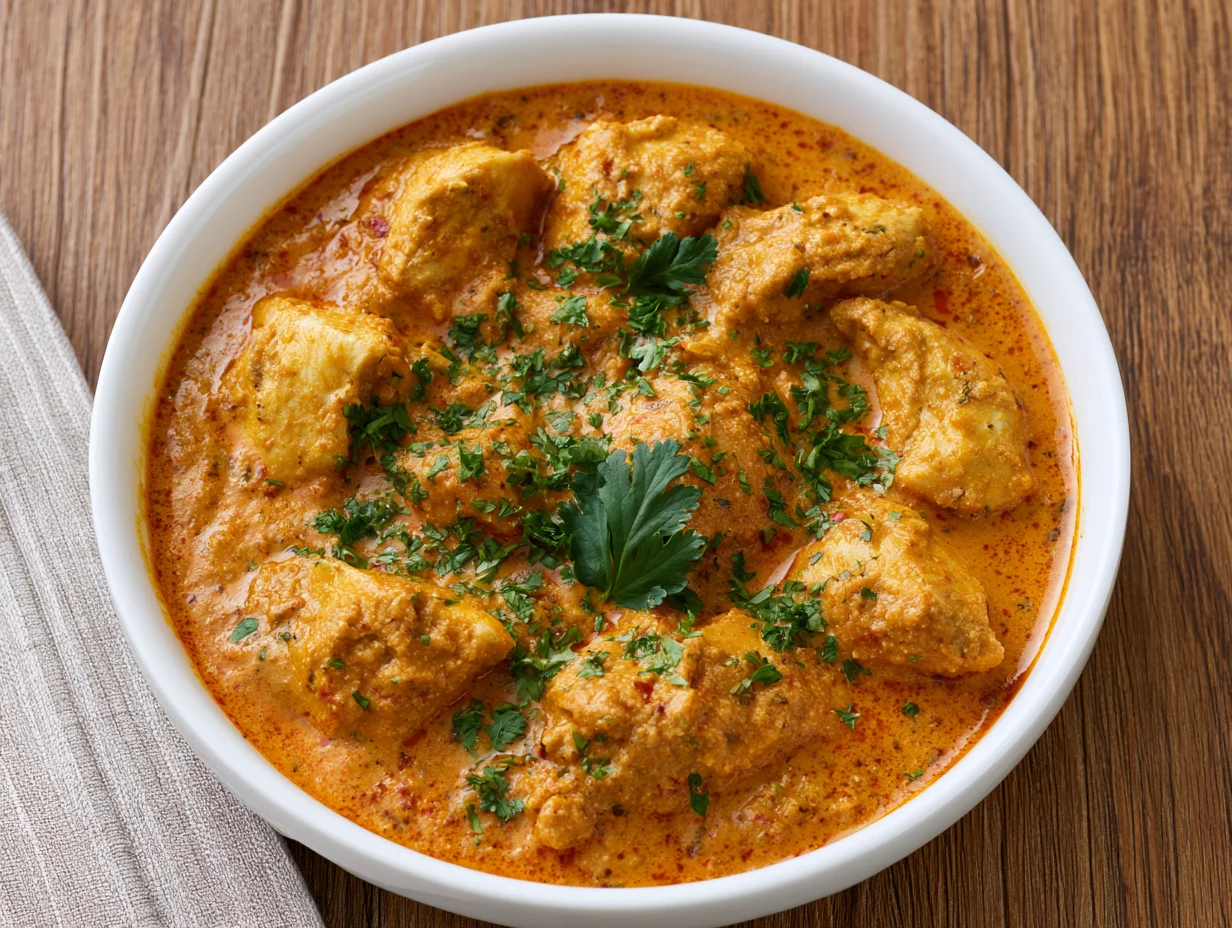
Flavorful Chicken Curry Recipe
A great chicken curry does not announce itself with tricks or theatrics. It announces itself with aroma — the moment cumin and coriander hit a hot pan of oil, the kitchen transforms into something that feels ancient, purposeful, and deeply welcoming. This flavorful chicken curry recipe is built on exactly that foundation: spice, patience, and an understanding of how layers of flavor are built one step at a time.
What separates a memorable curry from a forgettable one is not the number of spices on the list — it is the sequence in which they are used. Blooming whole spices in hot oil, building the masala base slowly, and adding the chicken at exactly the right moment are decisions that compound into a final dish of remarkable depth and complexity.
I have cooked this recipe across many kitchens and many occasions, refining the spice ratios and technique until the result was consistently extraordinary — not just good. The sauce is rich without being heavy, the chicken is tender without being overcooked, and the heat is present but controlled, building gradually rather than overwhelming from the first bite.
Whether you are cooking for a quiet weeknight dinner or a table full of guests who know their curry, this recipe holds up to both. It is the kind of dish that earns repeat requests — and this guide gives you everything you need to make it with complete confidence.
Ingredients You’ll Need
Read through this ingredient list once and you will notice something immediately — every single item here is pulling its weight, and nothing on it is there by accident or habit.
One of the things I love about this recipe is that it uses simple pantry ingredients. You probably already have most of them in your kitchen.
Base Ingredients
- 2 pounds boneless, skinless chicken thighs, cut into 2-inch pieces
- 3 tablespoons neutral oil (vegetable, canola, or avocado oil)
- 1 large yellow onion, finely diced
- 6 garlic cloves, minced
- 1 tablespoon fresh ginger, grated
- 2 medium tomatoes, finely chopped (or one 14-ounce can crushed tomatoes)
- ¾ cup plain full-fat yogurt, whisked smooth
- ½ cup water or low-sodium chicken stock
- 1½ teaspoons cumin seeds
- 1 teaspoon ground coriander
- 1½ teaspoons ground cumin
- 1½ teaspoons Kashmiri red chili powder (or mild paprika for less heat)
- 1 teaspoon turmeric powder
- 1 teaspoon garam masala
- 1½ teaspoons fine sea salt (adjust to taste)
- 2 tablespoons fresh cilantro, roughly chopped (for finishing)
- 1 tablespoon unsalted butter (for finishing)
Optional Add-ins
- 1 teaspoon ground cardamom (adds floral warmth)
- 2 dried bay leaves (added with the onion for depth)
- 1 cinnamon stick (bloomed in oil at the start)
- ½ cup full-fat coconut milk (stirred in at the end for a creamier sauce)
- 1 teaspoon sugar or honey (balances acidity from tomatoes)
- 1 tablespoon kasuri methi — dried fenugreek leaves (classic finishing touch)
- ½ teaspoon black pepper, freshly ground
- 1 green chili, slit lengthwise (for additional fresh heat)
Step-by-Step Instructions
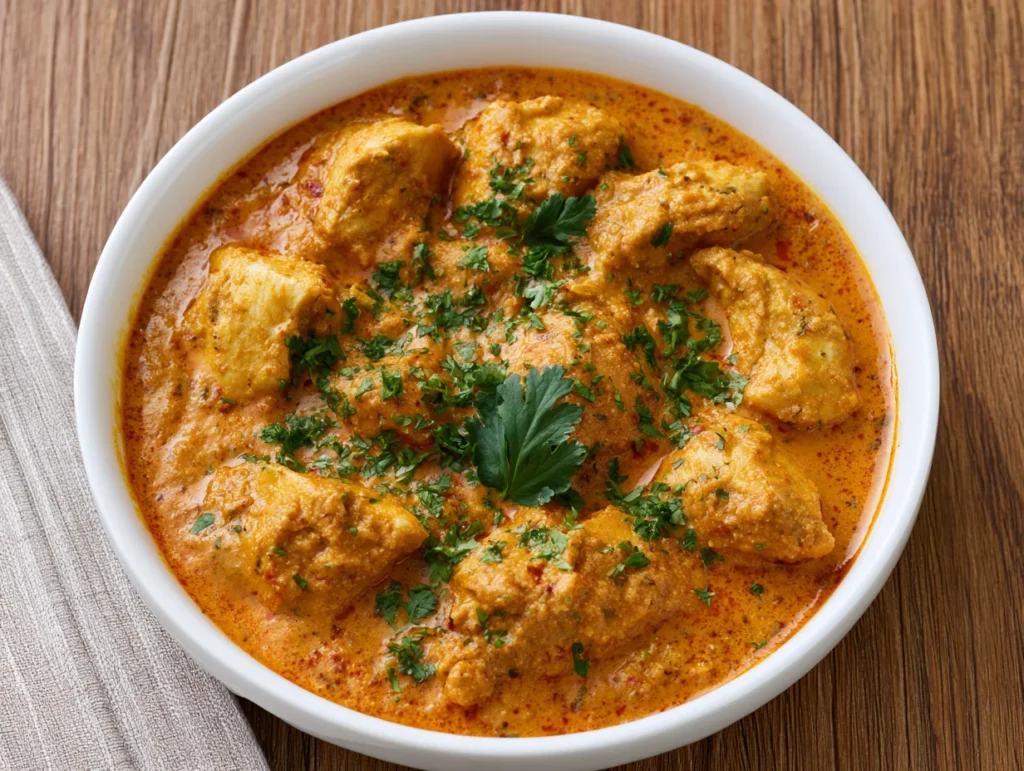
Step 1: Marinate the Chicken
Place the chicken pieces in a bowl and add half the turmeric (½ teaspoon), ½ teaspoon of the Kashmiri chili powder, ½ teaspoon fine sea salt, and 3 tablespoons of the whisked yogurt. Mix thoroughly until every piece is evenly coated. Cover and refrigerate for a minimum of 30 minutes — one hour is better, and overnight is best. This marinade begins the tenderizing process and ensures the spices penetrate the meat before it ever reaches the pan. Even a brief marination makes a meaningful difference to the depth of flavor in the finished curry.
Step 2: Build the Aromatic Base
Heat the oil in a large, heavy-bottomed pan or Dutch oven over medium-high heat. Once the oil shimmers, add the cumin seeds and allow them to bloom for 30 to 45 seconds until they darken slightly and release their fragrance. If using a cinnamon stick or bay leaves, add them now. Add the finely diced onion and cook, stirring regularly, for 12 to 15 minutes until deeply golden and caramelized — not just translucent. This step cannot be rushed. The golden onion is the flavor foundation of the entire curry, and its sweetness and depth carry through every bite of the finished dish.
Step 3: Add the Garlic and Ginger
Add the minced garlic and grated ginger directly to the caramelized onion and stir continuously for 2 minutes over medium heat. The mixture will darken quickly and become intensely fragrant — this is the point where the aromatics transition from raw to toasted, which is exactly what you want. Do not step away from the pan during this step. Garlic burns in seconds at this temperature, and burned garlic introduces a bitterness that cannot be corrected once it enters the sauce. Stir constantly and trust the process — these two minutes of attention produce a masala base of extraordinary richness and complexity.
Step 4: Cook the Tomatoes and Dry Spices
Add the chopped tomatoes to the pan and stir to combine. Cook over medium heat for 8 to 10 minutes, stirring occasionally, until the tomatoes have completely broken down and the oil begins to separate and pool around the edges of the masala. This stage — known as the bhuno — is where the flavor concentrates and deepens. Once the oil separates, add the ground coriander, remaining ground cumin, remaining Kashmiri chili powder, and remaining turmeric. Stir the dry spices into the masala and cook for 2 additional minutes, stirring constantly to prevent scorching, until the raw smell of each spice has cooked out completely.
Step 5: Sear the Marinated Chicken
Add the marinated chicken pieces to the pan and increase the heat to medium-high. Sear the chicken, turning occasionally, for 5 to 6 minutes until the pieces are lightly browned on the outside and the marinade has cooked into the masala base. Do not add liquid yet — this searing stage is critical for building the fond that contributes body and savory depth to the finished sauce. The chicken will release its own moisture initially, and that liquid should be allowed to evaporate almost completely before the next step. Once the pan is nearly dry and the masala clings to the chicken, you are ready to proceed.
Step 6: Add Yogurt and Simmer
Reduce the heat to medium-low. Add the remaining whisked yogurt one tablespoon at a time, stirring constantly between each addition. Adding yogurt too quickly over high heat causes it to split and curdle, breaking the sauce. Slow addition over gentle heat incorporates it smoothly into the masala. Once all the yogurt is incorporated, add the water or chicken stock, stir to combine, and cover the pan. Simmer on low heat for 18 to 20 minutes, stirring occasionally, until the chicken is cooked through and the sauce has thickened to a rich, coating consistency that clings to the back of a spoon.
Step 7: Finish and Serve
Remove the lid and stir in the garam masala and unsalted butter. Allow the curry to simmer uncovered for 2 additional minutes — the garam masala is always added at the end of cooking to preserve its volatile aromatics, which diminish rapidly under prolonged heat. If using kasuri methi, crush it between your palms to release the aroma and stir it in now. Taste the curry and adjust the salt. Finish with freshly chopped cilantro scattered over the top. Serve immediately alongside basmati rice, warm naan, or roti — the sauce is too good to leave anything on the plate.
Cook Time
Total
60 to 75 minutes (including marination and simmering time)
Prep
15 minutes active prep (plus 30 to 60 minutes marination)
Bake
35 to 40 minutes active cooking time on the stovetop
Servings
This recipe is calibrated for a generous, satisfying meal that works equally well for an intimate weeknight dinner and a relaxed gathering where the pot sits at the center of the table and people come back for seconds without hesitation.
Makes approximately 4 to 6 servings depending on portion size and accompaniments. Served over basmati rice with naan on the side, four people will eat very well. Stretched across a table with two or three additional dishes — a dal, a raita, a vegetable side — it comfortably feeds six without feeling thinned out or insufficient.
The recipe scales up cleanly to serve a larger crowd. Double the ingredients in a wide, deep pan and extend the onion caramelization time by 5 to 7 minutes to ensure the base develops properly despite the increased volume. The spice ratios hold without adjustment, though salt should always be tasted and corrected at the end of cooking regardless of batch size.
Common Mistakes in This Recipe
Rushing the onion caramelization is the most common and most damaging mistake in curry cooking. Many home cooks pull the onions off the heat when they turn translucent, missing the deep golden stage that produces the sweet, concentrated flavor base the curry depends on. Pale onions produce a flat, one-dimensional sauce that no amount of spice can fully compensate for.
Adding the dry spices too early — before the tomatoes have fully cooked down and the oil has separated — is another frequent error. Raw spice added to a wet, acidic environment produces a bitter, harsh flavor rather than the rounded, bloomed depth that properly timed spice addition creates. The oil separation is the visual signal that tells you the moment is right.
Adding yogurt too quickly over high heat is a mistake that breaks the sauce and creates a grainy, curdled texture that cannot be reversed. Many cooks add it all at once in a rush, not realizing that yogurt is protein-rich and behaves like eggs in a hot pan — it needs gradual introduction and gentle heat to incorporate smoothly.
Using chicken breast instead of thighs without adjusting the cooking time is an oversight that leads to dry, stringy meat suspended in an otherwise excellent sauce. Breast meat has significantly less fat and connective tissue than thighs and overcooks in a fraction of the time, particularly during the extended simmering stage that this recipe requires for the sauce to develop fully.
Solutions to Common Mistakes
Commit to the full onion caramelization time without compromise. Set a timer for 12 minutes, stir every 2 minutes, and do not reduce the heat below medium until the onions are visibly golden with dark amber edges. If the onions begin to stick, add a tablespoon of water and continue cooking — this deglazes the pan and accelerates caramelization without burning.
Watch for the oil separation signal before adding dry spices. When the tomato and onion masala reaches the right stage, you will see clear oil pooling around the edges of the mixture and the paste will begin to pull away from the sides of the pan. This is the precise moment to add the ground spices — not before, and not significantly after.
To incorporate yogurt without splitting, whisk it thoroughly before adding and bring the pan heat down to medium-low. Add one tablespoon at a time, stirring vigorously after each addition until fully absorbed before the next goes in. Full-fat yogurt splits less readily than low-fat varieties and is always the better choice for cooking in hot applications.
If using chicken breast, reduce the simmering time after adding liquid to 10 to 12 minutes rather than the full 18 to 20. Check for doneness at the 10-minute mark with an instant-read thermometer — 165°F is the target. Remove the pan from heat the moment the chicken is cooked through and allow residual heat to finish the process without toughening the meat further.
Nutritional Information (approx. per serving)
- Calories: 340 kcal
- Total Fat: 18g (of which saturated fat: 5g)
- Carbohydrates: 12g
- Dietary Fiber: 2g
- Natural Sugars: 5g
- Protein: 34g
- Sodium: 580mg
- Potassium: 480mg
- Iron: 15% of Daily Value
- Vitamin C: 18% of Daily Value
- Vitamin B6: 28% of Daily Value
- Magnesium: 10% of Daily Value
- Calcium: 8% of Daily Value
Turmeric is one of the most studied anti-inflammatory compounds in the culinary world. Its active compound, curcumin, has been extensively researched for its role in reducing chronic inflammation, supporting joint health, and contributing to cognitive function. Used here in meaningful quantity alongside black pepper — which dramatically increases curcumin absorption — its benefits are not merely symbolic.
Chicken thighs provide a complete amino acid profile alongside a substantial dose of vitamin B6, which supports neurotransmitter production, immune function, and protein metabolism. The protein content per serving is high enough to support muscle maintenance and satiety for several hours, making this curry a genuinely functional meal rather than just a flavorful one.
Garlic and ginger, both used generously in this recipe, are among the most well-documented functional foods in culinary medicine. Garlic’s allicin supports cardiovascular health and immune defense. Ginger contains gingerols and shogaols that reduce nausea, support digestion, and exhibit measurable anti-inflammatory activity — particularly relevant in a dish where they are cooked into the base and present in every bite.
Full-fat yogurt contributes probiotics that support gut microbiome health, as well as calcium and phosphorus for bone density. Tomatoes, cooked down into the masala, release lycopene — a powerful antioxidant that becomes more bioavailable through cooking than it is when consumed raw — adding a layer of nutritional value to what is already a deeply nourishing dish.
Storage Instructions
Allow the chicken curry to cool to room temperature before transferring to storage — placing hot curry directly into a sealed container traps condensation, which dilutes the sauce and promotes faster spoilage. Once cooled, transfer to an airtight container. Refrigerated curry keeps well for up to four days, and the flavor typically improves noticeably by the second day as the spices continue to develop and meld overnight.
Reheat refrigerated curry gently in a saucepan over medium-low heat, stirring occasionally and adding a splash of water or stock if the sauce has thickened during storage. Avoid high heat during reheating — it can toughen the chicken and cause the yogurt-based sauce to separate if brought to a rolling boil. A gentle, steady simmer is all that is needed to restore the curry to its original consistency and temperature.
This curry freezes exceptionally well, making it one of the most practical dishes for batch cooking and meal prep. Allow it to cool completely, then portion into individual freezer-safe containers or zip-top bags. Press out excess air before sealing to prevent freezer burn. Frozen curry maintains full flavor and texture for up to three months without any meaningful degradation in quality.
To thaw, transfer frozen curry to the refrigerator the night before and allow it to defrost slowly overnight. Reheat gently on the stovetop as described above. If you are short on time, place the sealed container in a bowl of warm water for 30 minutes to partially thaw before transferring to the pan. Never microwave curry directly from frozen — the uneven heat distribution toughens the chicken unevenly and breaks the sauce.
Suggestions
This chicken curry is versatile enough to anchor an entire meal with very little additional effort. The most natural pairing is aged basmati rice cooked with a pinch of salt and a small knob of butter — the long grains absorb the sauce beautifully and provide the starchy base the dish genuinely calls for. Warm naan or roti on the side turns the meal into something complete and deeply satisfying.
For a more elaborate spread, serve the curry alongside a simple cucumber raita made from grated cucumber, full-fat yogurt, cumin, and fresh mint. The cool, acidic raita provides an ideal counterpoint to the warm spice of the curry and refreshes the palate between bites. A small bowl of mango chutney on the table adds a sweet-tart dimension that complements the savory depth of the masala beautifully.
To present this as a dinner party centerpiece, serve it in a wide, shallow bowl with a swirl of cream or coconut milk on the surface, a scattering of fried curry leaves, and a wedge of lemon on the side. Finish the table with a simple green salad dressed with lemon and olive oil. The visual contrast of the rich, amber curry against fresh green herbs and garnishes is striking and requires no special skill to achieve.
If you enjoy building a full Indian-inspired meal, this curry pairs exceptionally well with a simple dal tadka and jeera rice. The combination of a protein-rich curry, a lentil dal, and fragrant cumin rice creates a nutritionally balanced and culturally authentic spread that satisfies every appetite at the table. Add a stack of warm rotis and the meal becomes a genuinely memorable occasion.
Seasonal Relevance
Chicken curry is a dish without a season — it belongs to every month of the year and finds a reason to be appropriate in every climate and every mood. That said, certain seasons amplify specific qualities of this recipe in ways that make it feel deliberately chosen rather than simply convenient. Understanding that relationship makes you a more intentional cook.
In winter, the warming properties of ginger, cumin, and turmeric make this curry feel medicinal in the best possible sense. The steam rising from a bowl of freshly made chicken curry on a cold evening is one of those small, powerful pleasures that the season demands. Add a cinnamon stick and extra black pepper to the base during winter months for an even more warming result.
Spring and summer open the door to lighter accompaniments that keep the meal from feeling too heavy in warmer temperatures. Serve the curry with a cooling cucumber raita, fresh mango on the side, and a crisp green salad. The curry itself does not need to change — the surroundings do the seasonal work. Reducing the chili powder by half makes it more approachable for outdoor serving in heat.
Autumn is arguably when a slow-cooked, deeply spiced curry feels most at home. As the days shorten and the appetite shifts toward richer, more substantial meals, this recipe meets that instinct perfectly. The caramelized onion base and long simmer create exactly the kind of layered warmth that autumn evenings call for. Cook a large batch, freeze half, and you will thank yourself for the foresight when the week gets busy.
Final Words
A recipe earns its place in your permanent rotation when it reliably makes the people around your table quiet for a moment — when conversation pauses, not because anything went wrong, but because the food deserved that pause. This flavorful chicken curry recipe is built for exactly that kind of moment.
What I want you to take away from this guide is not just a recipe but an understanding of why each step matters. The caramelized onion, the oil separation signal, the slow yogurt incorporation — these are not arbitrary instructions. They are the accumulated knowledge of a cooking tradition that has refined this dish over centuries, and every step reflects that depth.
Curry is forgiving in some ways and uncompromising in others. It rewards patience and attention in exactly the right proportion. Give it the time it asks for, use the best spices you can access, and trust the process when the kitchen fills with that aroma that tells you something genuinely good is happening on the stove.
Cook this recipe this week. Adjust the heat to your preference, experiment with the optional add-ins, and make it your own over time. The best version of any dish is the one you have cooked enough times to understand instinctively — and this is the recipe worth understanding.
Frequently Asked Questions
Can I make this chicken curry ahead of time for a dinner party?
Yes — this curry is actually better made a day ahead. The spices continue to develop and deepen overnight, producing a richer, more complex sauce by the following day. Reheat gently on the stovetop over medium-low heat with a splash of water or stock to restore the original consistency before serving.
Can I make this recipe dairy-free without losing the richness of the sauce?
Yes. Replace the yogurt with full-fat coconut milk added gradually in the same way — one tablespoon at a time over gentle heat. Omit the finishing butter or substitute coconut oil. The sauce will be slightly sweeter and richer in texture, but the depth and body remain fully intact throughout.
What is the best cut of chicken to use for the most flavorful curry?
Bone-in, skin-on chicken thighs produce the most flavorful result — the bone releases gelatin during cooking that enriches the sauce, and the fat from the skin adds body. If using boneless thighs for convenience, reduce the simmer time slightly. Avoid chicken breast for long-simmered curries as it overcooks and dries out quickly.
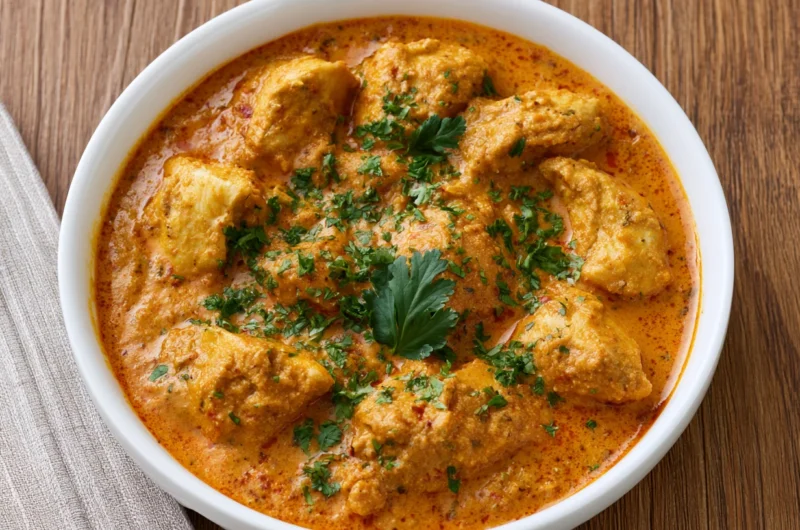
Flavorful Chicken Curry Recipe
6
servings15
minutes40
minutes340
kcal55
minutesRich, deeply spiced, and built on a slow-caramelized onion masala base — this flavorful chicken curry delivers tender, juicy chicken in a sauce so good it demands extra naan. A recipe worth mastering and repeating endlessly.
Ingredients
Base Ingredients:
2 pounds boneless, skinless chicken thighs, cut into 2-inch pieces
3 tablespoons neutral oil (vegetable, canola, or avocado oil)
1 large yellow onion, finely diced
6 garlic cloves, minced
1 tablespoon fresh ginger, grated
2 medium tomatoes, finely chopped (or one 14-ounce can crushed tomatoes)
¾ cup plain full-fat yogurt, whisked smooth
½ cup water or low-sodium chicken stock
1½ teaspoons cumin seeds
1 teaspoon ground coriander
1½ teaspoons ground cumin
1½ teaspoons Kashmiri red chili powder (or mild paprika for less heat)
1 teaspoon turmeric powder
1 teaspoon garam masala
1½ teaspoons fine sea salt (adjust to taste)
2 tablespoons fresh cilantro, roughly chopped (for finishing)
1 tablespoon unsalted butter (for finishing)
Optional Add-ins:
1 teaspoon ground cardamom
2 dried bay leaves
1 cinnamon stick
½ cup full-fat coconut milk
1 teaspoon sugar or honey
1 tablespoon kasuri methi (dried fenugreek leaves)
½ teaspoon black pepper, freshly ground
1 green chili, slit lengthwise
Directions
- Combine the chicken pieces with ½ teaspoon turmeric, ½ teaspoon Kashmiri chili powder, ½ teaspoon fine sea salt, and 3 tablespoons of the whisked yogurt. Mix until evenly coated, cover, and refrigerate for a minimum of 30 minutes — one hour or overnight preferred.
- Heat the oil in a large heavy-bottomed pan or Dutch oven over medium-high heat. Add the cumin seeds and bloom for 30 to 45 seconds until darkened and fragrant. Add bay leaves or cinnamon stick here if using.
- Add the finely diced onion and cook over medium heat, stirring regularly, for 12 to 15 minutes until deeply golden and caramelized. Do not rush this step — fully caramelized onions are the flavor foundation of the entire curry.
- Add the minced garlic and grated ginger. Stir continuously over medium heat for 2 full minutes until deeply fragrant and the raw smell has cooked out completely. Do not allow the garlic to burn.
- Add the chopped tomatoes and cook for 8 to 10 minutes, stirring occasionally, until fully broken down and the oil begins to separate and pool around the edges of the masala.
- Add the ground coriander, remaining ground cumin, remaining Kashmiri chili powder, and remaining turmeric. Stir into the masala and cook for 2 minutes, stirring constantly, until the raw smell of each spice has cooked out.
- Add the marinated chicken pieces and increase the heat to medium-high. Sear for 5 to 6 minutes, turning occasionally, until lightly browned and the marinade has cooked into the masala. Allow the pan to become nearly dry before adding liquid.
- Reduce heat to medium-low. Add the remaining whisked yogurt one tablespoon at a time, stirring constantly between each addition. Once all the yogurt is incorporated, add the water or chicken stock and stir to combine.
- Cover the pan and simmer on low heat for 18 to 20 minutes, stirring occasionally, until the chicken is cooked through and the sauce has thickened to a rich, coating consistency.
- Remove the lid and stir in the garam masala and unsalted butter. Simmer uncovered for 2 more minutes. Add kasuri methi if using, crushing it between your palms before adding. Taste and adjust salt.
- Finish with freshly chopped cilantro and serve immediately alongside basmati rice, naan, or roti.
Recipe Video
Notes
- Marinate the chicken for at least 30 minutes — overnight marination produces the most deeply flavored and tender result without any additional effort.
- Do not rush the onion caramelization. Cook on medium heat for the full 12 to 15 minutes until deeply golden — this is the most important step for a rich, complex sauce.
- Watch for oil separation after the tomatoes cook down — this is the visual signal that tells you the masala is ready for the dry spices. Adding spices before this point produces a harsh, bitter flavor.
- Always add yogurt one tablespoon at a time over medium-low heat, stirring between each addition. Adding it all at once over high heat causes it to split and curdle.
- Use full-fat yogurt — low-fat yogurt splits more easily under heat and produces a thinner, less cohesive sauce.
- Garam masala is always added at the end of cooking to preserve its volatile aromatics — never add it with the other dry spices during the cooking stage.
- If using kasuri methi, crush it between your palms before adding to release its aroma — this small step makes a significant difference to the final fragrance of the finished curry.
- This curry tastes significantly better the next day as the spices continue to develop overnight — make it ahead whenever time allows.
- Freeze in airtight containers for up to 3 months. Thaw overnight in the refrigerator and reheat gently on the stovetop with a splash of water or stock.