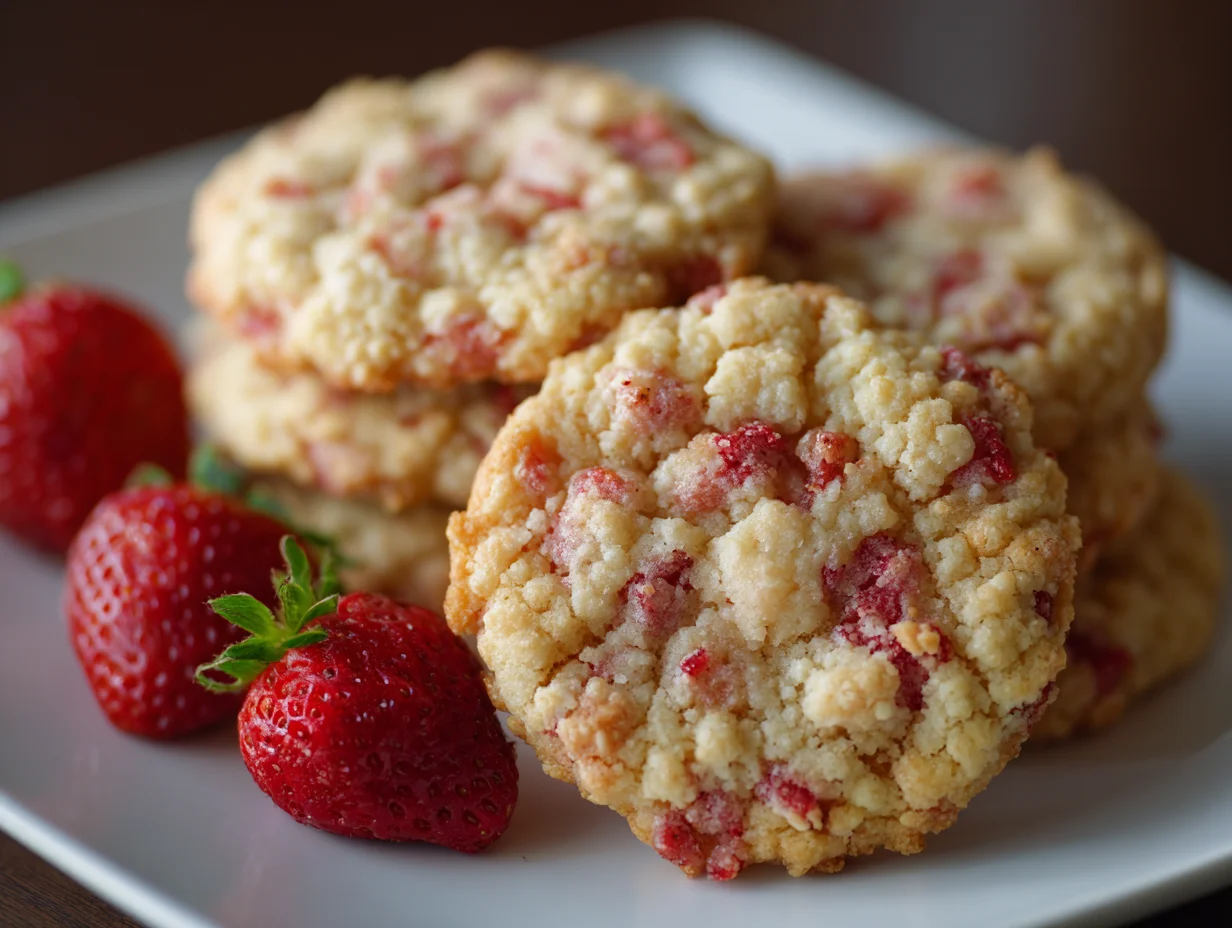
There’s something incredibly satisfying about creating a cookie that delivers both flavor and texture in perfect harmony. These Strawberry Crunch Cookies are a recipe I’ve refined to achieve that exact balance,soft, buttery centers paired with a crisp, vibrant strawberry topping. Inspired by classic strawberry shortcake flavors, this recipe brings a nostalgic yet elevated touch to your baking.
I designed it to be reliable, visually appealing, and worthy of any dessert table. Whether you’re baking for guests, family, or simply treating yourself, these cookies stand out with their bakery-style finish.
Every step in this guide reflects my approach as a chef,focused on precision, simplicity, and results that consistently impress without unnecessary complexity.
? If you enjoy fruity desserts, you’ll love our Fresh summer fruit tart with creamy filling and fruit.
Where Most Bakers Go Wrong with Texture
In my experience, the biggest mistake people make with strawberry crunch cookies is not respecting the balance between softness and crunch. I’ve seen many bakers overmix the dough, thinking it will improve consistency, but it actually creates dense, heavy cookies.
Another common issue is adding the crunch topping too early, which causes it to lose its crisp texture during baking. Using butter that’s too soft or melted also leads to cookies spreading too much and losing structure.
I’ve tested these variations myself, and even small missteps can significantly affect the final result. Texture is what defines this cookie, and ignoring these details often leads to cookies that look good but lack that satisfying bite and professional finish.
My Proven Method for Perfect Texture Every Time
When I make these cookies, I focus on control and timing. I always start with properly softened butter—not melted,and cream it just until light and smooth. Overworking the mixture is something I avoid completely. Chilling the dough is non-negotiable in my kitchen; it helps the cookies maintain their shape and improves overall texture.
I also prepare the crunch topping separately and only add it after baking, while the cookies are still warm. This keeps the topping crisp and visually appealing. Baking at the correct temperature is equally important,I never rush this step.
These small but intentional choices are what consistently give me cookies that are soft in the center, slightly crisp on the edges, and finished with that signature strawberry crunch.
Ingredients List

Base Ingredients:
- All-purpose flour
- Baking powder
- Baking soda
- Salt
- Unsalted butter (softened)
- Granulated sugar
- Brown sugar
- Egg
- Vanilla extract
- Strawberry extract or powder
Optional Add-ins:
- Crushed golden cookies (for crunch topping)
- Freeze-dried strawberries
- White chocolate chips
- Food coloring (pink, optional)
- Cream cheese drizzle
Step-by-Step Instructions

How I Prepare the Dough
I always begin by combining my dry ingredients,flour, baking powder, baking soda, and salt—in one bowl to ensure even distribution. In another bowl, I cream the butter with both sugars until the texture becomes light and slightly fluffy, but I’m careful not to overmix.
Then I add the egg, vanilla, and strawberry flavoring, blending just until smooth. Gradually, I fold in the dry ingredients, keeping the dough soft and cohesive. If it feels slightly sticky, I adjust with a small amount of flour. Before baking, I always chill the dough for at least 30 minutes. This step is essential in my process because it controls spreading and helps create cookies with a consistent shape and tender center.
? For another creamy and refreshing treat, try our Classic strawberry cheesecake with rich and smooth texture.
How I Create the Signature Crunch Topping
The crunch topping is what makes this recipe special, and I treat it with just as much attention as the dough. I combine crushed golden cookies with finely ground freeze-dried strawberries to achieve both texture and color. Sometimes, I add a small amount of melted butter,not too much,just enough to lightly bind the mixture without making it soggy.
I always keep the texture slightly coarse because that’s what gives the cookies their signature crunch. I never mix this topping into the dough, as it loses its crispness during baking. Instead, I prepare it separately and set it aside, ensuring it’s ready to be added at the perfect moment for maximum impact.
How I Shape and Bake for Best Results
When it’s time to bake, I preheat the oven properly and line my tray with parchment paper. I scoop evenly sized portions of chilled dough and roll them gently into balls. I space them out carefully to allow for even spreading and lightly flatten them for uniform baking. I watch the cookies closely,they’re ready when the edges are set but the centers still look soft. Overbaking is something I always avoid.
As soon as they come out of the oven, I press the crunch topping onto each cookie while they’re still warm. This helps it stick perfectly without losing texture. I let them cool slightly before transferring, which keeps their structure intact and gives them that professional finish I aim for.
Cook Time
Total: 45 minutes
Prep: 20 minutes
Bake: 12–15 minutes
Servings
When I make this recipe, I usually get around 18 to 24 cookies, depending on the size I choose. I like to keep them medium-sized because it allows the perfect balance between soft center and crunchy topping. This recipe is ideal for sharing, whether you’re hosting a gathering or preparing treats in advance. I’ve found that consistent portioning not only improves presentation but also ensures even baking.
If you prefer larger, bakery-style cookies, you can adjust the size, but you’ll need to slightly increase the baking time. No matter how you portion them, the goal remains the same,each cookie should deliver the same texture, flavor, and quality that makes this recipe stand out.
Makes approximately 20 cookies
Nutritional Information (approx. per serving)
- Calories: 180–220
- Carbohydrates: 25g
- Protein: 2g
- Fat: 9g
- Sugar: 15g
- Fiber: 1g
From my perspective, these cookies are meant to be enjoyed as a treat, not restricted unnecessarily. They offer a satisfying balance of sweetness and energy, making them perfect for occasional indulgence. The strawberry element adds a light fruity note, which keeps them from feeling overly heavy. When enjoyed in moderation, they fit comfortably into a balanced lifestyle without compromising on flavor or experience.
? If you’re a fan of easy no-bake sweets, don’t miss our Oreo icebox cake easy no bake dessert everyone loves.
Storage Instructions
In my kitchen, proper storage is just as important as baking. Once the cookies have cooled completely, I place them in an airtight container to protect their texture. I keep them at room temperature for up to three days, always ensuring they stay in a dry environment. If I need to store them longer, I refrigerate them, though I prefer bringing them back to room temperature before serving for the best texture. For long-term storage, I freeze them in a sealed container, and they hold up well for about a month. When ready to serve, I let them thaw naturally. This approach helps maintain both the softness of the cookie and the crispness of the topping.
Suggestions
Over time, I’ve experimented with a few variations that really elevate these cookies. A light drizzle of white chocolate or a cream cheese glaze adds both richness and visual appeal. Sometimes, I mix a small amount of crushed nuts into the topping for added texture. If I’m serving these to guests, I like presenting them slightly warm with a scoop of vanilla ice cream—it creates a more complete dessert experience. For a more natural approach, I prefer using real strawberry powder instead of artificial coloring. Small details like uniform shaping and thoughtful presentation make a big difference. These are the touches I rely on to turn a simple cookie into something memorable.
Seasonal Relevance
I often find myself baking these cookies more during spring and summer because their bright flavor and color fit perfectly with the season. They’re ideal for picnics, gatherings, and light dessert tables. That said, I don’t limit them to one season. By using freeze-dried strawberries, I can maintain consistent flavor year-round. During holidays or special occasions, I like to adjust the presentation to match the theme, making them more festive. Their versatility is one of the reasons I return to this recipe often. Whether it’s a warm afternoon or a cozy evening, these cookies adapt easily, making them a reliable choice no matter the time of year.
Conclusion
This recipe represents my approach to baking—simple techniques executed with precision to create something truly satisfying. Strawberry Crunch Cookies are more than just a dessert; they’re a combination of texture, flavor, and presentation done right. By focusing on the details,proper mixing, chilling, and timing,you can consistently achieve results that feel professional and rewarding. I’ve refined this recipe to eliminate guesswork and ensure success, whether you’re an experienced baker or just starting out. If you follow the process carefully, you’ll end up with cookies that not only taste incredible but also look like they came straight from a bakery. That’s always the goal in my kitchen.
? Looking for more berry-inspired desserts? Check out our Mixed berry cake soft cake loaded with fresh berries.
Frequently Asked Questions
1. Can I use fresh strawberries instead of freeze-dried ones?
I don’t recommend using fresh strawberries because they add too much moisture, which affects texture. Freeze-dried strawberries give a concentrated flavor without compromising the structure, which is essential for achieving the perfect cookie consistency.
2. Why do I need to chill the dough before baking?
Chilling the dough helps solidify the butter, which prevents excessive spreading during baking. In my experience, this step is key to maintaining the cookie’s shape and achieving a soft, well-structured center.
3. Can I prepare the dough in advance?
Yes, I often prepare the dough ahead of time and refrigerate it for up to 24 hours. This not only saves time but also enhances the flavor, making the cookies taste even better when baked later.
4. How do I keep the topping crunchy?
I always add the topping after baking while the cookies are still warm. This ensures it sticks properly without absorbing moisture, which helps maintain that crisp texture I aim for.
5. Can I make this recipe without eggs?
Yes, you can substitute eggs with alternatives like applesauce or yogurt. However, I recommend testing small batches first, as the texture may vary slightly compared to the original version.