
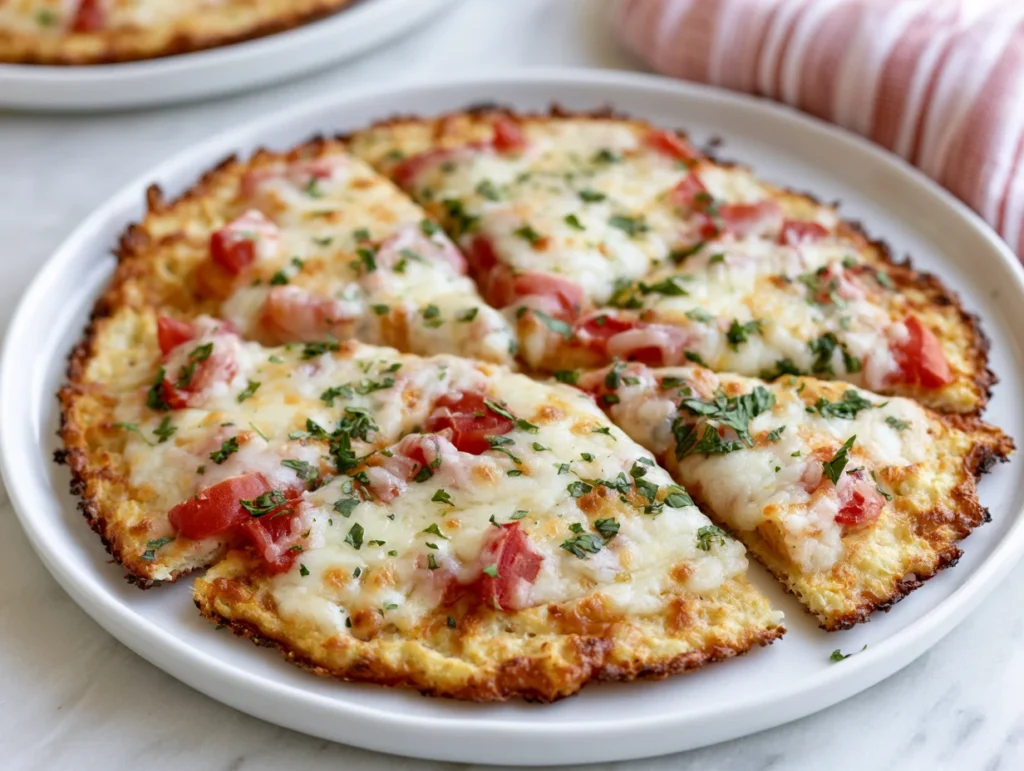
Pizza lovers looking for a healthier, gluten-free alternative often struggle to find a crust that is both crisp and satisfying. This Cauliflower Pizza Crust Recipe solves that problem beautifully by delivering a golden, flavorful base with a surprisingly sturdy texture. It offers the comfort of traditional pizza while fitting perfectly into modern healthy eating lifestyles.
What makes this recipe exceptional is the technique behind the crust. Properly prepared cauliflower creates a light yet structured foundation that crisps around the edges while remaining tender in the center. Combined with rich parmesan, mozzarella, and aromatic Italian seasoning, every bite feels indulgent without being overly heavy.
This homemade cauliflower pizza crust has become a favorite for low-carb dinners, keto-friendly meal plans, gluten-free cooking, and healthy family meals. It is versatile enough for weeknight dinners yet impressive enough for entertaining guests who appreciate restaurant-style healthy recipes.
Best of all, this recipe uses affordable ingredients and practical cooking methods that consistently produce professional-quality results right from your own kitchen.
Ingredients You’ll Need
A great cauliflower pizza crust starts with moisture control, balanced seasoning, and the right blend of cheeses. The ingredients below work together to create a crispy, flavorful crust that holds toppings beautifully without becoming soggy.
Base Ingredients:
- 1 large head cauliflower (about 4 cups riced cauliflower)
- 1 large egg
- 1 cup shredded mozzarella cheese
- 1/4 cup grated parmesan cheese
- 1 teaspoon Italian seasoning
- 1/2 teaspoon garlic powder
- 1/2 teaspoon sea salt
- 1/4 teaspoon black pepper
- 1 tablespoon olive oil
- 1/4 cup pizza sauce
- 1/2 cup shredded mozzarella cheese for topping
Optional Add-ins:
- 1/4 teaspoon crushed red chili flakes
- 1 tablespoon fresh basil, chopped
- 1/4 cup sliced mushrooms
- 1/4 cup black olives
- 1/4 cup diced bell peppers
- 2 tablespoons turkey pepperoni
- 1 teaspoon onion powder
- 1 tablespoon cornmeal for added crispness
Step-by-Step Instructions
Rice and Cook the Cauliflower
Wash the cauliflower thoroughly and remove the thick stem and leaves. Cut the florets into medium pieces, then pulse them in a food processor until the texture resembles rice. Avoid over-processing because overly fine cauliflower can become mushy during baking.
Transfer the cauliflower rice to a microwave-safe bowl and microwave for about 5 minutes until softened. Let it cool slightly before placing it into a clean kitchen towel. Squeeze firmly to remove as much moisture as possible. This step is critical because dry cauliflower produces a crisp, sturdy crust rather than a soft or soggy base.
Prepare the Pizza Crust Mixture
Place the dried cauliflower rice into a large mixing bowl. Add the egg, mozzarella cheese, parmesan cheese, Italian seasoning, garlic powder, salt, and black pepper. Stir thoroughly until the ingredients are evenly incorporated and the mixture holds together when pressed.
The combination of cheese and egg acts as a natural binder while also adding rich flavor and structure. If the mixture still feels damp, continue pressing moisture from the cauliflower before shaping the crust. A properly balanced mixture creates a much better texture after baking and prevents the crust from breaking apart when sliced.
Shape and Bake the Crust
Preheat your oven to 425°F and line a baking tray or pizza stone with parchment paper. Place the cauliflower mixture onto the prepared surface and shape it into a thin, even circle approximately 1/4 inch thick. Keeping the thickness uniform ensures even baking.
Brush the outer edges lightly with olive oil to encourage browning and crispness. Bake for 25 to 30 minutes until the crust turns golden brown with firm edges. Proper baking at this stage develops structure and flavor, which helps the crust support toppings without becoming soft after the second bake.
Add Toppings and Finish Baking
Remove the baked crust from the oven and spread pizza sauce evenly across the surface, leaving a small border around the edges. Add mozzarella cheese along with your preferred toppings, but avoid overloading the pizza because excess moisture can soften the crust.
Return the pizza to the oven and bake for another 8 to 10 minutes until the cheese melts and becomes bubbly. Allow the pizza to rest for several minutes before slicing. This resting period helps the crust firm slightly, making it easier to serve clean slices with a crisp edge and satisfying texture.
Cook Time
Total:
50 minutes
Prep:
20 minutes
Bake:
30 minutes
Servings
Makes approximately 4 servings, depending on portion size and toppings used. The crust is filling while remaining lighter than traditional pizza dough, making it ideal for balanced lunches and healthy dinner recipes.
For family meals, pair the pizza with a crisp green salad or roasted vegetables for a complete restaurant-style dinner. The lighter crust keeps the meal satisfying without feeling overly heavy.
If serving guests, the recipe can easily be doubled to create multiple crusts with different topping combinations. This flexibility makes it excellent for entertaining, meal prep, and customizable family pizza nights.
Common Mistakes in This Recipe
One major mistake is failing to remove enough moisture from the cauliflower after cooking. Excess water prevents proper crisping and often leads to a weak crust that breaks apart during slicing.
Another common issue is shaping the crust too thick. Thick cauliflower crusts tend to stay soft in the center while the outer edges cook too quickly and become overly dark.
Using too much sauce or watery vegetable toppings can also ruin the final texture. Excess moisture seeps into the crust and causes sogginess even after proper baking.
Skipping the initial crust bake is another frequent error. The crust must bake fully before toppings are added or it will never develop the structure needed for a stable pizza base.
Solutions to Common Mistakes
Always squeeze the cauliflower thoroughly using a kitchen towel or cheesecloth. Removing as much moisture as possible is the secret to achieving a crisp and restaurant-quality crust.
Keep the crust thin and evenly shaped before baking. Uniform thickness allows consistent heat distribution and creates better texture throughout the pizza.
Use moderate amounts of sauce and avoid overly wet toppings when possible. Pre-cooking vegetables like mushrooms can also help reduce extra moisture during baking.
Bake the crust until deeply golden before adding toppings. Proper pre-baking strengthens the structure and improves both flavor and crispness in the finished pizza.
Nutritional Information (approx. per serving)
- Calories: 210
- Protein: 14g
- Carbohydrates: 9g
- Fiber: 3g
- Fat: 13g
- Saturated Fat: 5g
- Sodium: 480mg
- Sugar: 3g
- Vitamin C: 65% DV
- Calcium: 20% DV
Cauliflower is naturally rich in antioxidants, vitamin C, and fiber, making this recipe a nutrient-dense alternative to traditional pizza crust made from refined flour.
The combination of cheese and cauliflower creates a balanced meal with protein and healthy fats that support fullness and stable energy levels after eating.
Because this crust is lower in carbohydrates, it works well for keto-friendly meals, low-carb recipes, and gluten-free eating plans without sacrificing comfort-food appeal.
This recipe also helps increase vegetable intake in a practical and flavorful way, making it especially appealing for families seeking healthier homemade dinner ideas.
Storage Instructions
Store leftover cauliflower pizza slices in an airtight container in the refrigerator for up to 3 days. Let the pizza cool completely before storing to prevent trapped steam from softening the crust.
For the best texture, reheat slices in an oven, toaster oven, or air fryer instead of a microwave. Dry heat restores crispness and prevents the crust from becoming rubbery.
You can also freeze the baked crust without toppings for future meals. Wrap it tightly in plastic wrap and store it inside a freezer-safe bag for up to 2 months.
When ready to use, thaw the crust overnight in the refrigerator and bake briefly before adding fresh toppings. This method maintains better texture and flavor compared to freezing fully assembled pizza.
Suggestions
Serve this cauliflower pizza crust with homemade garlic sauce, fresh salads, or roasted vegetables for a complete and satisfying healthy dinner experience.
For extra crispness, bake the crust on a preheated pizza stone instead of a standard baking sheet. The direct heat improves browning underneath the crust significantly.
Experiment with premium topping combinations such as spinach and feta, grilled chicken, roasted garlic, or fresh basil and mozzarella for gourmet-style homemade pizza nights.
Adding fresh herbs after baking elevates the flavor profile beautifully. Basil, oregano, parsley, or red chili flakes add freshness and complexity that complement the roasted cauliflower perfectly.
Seasonal Relevance
This cauliflower pizza crust recipe works exceptionally well during colder months when hearty comfort food cravings increase but healthier meal options are still desired.
In summer, lighter toppings such as tomatoes, basil, and fresh vegetables create a fresher pizza experience perfect for casual outdoor dinners and gatherings.
During the holiday season, this recipe offers an excellent gluten-free and low-carb alternative for guests who want healthier comfort food without compromising flavor.
Since cauliflower remains widely available year-round, this recipe stays affordable, accessible, and practical no matter the season, making it a dependable addition to weekly meal planning.
Final Words
This Cauliflower Pizza Crust Recipe proves that healthy comfort food can still deliver outstanding texture, flavor, and satisfaction. It combines practical cooking techniques with wholesome ingredients to create a genuinely enjoyable homemade pizza experience.
The crisp edges, cheesy flavor, and sturdy structure make this crust stand out from many disappointing vegetable-based alternatives often found online.
Once you master the moisture-removal process, the recipe becomes highly reliable and easy to customize with endless topping possibilities tailored to your preferences.
Whether you are focused on gluten-free cooking, low-carb dinners, healthy meal prep, or simply trying something new, this cauliflower pizza crust offers a smart and delicious alternative worth making again and again.
Frequently Asked Questions
Can I make cauliflower pizza crust dairy-free?
Yes, you can substitute dairy-free mozzarella and vegan parmesan alternatives for the traditional cheese. However, choose high-quality plant-based cheeses designed for melting because they help maintain the structure and texture of the crust more effectively during baking.
Why is my cauliflower crust not getting crispy enough?
The most common reason is excess moisture remaining in the cauliflower. Thoroughly squeezing out water and baking the crust until deeply golden before adding toppings are essential steps for achieving a crispy and firm texture.
Can I use frozen cauliflower for this recipe?
Yes, frozen cauliflower works very well and can save preparation time. Thaw it completely and squeeze out all excess moisture before mixing with the remaining ingredients. Proper draining is even more important with frozen cauliflower because it naturally contains additional water.
