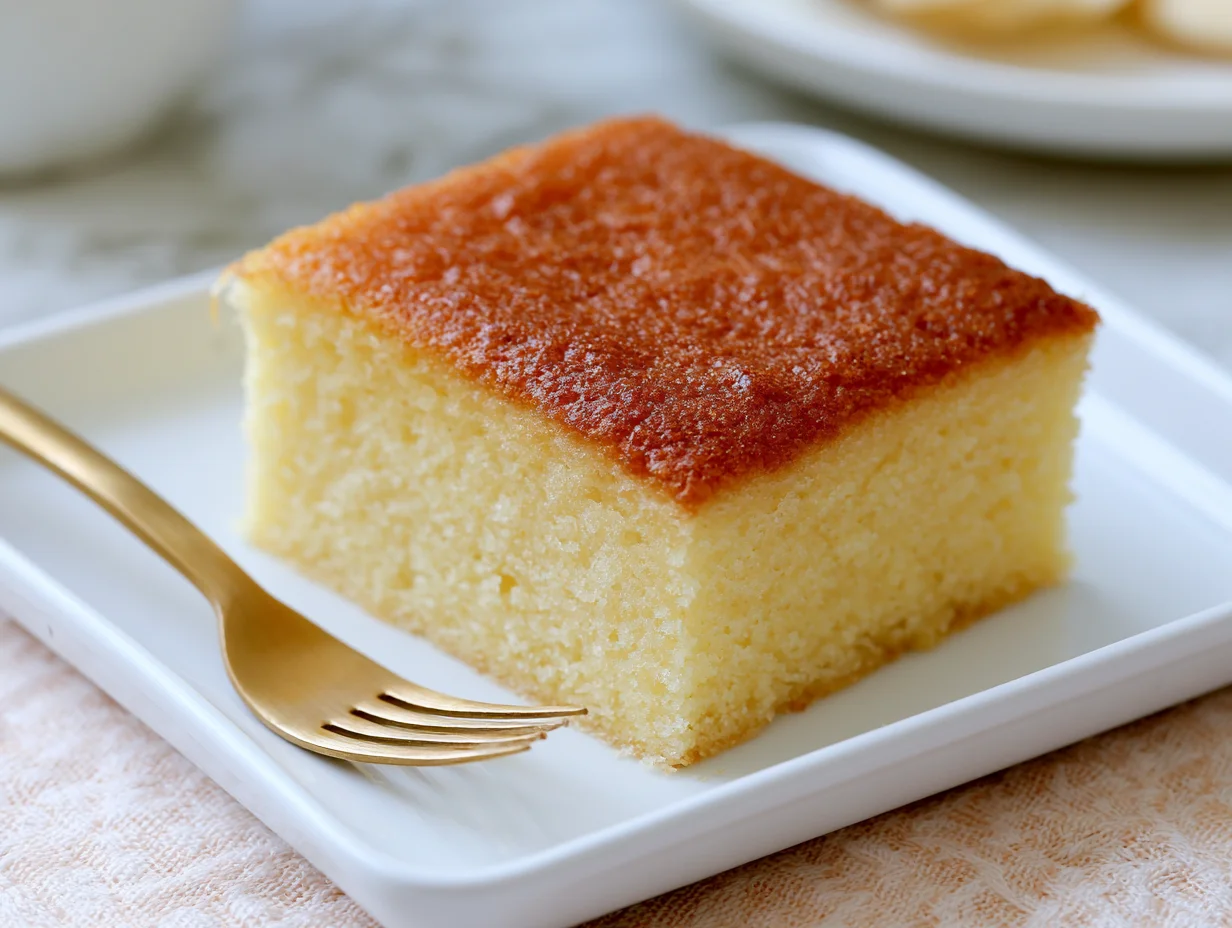
Classic Butter Cake Recipe
There are cakes that impress, and then there are cakes that comfort. The Classic Butter Cake belongs entirely to the second category — and that is precisely what makes it unforgettable.
This is the kind of recipe that has lived on handwritten index cards, passed quietly between generations, perfected in home kitchens long before food blogs existed. It does not rely on exotic flavors or elaborate techniques. What it relies on is quality butter, the right ratio of ingredients, and a method practiced with care.
Every bite delivers a tender, golden crumb with a rich, mellow sweetness that feels both nostalgic and deeply satisfying. It is the sort of cake you reach for when you want something that simply works — for birthdays, Sunday afternoons, or no occasion at all.
Master this recipe once, and you will return to it for life. It is that reliable, that good, and that worth knowing by heart.
Ingredients You’ll Need
If there is one recipe where your ingredients do the real talking, it is this one — every element earns its place, and nothing hides behind complexity.
One of the things I love about this recipe is that it uses simple pantry ingredients. You probably already have most of them in your kitchen.
Base Ingredients:
- 2 cups all-purpose flour
- 1 cup unsalted butter, softened to room temperature
- 1 cup granulated white sugar
- 4 large eggs, at room temperature
- ½ cup whole milk, at room temperature
- 2 teaspoons pure vanilla extract
- 2 teaspoons baking powder
- ¼ teaspoon fine salt
Optional Add-ins:
- 1 tablespoon lemon zest
- ½ teaspoon almond extract
- 2 tablespoons sour cream for added richness
- ¼ cup powdered sugar for dusting
Step-by-Step Instructions
Step 1: Preheat and Prepare Your Pan
Set your oven to 350°F (175°C) and allow it to fully preheat before anything else goes in. Grease a 9-inch round cake pan or an 8×8 square pan generously with butter, then line the bottom with parchment paper. Lightly flour the sides. This step matters more than most people think — a properly prepared pan ensures your cake releases cleanly, preserves its beautiful golden crust, and prevents any uneven baking around the edges. Do not skip the parchment.
Step 2: Cream the Butter and Sugar
In a large mixing bowl, beat the softened butter and granulated sugar together using a hand mixer or stand mixer fitted with the paddle attachment. Start on low speed for one minute, then increase to medium-high and continue beating for a full four to five minutes. You are looking for a mixture that is noticeably pale, fluffy, and doubled in volume. This stage builds the air structure that gives the cake its lift. Stopping too early will result in a denser, heavier crumb. Do not rush it.
Step 3: Add Eggs and Vanilla
Add the eggs one at a time, beating well after each addition and scraping down the bowl between additions. Each egg must be fully incorporated before the next goes in. This builds emulsification and prevents the batter from curdling. After the last egg, add the pure vanilla extract and mix for another thirty seconds. If you are using almond extract or lemon zest, add them at this point. The batter may look slightly curdled at this stage — that is completely normal and will smooth out once the flour goes in.
Step 4: Combine Dry Ingredients
In a separate bowl, whisk together the all-purpose flour, baking powder, and fine salt until evenly combined. Whisking the dry ingredients together ensures the leavening is distributed uniformly throughout the batter, which means an even rise and consistent texture in every slice. Do not skip this step or add the baking powder directly into the batter. Uneven distribution can cause pockets of bitterness or irregular rising. Thirty seconds of whisking makes a real difference.
Step 5: Alternate Dry and Wet Ingredients
With your mixer on low speed, add the flour mixture in three additions, alternating with the milk in two additions. Begin and end with the flour. Mix only until each addition just disappears — do not overmix at this stage. Overworking the batter once the flour is added develops gluten, which will make your cake tough and dense rather than tender and soft. If using sour cream, fold it in gently at the very end with a spatula. The finished batter should be smooth, thick, and ribbon-like.
Step 6: Bake Until Golden
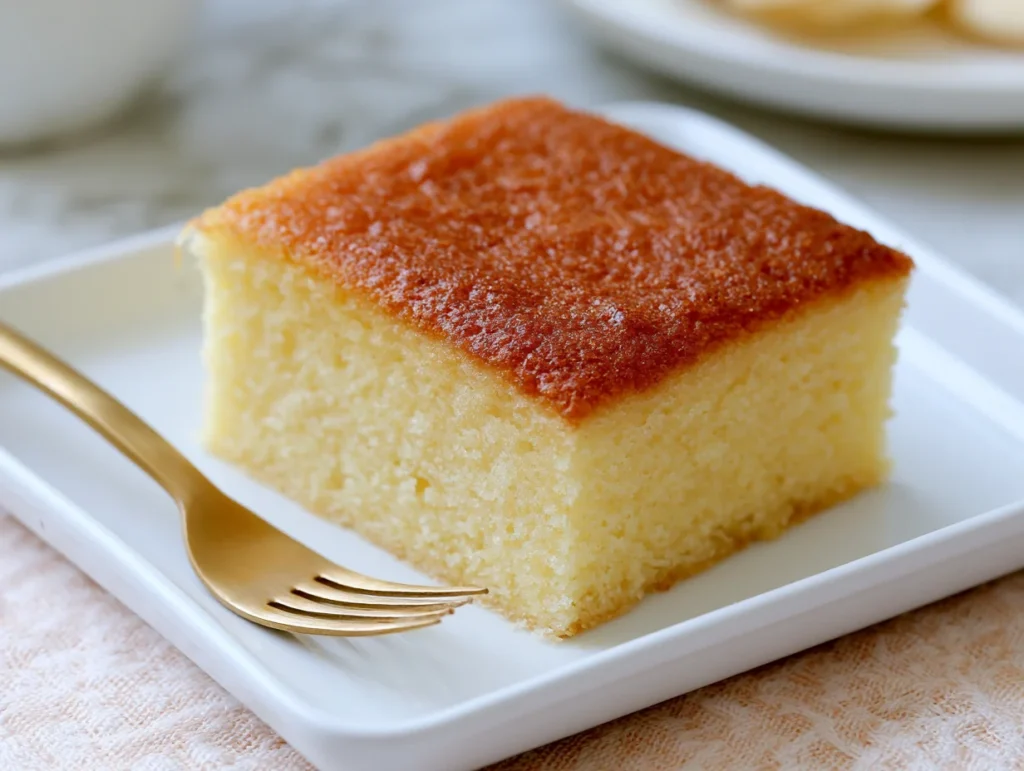
Pour the batter into your prepared pan and smooth the top with an offset spatula. Tap the pan gently on the counter twice to release any large air bubbles. Place it in the center rack of the preheated oven and bake for 35 to 40 minutes. The cake is done when the top is deep golden, the edges have pulled slightly away from the sides of the pan, and a toothpick or cake tester inserted into the center comes out completely clean. Avoid opening the oven before the 30-minute mark.
Step 7: Cool and Serve
Remove the cake from the oven and let it rest in the pan for exactly 10 minutes on a wire rack. Do not attempt to remove it while it is still hot — it needs that short resting time to firm up enough to release cleanly. After 10 minutes, run a thin knife or offset spatula around the edges, then invert gently onto the rack to cool completely. Allow it to cool for at least 45 minutes before slicing. Cutting into a warm butter cake collapses the crumb. Patience here is genuinely rewarded.
Cook Time
Total:
Approximately 55 to 60 minutes
Prep:
15 to 20 minutes
Bake:
35 to 40 minutes
Servings
This Classic Butter Cake recipe yields one 9-inch round cake or one 8×8 square cake. Sliced modestly, as a dessert course or an afternoon treat alongside tea or coffee, it serves comfortably without anyone feeling shortchanged. The texture is rich and satisfying, which means smaller slices go a long way.
Makes approximately 8 to 10 servings, depending on how the cake is cut. For larger gatherings or celebrations, you can easily double the recipe and bake two layers for a stacked cake with buttercream or fresh whipped cream in between.
Leftovers, if there are any, keep beautifully at room temperature for up to three days. In a household of butter cake lovers, it rarely lasts that long.
Common Mistakes in This Recipe
The most frequent mistake home bakers make is using cold butter and cold eggs straight from the refrigerator. Room temperature ingredients are not a suggestion — they are a functional requirement. Cold butter will not cream properly, and cold eggs will cause the emulsion to break, resulting in a curdled, uneven batter that bakes into a dense, greasy cake.
Another common error is overmixing the batter once the flour has been added. Many bakers continue to beat on medium or high speed out of habit, but this activates gluten and turns a tender cake into a tough, chewy one. The moment the flour disappears into the batter, the mixing should stop.
Incorrect oven temperature is also a significant factor. Many home ovens run hotter or cooler than their dial indicates. Baking this cake in an oven that is too hot will cause the top to brown and set before the center is fully cooked, leaving a raw, sunken middle. Too cool, and the cake spreads flat and bakes unevenly.
Finally, many bakers underestimate the creaming stage. Four to five minutes may feel excessive, but it is exactly what creates the airy, pale, voluminous base that produces a light crumb. Cutting it to two minutes is the single biggest reason home butter cakes turn out flat and heavy.
Solutions to Common Mistakes
The fix for temperature-sensitive ingredients is simple: pull your butter, eggs, and milk out of the refrigerator at least one hour before you begin. If you are short on time, place whole eggs in a bowl of warm (not hot) water for 10 minutes, and microwave butter in 5-second bursts just until softened but not melted.
To avoid overmixing, switch to a spatula as soon as you begin adding flour, or keep your mixer on the lowest speed setting. Count your additions and stop the moment the last streak of flour disappears. Every extra second after that point works against the final texture.
Invest in a simple oven thermometer — they cost very little and are one of the highest-impact tools in a baker’s kitchen. Place it on the center rack and adjust your oven temperature accordingly. Most ovens need a 10 to 25-degree correction.
For the creaming stage, set a timer. Four minutes of proper creaming at medium-high speed is non-negotiable. Watch the butter transform — it should turn from pale yellow to almost white, nearly doubling in volume. That visual change is your confirmation that air has been properly incorporated. Trust the process.
Nutritional Information (approx. per serving)
- Calories: 380 kcal
- Total Fat: 21g
- Saturated Fat: 13g
- Cholesterol: 120mg
- Sodium: 160mg
- Total Carbohydrates: 44g
- Sugars: 24g
- Protein: 5g
- Fiber: 0.5g
- Calcium: 60mg
- Iron: 1.4mg
Butter is often misunderstood as merely an indulgence, but it is a genuine source of fat-soluble vitamins — specifically vitamins A, D, E, and K2 — which support immune function, bone health, and cellular repair. A slice of this cake contributes meaningfully to your daily fat-soluble vitamin intake.
Eggs, which form a structural backbone of this recipe, are one of the most complete proteins available. They provide all nine essential amino acids, along with choline, which supports brain function and liver health. Four eggs across the entire recipe means each serving delivers real nutritional value alongside the pleasure of eating.
Whole milk adds calcium, phosphorus, and a modest amount of protein that, together with the eggs, makes this a more nourishing treat than most commercial baked goods. The fat content in whole milk also contributes to the velvety crumb and moist texture that defines a well-made butter cake.
Enjoyed in reasonable portions and made with quality ingredients, Classic Butter Cake is a dessert you can feel genuinely good about. There is something to be said for food made from scratch, without additives or preservatives, that nourishes as much as it satisfies.
Storage Instructions
Once the cake has cooled completely, store it at room temperature under a cake dome or wrapped tightly in plastic wrap. It will stay moist and fresh for up to three days at room temperature, provided your kitchen is not excessively warm or humid. Do not refrigerate unless the weather demands it — refrigeration dries out butter cakes quickly and dulls the flavor considerably.
For longer storage, this cake freezes exceptionally well. Wrap individual slices or the whole unfrosted cake tightly in plastic wrap, then place it in a zip-lock freezer bag or an airtight container. It will keep in the freezer for up to two months without any noticeable loss of quality.
To thaw frozen slices, remove them from the freezer and allow them to come to room temperature on the counter for one to two hours. Do not microwave to defrost — it steams the cake and makes the crumb gummy. For the best texture after freezing, a brief 5-minute warm in a 300°F oven brings it back remarkably close to fresh-baked.
If you have topped or filled the cake with cream, buttercream, or whipped cream, the storage rules change. Frosted cakes should be refrigerated and consumed within two days. Bring to room temperature for 30 minutes before serving for the best flavor and texture.
Suggestions
Classic Butter Cake is one of the most versatile bases in baking. Its clean, mellow flavor makes it an ideal canvas for a wide range of pairings and presentations. The simplest and most elegant option is a dusting of powdered sugar over the top — it is unfussy, beautiful, and lets the cake speak entirely for itself.
For an afternoon tea or coffee pairing, serve slices with a dollop of lightly whipped cream and a handful of fresh berries. Strawberries, raspberries, and blueberries all work beautifully against the richness of the butter. A thin drizzle of honey over the top adds a subtle floral note that elevates the whole plate.
If you want to turn this into a celebration cake, split the layers horizontally and fill them with classic vanilla buttercream, lemon curd, or pastry cream. The cake holds up beautifully under the weight of frosting and layers without losing its structure or becoming too dense.
For a more rustic, everyday presentation, bake the batter in a loaf pan instead of a round or square. Slice it thickly and serve it barely warm, the way it would have been served in a farmhouse kitchen — simple, honest, and deeply satisfying without a single garnish needed.
Seasonal Relevance
Classic Butter Cake transcends seasons in a way few recipes manage. It is one of those rare bakes that feels perfectly appropriate in January and equally at home in the height of August — the ingredients never change, but the way you serve it can shift beautifully with the time of year.
In spring, pair the cake with fresh strawberries and a light lemon glaze. The brightness of citrus and ripe berries against the buttery crumb creates something that feels genuinely seasonal and celebratory without any effort. Spring birthdays and garden parties are natural homes for this cake at its most cheerful.
Summer calls for a cooler approach. Serve thin slices alongside homemade ice cream or a chilled berry compote. The richness of the cake balances the cold sweetness of ice cream in a way that makes every bite feel considered. Outdoor gatherings, picnics, and late-evening dinner parties all welcome this without hesitation.
In autumn and winter, lean into warmth. A spiced caramel glaze, a dusting of cinnamon sugar, or a warm vanilla sauce poured tableside transforms this cake into something that feels genuinely seasonal. Paired with a mug of strong tea or spiced coffee, the Classic Butter Cake becomes the kind of comfort food that marks the best moments of the cold months.
Final Words
If you take one thing from this recipe, let it be this: great baking is not about complexity. It is about understanding the fundamentals, respecting the process, and using quality ingredients with intention. The Classic Butter Cake asks very little of you — and gives back an enormous amount.
This is a recipe worth practicing. The first time you make it, you will be pleased. The fifth time, you will begin to feel it in your hands — the texture of properly creamed butter, the moment the batter reaches the right consistency, the specific golden color that tells you the cake is done before the timer even goes off. That kind of knowledge is only built through repetition, and this cake is worth repeating.
Share it generously. There is something about a homemade butter cake that communicates care in a way store-bought never can. Bring it to a neighbor, take it to a gathering, or simply leave it on the kitchen counter for the people you love to find. It does not need an occasion to mean something.
Return to this recipe often. Treat it as a foundation and a companion in your baking practice. Add a pinch of cardamom one week, a tablespoon of orange zest the next. Make it your own, slowly, over time. The Classic Butter Cake has been doing exactly that — becoming someone’s own — for generations. Now it can do the same for you.
Frequently Asked Questions
Can I use salted butter instead of unsalted butter in this recipe?
You can, but it is not recommended. Salted butter varies in sodium content by brand, which makes it difficult to control the salt level in the final cake. Unsalted butter gives you full control. If you only have salted butter, reduce the added salt in the recipe to a small pinch.
Why did my butter cake sink in the middle after baking?
A sunken center is usually caused by one of three things: opening the oven door too early, underbaking, or using too much leavening. Ensure your oven is fully preheated, do not open the door before the 30-minute mark, and always verify doneness with a toothpick before removing the cake from the oven.
Can I make this recipe ahead of time for an event or celebration?
Absolutely. This cake actually improves slightly overnight as the crumb settles and the flavor deepens. Bake it the day before, cool completely, wrap tightly in plastic wrap, and store at room temperature. Frost or garnish on the day of serving for the best presentation and freshness.
Classic Butter Cake Recipe
10
servings20
minutes40
minutes380
kcal1
hourA timeless homemade butter cake with a golden, tender crumb and rich, mellow sweetness. Made from simple pantry staples, this foolproof recipe delivers bakery-quality results every time — perfect for celebrations, afternoon tea, or everyday baking.
Ingredients
Base
2 cups all-purpose flour
1 cup unsalted butter, softened
1 cup granulated white sugar
4 large eggs, room temp
½ cup whole milk, room temp
2 tsp pure vanilla extract
2 tsp baking powder
¼ tsp fine salt
Optional add-ins
1 tbsp lemon zest
½ tsp almond extract
2 tbsp sour cream
¼ cup powdered sugar for dusting
Directions
- Preheat oven to 350°F (175°C). Grease and line a 9-inch round or 8×8 square pan with parchment paper. Lightly flour the sides.
- Beat softened butter and sugar on medium-high for 4–5 minutes until pale, fluffy, and doubled in volume.
- Add eggs one at a time, beating well after each. Mix in vanilla extract (and any optional extracts or zest).
- Whisk together flour, baking powder, and salt in a separate bowl until evenly combined.
- Alternate adding flour mixture (3 additions) and milk (2 additions) to the butter mixture on low speed. Begin and end with flour. Do not overmix.
- Pour batter into the prepared pan, smooth the top, and tap gently on the counter to release air bubbles.
- Bake 35–40 minutes until deep golden and a toothpick inserted in the center comes out clean.
- Cool in pan for 10 minutes, then invert onto a wire rack. Cool fully (at least 45 minutes) before slicing.
Recipe Video
Notes
- Always use room temperature butter, eggs, and milk — cold ingredients prevent proper emulsification and result in a dense, uneven crumb.
- Do not skip the creaming stage. A full 4–5 minutes at medium-high speed is what creates the light, airy structure of this cake.
- Stop mixing the moment the flour disappears into the batter — overmixing develops gluten and makes the cake tough.
- Use an oven thermometer to verify your oven temperature. Most home ovens run 10–25°F off from the dial setting.
- For optional add-ins, fold sour cream in last with a spatula; stir lemon zest or almond extract in after the eggs.
- Store at room temperature, wrapped tightly, for up to 3 days. Freeze unfrosted slices for up to 2 months.
- This cake doubles easily — bake two layers for a stacked celebration cake with buttercream or lemon curd filling.