Rich Chocolate Icing Recipe
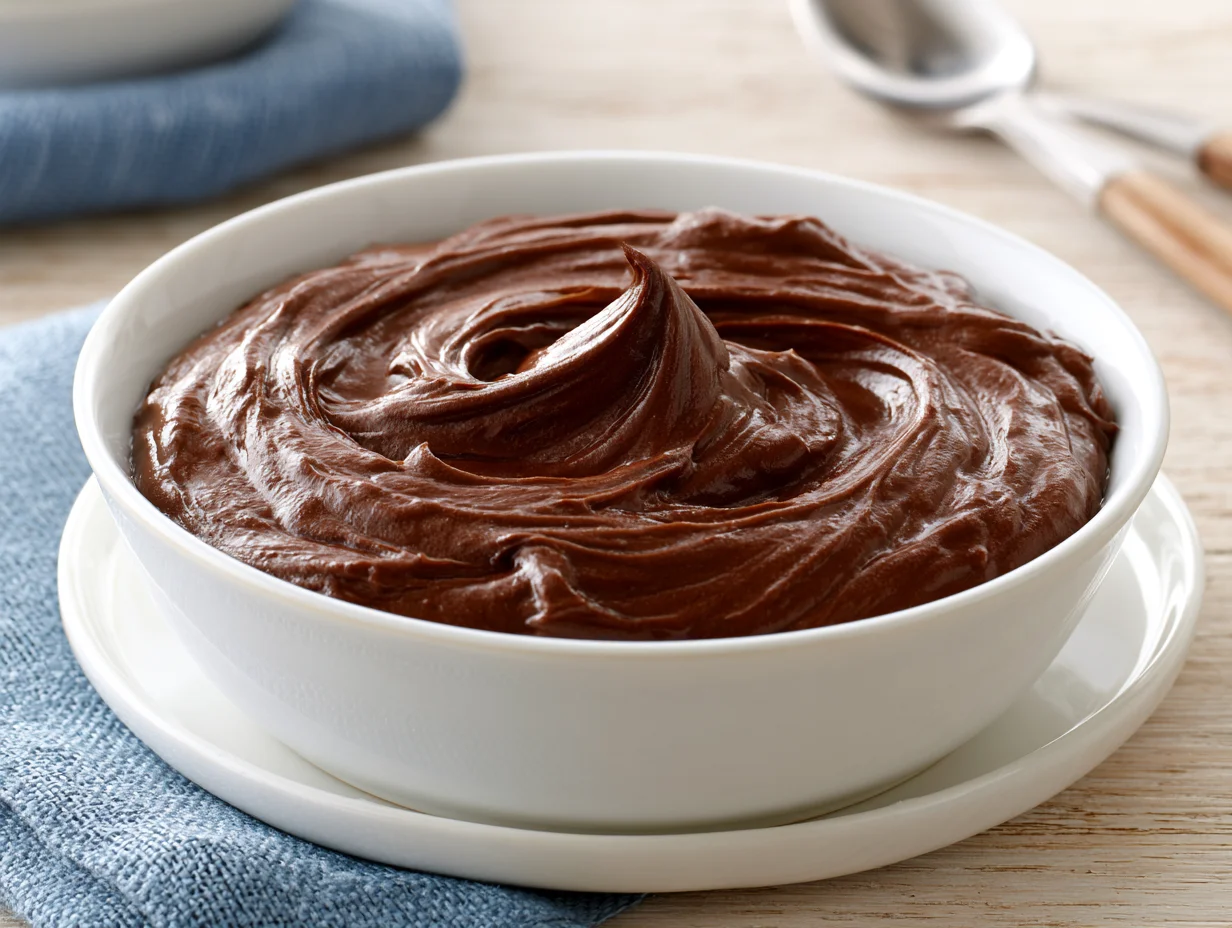
There are frostings, and then there is chocolate icing that makes you pause mid-bite. The kind that clings to a cake layer with silky confidence, holds its shape under a piping tip, and delivers that deep, bittersweet richness in every single swipe. This is that recipe.
Whether you are finishing a layered celebration cake, spreading it over a batch of warm brownies, or simply topping cupcakes for a Tuesday treat, this rich chocolate icing is the kind of recipe that earns a permanent spot in your kitchen. It is not an afterthought — it is the reason people ask for seconds.
What makes it stand apart from the average chocolate frosting? It comes down to technique and ingredient quality. The ratio of fat to cocoa, the temperature of the butter, and the type of chocolate you reach for — every detail shapes the final texture and depth of flavor. This recipe does not cut corners on any of that.
By the end of this guide, you will have a smooth, glossy, intensely chocolatey icing that tastes like it came from a high-end bakery. And once you have made it, you will never go back to anything from a can again.
Ingredients You’ll Need
There is something quietly satisfying about watching a handful of pantry staples come together into something genuinely spectacular — and this icing is exactly that kind of recipe.
One of the things I love about this recipe is that it uses simple pantry ingredients. You probably already have most of them in your kitchen.
Base Ingredients
- 3 cups powdered sugar, sifted
- ½ cup unsalted butter, softened to room temperature
- ½ cup unsweetened cocoa powder (Dutch-process preferred)
- ⅓ cup whole milk or heavy cream
- 2 teaspoons pure vanilla extract
- 1 pinch fine sea salt
- 100 g semi-sweet or bittersweet chocolate, melted and slightly cooled
Optional Add-ins
- 1 tablespoon espresso powder (to intensify the chocolate flavor)
- 2 tablespoons sour cream (for a subtle tang and extra creaminess)
- ½ teaspoon cinnamon (adds warmth and depth)
- 1 tablespoon dark rum or bourbon (for a sophisticated adult twist)
- 2 tablespoons cream cheese, softened (for a denser, tangier texture)
Step-by-Step Instructions
Step 1: Melt and Cool the Chocolate
Start by breaking your semi-sweet or bittersweet chocolate into pieces and melting it gently. Use a double boiler or a microwave-safe bowl in 30-second intervals, stirring between each round. Once fully melted, set it aside to cool until it is just slightly warm to the touch — not hot. Adding hot chocolate directly to butter will cause it to separate, which ruins the texture entirely. Patience here pays off.
Step 2: Beat the Butter Until Fluffy
In a large mixing bowl, beat the softened butter on medium-high speed for about 3 to 4 minutes until it turns pale, light, and noticeably fluffy. This step is non-negotiable. Well-beaten butter creates the airy base that gives this icing its smooth, spreadable consistency. Under-beating at this stage leads to a dense, heavy frosting that does not hold up well or pipe cleanly.
Step 3: Add the Cocoa Powder and Salt
Reduce your mixer to low speed and add the sifted cocoa powder along with the pinch of sea salt. Mix until fully combined before increasing the speed. Sifting the cocoa powder beforehand prevents lumps and ensures the icing turns out perfectly smooth. The salt is not optional — it balances the sweetness and amplifies the chocolate flavor in a way that makes an immediate difference. Mix until the cocoa is fully incorporated and no dry streaks remain.
Step 4: Incorporate the Melted Chocolate
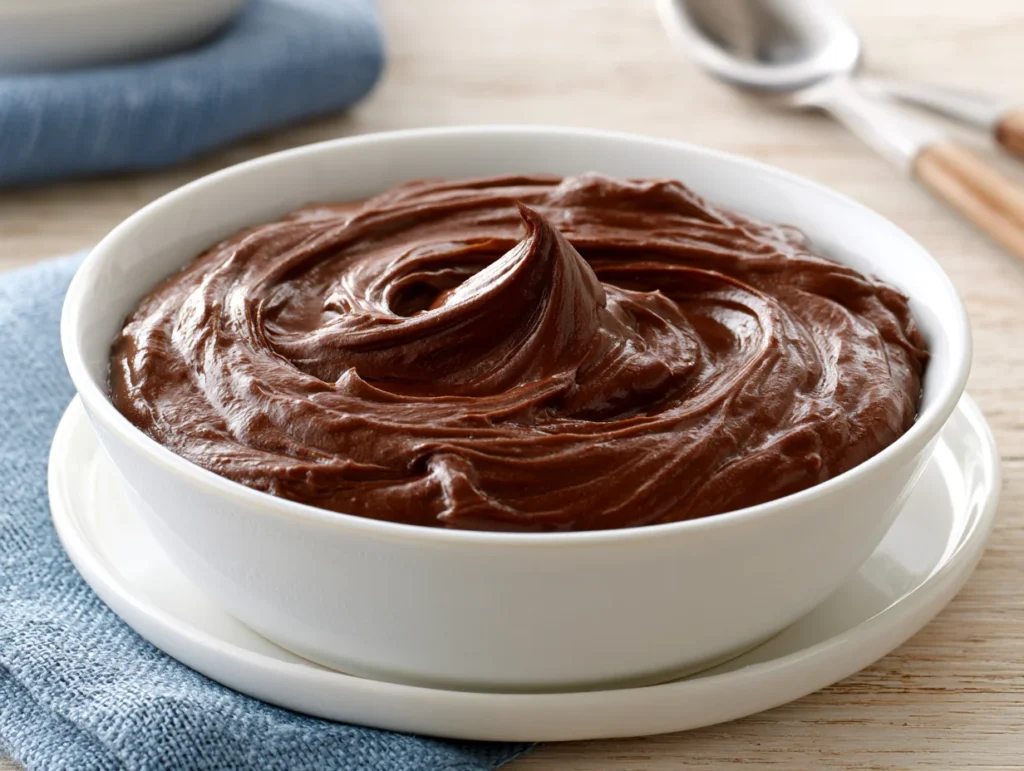
With the mixer on low, pour the cooled melted chocolate into the butter and cocoa mixture in a slow, steady stream. Once added, increase the speed to medium and beat for about 2 minutes. The melted chocolate adds richness, glossiness, and a more complex flavor profile that cocoa powder alone cannot achieve. This is what makes the icing taste like real chocolate rather than a powdered imitation.
Step 5: Add the Powdered Sugar Gradually
Begin adding the sifted powdered sugar one cup at a time, alternating with small splashes of milk or heavy cream. Add the vanilla extract during this stage as well. Mix on low between each addition to avoid a cloud of sugar, then beat on medium for 30 seconds after each cup. Alternating sugar and cream helps you control the final consistency without oversaturating the icing or making it too stiff to spread.
Step 6: Adjust Consistency and Final Beat
Once all the sugar is incorporated, increase the mixer to medium-high and beat the icing for a final 2 to 3 minutes. This last beat makes it noticeably lighter in texture and brighter in color. If the icing is too thick, add milk one teaspoon at a time. If it feels too soft, add powdered sugar a tablespoon at a time. At this point, fold in any optional add-ins if using. Taste and adjust sweetness or salt before using.
Cook Time
Total
Approximately 15 to 20 minutes from start to finish.
Prep
10 to 12 minutes, including melting the chocolate and softening the butter.
Bake
No baking required. Icing is made entirely on the stovetop and with a mixer.
Servings
This recipe makes enough rich chocolate icing to generously frost a two-layer 8-inch or 9-inch round cake, covering the top and sides with a thick, even coat. It is also more than sufficient for frosting 24 standard-size cupcakes with a modest swirl or a piped rosette on each one.
If you are using this icing for a sheet cake or a three-layer build, you may want to scale the recipe by one and a half times to ensure full coverage without running short midway through frosting.
Makes approximately 3 cups of finished chocolate icing, which translates to roughly 24 servings when used on cupcakes or 12 to 16 generous slices when spread across a layered cake.
Common Mistakes in This Recipe
One of the most frequent errors is using butter that is either too cold or too warm. Cold butter does not cream properly, leaving you with a lumpy, stiff icing. Butter that is too soft or slightly melted creates a greasy, unstable texture that breaks down under the mixer and refuses to hold its shape when piped.
Another common mistake is skipping the step of sifting both the cocoa powder and the powdered sugar. Unsifted ingredients introduce lumps that persist even after extended mixing, giving the final icing an uneven, gritty texture. It only takes an extra minute and makes a visible difference in smoothness.
Many home bakers add too much milk at once in an attempt to loosen a stiff icing. Adding liquid in large quantities destabilizes the fat structure, resulting in an icing that is too runny to spread cleanly or pipe without collapsing.
Finally, rushing the butter-beating stage is a mistake that quietly undermines the entire recipe. Many people beat the butter for just 60 seconds and move on. That is not enough time. Under-beaten butter produces a flat, dense icing that lacks the lightness and lift that makes this recipe exceptional.
Solutions to Common Mistakes
For butter temperature, pull it from the refrigerator about 45 to 60 minutes before you plan to make the icing. Press it with your finger — it should leave a clean indent but not feel squishy or oily. That is the sweet spot for creaming.
Always sift your cocoa powder and powdered sugar without exception. If you do not own a sifter, use a fine-mesh strainer and tap gently over the bowl. This one step eliminates lumps before they have a chance to form and ensures a silky, even texture throughout.
When adjusting the consistency, add liquid in very small amounts — one teaspoon at a time. After each addition, beat for 20 seconds and assess. It is far easier to add more than to correct an icing that has become too thin.
For the butter-beating step, set a timer. Beat for a full 3 to 4 minutes and do not cut it short. The visual change is clear — the butter will shift from pale yellow to almost white and increase noticeably in volume. That transformation is what gives this icing its signature lightness.
Nutritional Information (approx. per serving)
- Calories: 185 kcal
- Total Fat: 9 g
- Saturated Fat: 5.5 g
- Cholesterol: 20 mg
- Sodium: 30 mg
- Total Carbohydrates: 27 g
- Dietary Fiber: 1.2 g
- Total Sugars: 24 g
- Protein: 1 g
- Iron: 0.8 mg
- Calcium: 15 mg
Dark cocoa and bittersweet chocolate, the primary flavor base of this icing, are genuinely rich in antioxidants — specifically flavonoids, which have been associated with improved cardiovascular health and reduced inflammation when consumed in moderation.
The use of unsalted butter as the fat source provides fat-soluble vitamins, including small amounts of vitamin A and vitamin E, which contribute to cellular health. When paired with whole milk or heavy cream, the icing also delivers a modest dose of calcium and phosphorus.
The espresso powder, if included, contributes trace antioxidants and adds a depth of flavor that allows you to use slightly less sugar without compromising on richness. This naturally reduces the overall sugar load per serving without sacrificing taste.
While this is undeniably an indulgent recipe, using quality chocolate with a higher cocoa percentage keeps the sugar content more balanced compared to commercial frostings, which tend to rely almost entirely on sugar and hydrogenated fats to achieve their texture.
Storage Instructions
Once prepared, this chocolate icing can be stored in an airtight container at room temperature for up to 24 hours if your kitchen is cool and dry. Beyond that, refrigeration is recommended to preserve both freshness and texture, especially in warm climates or during summer months.
In the refrigerator, the icing will keep well for up to one week. Before using refrigerated icing, allow it to come to room temperature for at least 45 minutes, then re-beat it with a hand or stand mixer for 1 to 2 minutes to restore its smooth, spreadable consistency.
For longer storage, this icing freezes beautifully. Transfer it to a freezer-safe container or a resealable freezer bag with the air pressed out. It will keep for up to three months in the freezer. Thaw overnight in the refrigerator, then bring to room temperature and re-beat before use.
If the icing has been used to frost a cake, the finished cake can be kept at room temperature under a cake dome for up to two days. For longer storage, refrigerate the frosted cake loosely covered. Allow slices to come to room temperature before serving for the best flavor and texture.
Suggestions
This chocolate icing pairs beautifully with classic yellow butter cake, where its deep richness plays against the subtle sweetness of the sponge. It is equally at home on a red velvet cake, where the cocoa in the icing echoes the chocolate notes baked into the layers beneath.
For an elevated dessert experience, use this icing between layers of espresso-soaked chocolate genoise and finish the exterior with a smooth, final coat using a bench scraper for that sharp-edged look that photographs beautifully and impresses at any gathering.
Beyond cakes, consider using this icing as a filling for sandwich cookies, a dip for fresh strawberries, or a thick spread on warm toasted brioche. It is versatile enough to move beyond its traditional role without losing any of its character.
If you are making cupcakes for a party, fit a piping bag with a 1M star tip and pipe tall, dramatic swirls. For a more polished look, use an offset spatula to spread the icing flat and finish with a dusting of cocoa powder or a few chocolate shavings scattered across the top.
Seasonal Relevance
Rich chocolate icing is one of those recipes that genuinely belongs to every season, though it earns its most celebrated moments in autumn and winter. During colder months, the deep, warming notes of dark chocolate feel perfectly suited to the season — especially when paired with spiced cakes, gingerbread layers, or peppermint-infused sponges at the holidays.
In spring, this icing finds its way onto Easter cakes and birthday layer cakes, often paired with fresh raspberries or lemon curd between the layers for a contrast that feels bright and seasonal without abandoning the chocolate richness everyone loves.
Summer calls for sheet cakes — simple, casual, and crowd-friendly. This icing holds up reasonably well in moderate temperatures and looks stunning spread across a dark chocolate sheet cake topped with fresh cherries or sliced strawberries at a backyard celebration.
Come fall, pair this icing with a pumpkin spice cake or a salted caramel layer cake where the bittersweet chocolate acts as an anchor against bolder flavors. Add a pinch of cinnamon and a splash of bourbon to the icing itself, and you have something that tastes unmistakably like the season.
Final Words
A truly great chocolate icing is not complicated, but it demands respect for the process. Every step in this recipe exists for a reason — the temperature of the butter, the gradual addition of sugar, the final extended beat that transforms the texture from decent to exceptional. When you follow it with care, the result is unmistakably different from anything rushed or improvised.
What I want you to take away from this recipe is not just a formula, but an understanding of why it works. Once you know that beaten butter creates lightness, that sifted cocoa eliminates lumps, and that melted chocolate adds depth that powder alone cannot, you can adapt this icing to suit whatever project comes next.
Make it once and you will find yourself returning to it again and again — for birthdays, for holidays, for the kind of quiet Wednesday afternoon when you decide a homemade cake is exactly what the week needs. That is the mark of a truly reliable recipe.
This is chocolate icing done with intention. Share it generously, serve it proudly, and do not be surprised when people ask you for the recipe. That is simply what happens when you stop cutting corners and start making food that is genuinely worth eating.
Frequently Asked Questions
Can I make this chocolate icing ahead of time and use it the next day?
Yes, absolutely. Prepare the icing, transfer it to an airtight container, and refrigerate it for up to one week. When ready to use, allow it to sit at room temperature for 45 minutes, then re-beat with a mixer for 1 to 2 minutes until it returns to its original smooth, fluffy consistency.
What type of cocoa powder works best in this recipe — natural or Dutch-process?
Dutch-process cocoa is strongly preferred here. It has been treated to neutralize acidity, which results in a smoother, darker, more intensely chocolatey flavor. Natural cocoa works in a pinch, but the icing will taste slightly more acidic and the color will be noticeably lighter and less rich.
How do I fix chocolate icing that has turned grainy or curdled?
A grainy or curdled icing is almost always a temperature issue — usually butter that was too cold or chocolate that was added while still too hot. To fix it, warm the bowl slightly by placing it over a pot of hot water for 30 to 60 seconds while stirring, then re-beat on medium-high until the texture smooths out completely.
Rich Chocolate Icing Recipe
24
servings10
minutes20
minutes185
kcal30
minutesA silky, intensely rich chocolate icing made with real melted chocolate and Dutch-process cocoa. Perfectly smooth, deeply flavored, and versatile enough for cakes, cupcakes, and brownies — this is the only chocolate frosting recipe you will ever need.
Ingredients
3 cups powdered sugar, sifted
0.5 cups unsalted butter, softened to room temperature
0.5 cups unsweetened cocoa powder (Dutch-process preferred), sifted
0.3 cups whole milk or heavy cream
2 teaspoons pure vanilla extract
1 pinch fine sea salt
100 grams semi-sweet or bittersweet chocolate, melted and slightly cooled
1 tablespoons espresso powder (optional)
2 tablespoons sour cream, optional
0.5 teaspoons cinnamon, optional
1 tablespoons dark rum or bourbon, optional
2 tablespoons cream cheese, softened, optional
Directions
- Melt and Cool the Chocolate: Break 100 grams semi-sweet or bittersweet chocolate, melted and slightly cooled into pieces and melt gently using a double boiler or microwave in 30-second intervals, stirring between each round. Once fully melted, set aside to cool until just slightly warm to the touch — not hot. Adding hot chocolate to butter will cause it to separate and ruin the texture.
- Beat the Butter: In a large mixing bowl, beat 0.5 cups unsalted butter, softened to room temperature on medium-high speed for 3 to 4 minutes until pale, light, and fluffy. This step builds the airy base that gives the icing its smooth, spreadable consistency. Do not rush it — under-beaten butter results in a dense, heavy frosting.
- Add Cocoa Powder and Salt: Reduce mixer to low speed. Add 0.5 cups unsweetened cocoa powder (Dutch-process preferred), sifted and 1 pinch fine sea salt. Mix until fully combined before increasing speed. Sifting the cocoa beforehand prevents lumps and ensures a silky smooth finish. The salt balances sweetness and amplifies the chocolate flavor significantly.
- Incorporate the Melted Chocolate: With the mixer on low, pour the cooled 100 grams semi-sweet or bittersweet chocolate, melted and slightly cooled in a slow, steady stream into the butter and cocoa mixture. Increase speed to medium and beat for about 2 minutes The melted chocolate adds glossiness, richness, and a complex depth that cocoa powder alone cannot achieve.
- Add Powdered Sugar and Cream: Add 3 cups powdered sugar, sifted one cup at a time, alternating with small splashes of 0.3 cups whole milk or heavy cream. Mix in 2 teaspoons pure vanilla extract during this stage. Beat on low between each addition, then on medium for 30 seconds after each cup. Alternating sugar and cream helps you control consistency without over-thinning the icing.
- Final Beat and Adjust Consistency: Increase mixer to medium-high and beat for a final 2 to 3 minutes until noticeably lighter in texture. If too thick, add 0.3 cups whole milk or heavy cream one teaspoon at a time. If too soft, add more 3 cups powdered sugar, sifted a tablespoon at a time. Fold in any optional add-ins, taste, and adjust before using.
Recipe Video
Notes
- Pull butter from the refrigerator 45 to 60 minutes before starting. It should leave a clean indent when pressed but not feel oily or squishy.
- Always sift both the cocoa powder and the powdered sugar. If you do not have a sifter, use a fine-mesh strainer — this single step eliminates lumps before they form.
- Add liquid in very small amounts — one teaspoon at a time — and beat briefly after each addition before assessing consistency.
- This recipe makes approximately 3 cups of icing, enough to generously frost a two-layer 8 or 9-inch cake or 24 standard cupcakes.
- For a more intense chocolate flavor, add 1 tablespoon of espresso powder — it will not taste like coffee but will significantly deepen the chocolate notes.
- Finished icing can be stored in an airtight container in the refrigerator for up to one week or frozen for up to three months. Re-beat after bringing to room temperature before using.
- For a clean, sharp-edged finish on layer cakes, apply a thin crumb coat first, chill for 15 minutes, then apply the final coat with a bench scraper.