Homemade Apple Butter Recipe
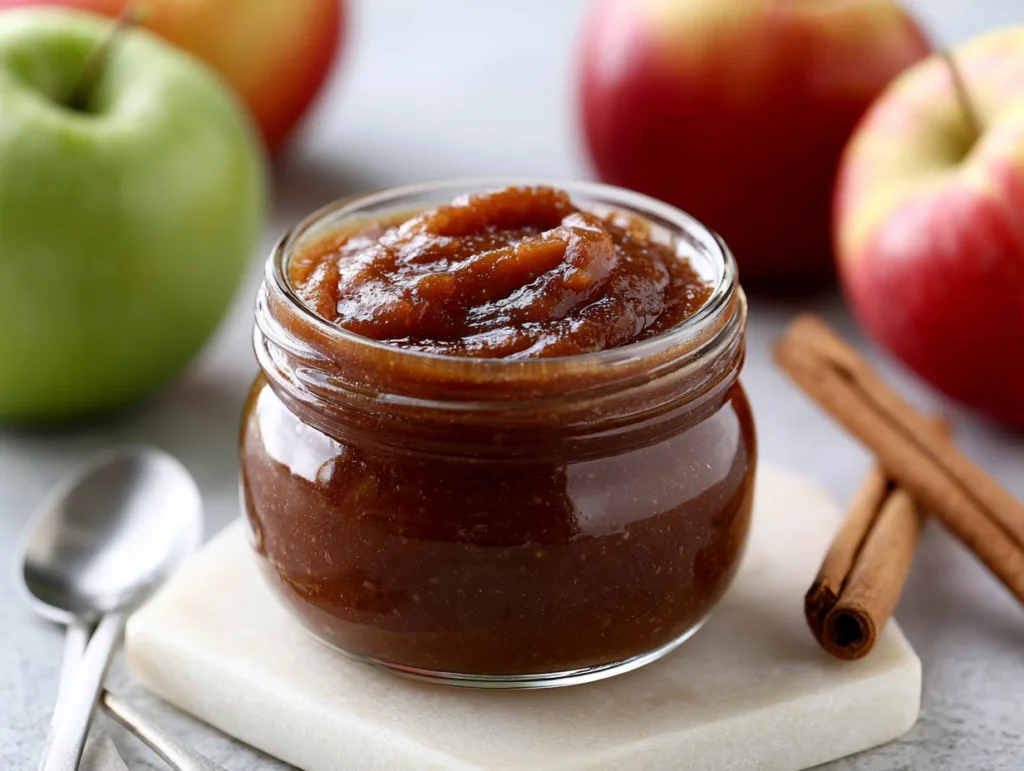
There are recipes that simply feed you, and then there are recipes that feel like a memory in a jar. Homemade apple butter is the latter. It is the kind of thing that transforms a pile of ordinary apples into something deeply aromatic, velvety smooth, and so richly spiced that your whole kitchen smells like the best version of autumn you have ever experienced.
What makes this recipe genuinely special is patience. Apple butter is not rushed. It slow-cooks until the natural sugars in the apples caramelize into something almost candy-like, and the texture shifts from chunky to silky without you doing much at all. That process alone is worth understanding before you begin.
I have tested this recipe across a dozen batches using different apple varieties, different ratios of spice, and both stovetop and oven methods. What you are getting here is the version that consistently delivers the deepest flavor, the smoothest consistency, and the most reliable results whether you are making it for the first time or the fiftieth.
Spread it on sourdough toast, swirl it into oatmeal, dollop it onto biscuits, or spoon it straight from the jar at midnight — no judgment here. This recipe belongs in your permanent rotation the moment you taste it.
Ingredients You’ll Need
Every great jar of apple butter starts with ingredients you can trust, and this one keeps things beautifully straightforward — nothing exotic, nothing that requires a specialty store.
Base Ingredients:
- 3 lbs apples (Fuji, Honeycrisp, or a mix of sweet and tart varieties), peeled, cored, and chopped
- ½ cup granulated sugar
- ¼ cup brown sugar, packed
- 1 tsp ground cinnamon
- ¼ tsp ground cloves
- ¼ tsp ground nutmeg
- 1 tbsp fresh lemon juice
- ½ tsp pure vanilla extract
- ⅛ tsp fine sea salt
- ¼ cup apple cider or apple juice
Optional Add-ins:
- ½ tsp ground cardamom (for a floral, warming depth)
- 1 tsp apple cider vinegar (for a subtle tang that balances sweetness)
- 1 pinch cayenne pepper (unexpected, but it adds a quiet warmth)
- 1 tbsp maple syrup (in place of part of the sugar for a more complex sweetness)
- ½ tsp ground ginger (adds brightness and a gentle heat)
Step-by-Step Instructions
Step 1: Prepare the Apples
Start by peeling, coring, and roughly chopping your apples into one-inch pieces. You do not need precision here — everything will eventually cook down completely. Using a mix of apple varieties gives the best flavor outcome. Sweeter apples like Fuji or Gala bring body and natural sweetness, while a tart variety like Granny Smith or Braeburn adds the contrast that keeps apple butter from tasting flat. Aim for roughly equal proportions if mixing.
Step 2: Combine Everything in the Pot
Add the chopped apples to a large, heavy-bottomed pot or Dutch oven. Pour in the apple cider, then add both sugars, all the spices, lemon juice, salt, and vanilla. Stir everything together until the apples are evenly coated. The mixture will look loose and chunky at this point — that is exactly right. Place the pot over medium heat and bring it to a gentle simmer, stirring occasionally to prevent anything from sticking to the bottom early on.
Step 3: Cook Low and Slow
Once the mixture reaches a simmer, reduce the heat to low. Cover the pot partially, leaving a small gap for steam to escape. Cook for 45 to 60 minutes, stirring every 10 to 15 minutes. The apples will soften and break down gradually, releasing their natural juices. The mixture will begin to thicken as liquid evaporates. You are looking for the apples to be completely tender and falling apart before you move to the next step. Do not rush this phase — it builds the foundation of flavor.
Step 4: Blend Until Silky Smooth
Once the apples have fully broken down and the mixture looks like a thick, rustic applesauce, remove the pot from heat and allow it to cool for about 10 minutes. Use an immersion blender directly in the pot to blend everything into a smooth, uniform consistency. Alternatively, transfer the mixture in batches to a countertop blender, being careful with the hot liquid. Blend until completely smooth. If you prefer a slightly textured apple butter, blend only partially — both are perfectly valid results.
Step 5: Reduce to the Perfect Consistency
Return the blended mixture to the pot over low heat. Cook uncovered, stirring frequently, for another 20 to 30 minutes. This is the reduction phase where the apple butter deepens in color, intensifies in flavor, and thickens to that characteristic spreadable consistency. You will know it is ready when a spoonful dropped onto a cold plate holds its shape without watery liquid pooling around the edges. Taste and adjust sweetness or spice at this point if needed.
Step 6: Jar and Cool
Remove the pot from heat and let the apple butter cool for 15 minutes. Transfer it into clean glass jars using a wide-mouth funnel or a ladle. Leave about half an inch of headspace at the top of each jar. Seal loosely and allow the jars to come to room temperature before refrigerating. If you plan to process the jars for shelf-stable storage using a water bath canning method, follow proper canning guidelines for safe preservation. For everyday use, refrigerating is perfectly sufficient.
Cook Time
Total:
Approximately 1 hour 45 minutes from start to finish, including preparation and cooling time.
Prep:
15 minutes for peeling, coring, and chopping the apples.
Bake:
1 hour 15 minutes of active stovetop cooking across the simmering and reduction phases.
Servings
This recipe produces a generous, satisfying yield that makes it worth the cooking time investment. Makes approximately 2 to 2½ cups of finished apple butter, depending on how long you reduce the mixture and how much moisture your specific apples contain.
That translates to roughly 16 to 20 tablespoon-sized servings, making this ideal for spreading across a week’s worth of breakfasts, gifting a jar to a neighbor, or stashing one in the freezer for a later date.
If you need a larger batch — for holiday gifting, canning season, or simply because you love it — this recipe scales up beautifully. Double or triple the quantities and use a wider pot to allow for more efficient evaporation during the reduction phase.
Common Mistakes in This Recipe
One of the most frequent errors home cooks make is using a single apple variety. While it works, the flavor profile ends up one-dimensional. Relying only on a sweet apple produces an overly sugary result, while using only tart apples can leave the butter feeling sharp and thin. A blend of varieties is not optional if you want depth.
Cooking at too high a heat is another issue that catches people off guard. Apple butter can scorch on the bottom of the pot when the heat is too aggressive, and once that happens, the burnt flavor bleeds through the entire batch. Low and slow is the only way to develop the caramelized, rich character that makes this recipe worth making.
Skipping the reduction phase is perhaps the most damaging mistake. Many people blend the cooked apples and assume the texture is correct. It is not. The uncovered reduction step after blending is what transforms the mixture from glorified applesauce into true apple butter — thick, concentrated, and spreadable.
Under-seasoning at the end is also surprisingly common. Spices mellow and integrate as they cook, which means what tasted bold at the start can seem subtle by the time the butter is finished. Always taste before jarring and adjust cinnamon, vanilla, or salt as needed.
Solutions to Common Mistakes
The solution to the single-variety problem is simple: combine at least two types of apples, ideally one sweet and one tart. Fuji and Granny Smith is a reliable pairing. If you only have one type on hand, a small splash of apple cider vinegar can introduce the tartness that a single sweet variety lacks.
To avoid scorching, use a heavy-bottomed pot and keep your burner on low after the initial simmer. Stir every 10 minutes during the long cooking phase and use a silicone spatula that can reach the corners and edges of the pot where burning is most likely to start.
For anyone who has ended up with thin apple butter, the fix is straightforward: put it back on the stove uncovered and continue reducing. Set a timer, stir frequently, and run the cold-plate test every 10 minutes until it holds its shape properly.
For under-seasoned apple butter, add a small pinch of cinnamon and salt right at the end, stir it in, and let it cook for two additional minutes before tasting again. Vanilla extract added after removing from heat keeps its brightness and can lift a batch that tastes flat.
Nutritional Information (approx. per serving)
- Calories: 45 kcal
- Total Carbohydrates: 11g
- Sugars: 9g
- Dietary Fiber: 0.5g
- Total Fat: 0g
- Protein: 0g
- Sodium: 10mg
- Vitamin C: 1mg
- Potassium: 35mg
Apple butter, when made at home with real fruit, carries genuine nutritional merit that store-bought spreads rarely match. Apples are a natural source of polyphenols and antioxidants that support cardiovascular health and help the body manage oxidative stress.
The fiber present, though modest per tablespoon serving, contributes to digestive regularity and helps slow the absorption of sugar into the bloodstream. This makes homemade apple butter a meaningfully better choice than refined jam when eaten as part of a balanced breakfast.
Cinnamon, which is central to this recipe, has been studied extensively for its role in supporting healthy blood sugar levels. Even in the small amounts used in cooking, it adds a functional dimension beyond just flavor.
The fact that this recipe contains no artificial preservatives, no corn syrup, and no colorings means you are getting a clean, whole-food spread that you can feel good about including in your daily routine.
Storage Instructions
Once your apple butter has cooled completely and been transferred to clean glass jars, it will keep in the refrigerator for up to three weeks. Make sure the lids are sealed tightly after each use and that you always use a clean spoon when serving to prevent contamination that would shorten the shelf life.
For longer storage, apple butter freezes exceptionally well. Portion it into small freezer-safe containers or even ice cube trays for convenient single-use portions. Frozen apple butter stays at its best quality for up to six months. Thaw it overnight in the refrigerator before using — do not microwave it directly from frozen, as the texture can become uneven.
If you are processing jars for pantry storage using water bath canning, properly sealed jars will last for up to one year in a cool, dark location. Always follow tested canning guidelines from a reliable source such as the USDA Complete Guide to Home Canning to ensure food safety when shelf-stable storage is your goal.
One practical tip: label your jars with the date they were made. Apple butter all looks fairly similar after a few weeks, and knowing exactly when a batch was prepared helps you rotate your supply and use it at peak quality without any guessing involved.
Suggestions
Apple butter is versatile far beyond the breakfast table, and once you have a jar in your refrigerator, you will find yourself reaching for it constantly. The most obvious use is spread thickly on toast, an English muffin, or a warm biscuit — and that will never get old — but it earns its place in savory cooking just as readily.
Try it as a glaze for roasted pork tenderloin or pork chops. Brush it on during the last 15 minutes of cooking and it caramelizes into something extraordinary. It also works beautifully stirred into a pan sauce for chicken or whisked into a vinaigrette alongside apple cider vinegar and Dijon mustard for a salad dressing with real character.
On the sweeter side, swirl apple butter into Greek yogurt or overnight oats for an effortless weekday breakfast upgrade. It works as a filling for crêpes, a topping for vanilla ice cream, or a layer inside a bundt cake or spice loaf — just substitute it for part of the oil or applesauce called for in your batter.
For entertaining, pair a jar of homemade apple butter with aged cheddar, sharp gouda, and crusty bread on a cheese board. The contrast between the sweet, spiced butter and a properly funky aged cheese is one of those flavor combinations that stops a room.
Seasonal Relevance
Apple butter has an undeniable identity as a fall recipe, and for good reason. The window from late August through November is when apples are at their absolute peak — freshly harvested, deeply flavorful, and available in the widest variety. Making apple butter during this window means you are starting with the best possible raw material.
That said, apple butter is not limited to autumn. Because commercially available apples are stored and sold year-round, you can make this recipe in any month and still achieve excellent results. It is particularly useful in winter when warming, spiced foods feel most welcome at the table.
In spring and early summer, apple butter can feel like a pantry staple that bridges the gap before stone fruits and berries come into season. Spread on morning toast alongside fresh strawberries or used as a filling for spring rolls with brie, it transitions beautifully across the calendar.
The recipe also fits naturally into holiday cooking. Gifted in small decorative jars, it makes a thoughtful and genuinely useful present for Thanksgiving hosts, Christmas neighbors, or anyone who appreciates food made with care. A handwritten label and a ribbon are all that is needed to turn a jar of homemade apple butter into something memorable.
Final Words
If you have made it this far, you already know that this is not a recipe you make once and forget. Apple butter has a way of becoming a household staple quickly — something you find yourself making in batches every few weeks because the jar never seems to last long enough.
What I love most about this recipe is that it rewards attention without demanding perfection. The process of watching apples transform slowly into something so concentrated and beautiful is genuinely satisfying, and the result is something you made entirely from scratch with your own hands.
If this is your first time making apple butter, trust the process and resist the urge to rush any of the steps. The patience required is minimal compared to the payoff. And if you have made apple butter before, I hope this version gives you something new to consider — whether it is the blend of apple varieties, the reduction technique, or a new serving suggestion that you had not tried.
Come back and let me know how your batch turned out. Recipes like this one get better with every person who makes them their own, and I genuinely love hearing what small adjustments or personal touches people bring to the process.
Frequently Asked Questions
Can I make this apple butter in a slow cooker instead of on the stovetop?
Absolutely. Add all the ingredients to a slow cooker, cook on low for 8 to 10 hours or high for 4 to 5 hours with the lid slightly ajar, then blend and reduce on the stovetop for 20 minutes to reach the right consistency. The slow cooker method requires less attention and produces equally rich results.
What is the difference between applesauce and apple butter?
Applesauce is cooked apples blended to a soft consistency with minimal reduction. Apple butter is cooked much longer, reduced until deeply concentrated, and darkened in color as the natural sugars caramelize. The texture is thicker, the flavor far more intense, and the color shifts from pale to a rich, deep brown.
Do I need to add sugar, or can I make this completely unsweetened?
You can make apple butter without added sugar by relying entirely on the natural sweetness of the apples. Use sweeter varieties like Fuji or Gala, and extend the cooking time slightly to allow the natural sugars to concentrate fully. The result will be less sweet than the standard version but still deeply flavorful and spreadable.
Homemade Apple Butter Recipe
20
servings15
minutes1
hour15
minutes45
kcal1
hour30
minutesThis slow-cooked homemade apple butter is velvety smooth, warmly spiced, and deeply rich. Made with simple pantry staples and fresh apples, it spreads beautifully on toast, biscuits, oatmeal, and so much more.
Ingredients
Base Ingredients:
3 lbs apples (Fuji, Honeycrisp, or a mix of sweet and tart varieties), peeled, cored, and chopped
½ cup granulated sugar
¼ cup brown sugar, packed
1 tsp ground cinnamon
¼ tsp ground cloves
¼ tsp ground nutmeg
1 tbsp fresh lemon juice
½ tsp pure vanilla extract
⅛ tsp fine sea salt
¼ cup apple cider or apple juice
Optional Add-ins:
½ tsp ground cardamom
1 tsp apple cider vinegar
1 pinch cayenne pepper
1 tbsp maple syrup
½ tsp ground ginger
Directions
- Peel, core, and roughly chop the apples into one-inch pieces. No precision needed as everything cooks down completely.
- Add chopped apples to a large heavy-bottomed pot or Dutch oven. Add apple cider, both sugars, all spices, lemon juice, salt, and vanilla. Stir until the apples are evenly coated.
- Place the pot over medium heat and bring to a gentle simmer, stirring occasionally.
- Reduce heat to low and partially cover the pot leaving a small gap for steam to escape. Cook for 45 to 60 minutes, stirring every 10 to 15 minutes, until apples are completely tender and falling apart.
- Remove from heat and cool for 10 minutes. Use an immersion blender to blend everything directly in the pot until completely smooth. Alternatively, transfer in batches to a countertop blender.
- Return the blended mixture to the pot over low heat. Cook uncovered for 20 to 30 minutes, stirring frequently, until the butter thickens and holds its shape on a cold plate.
- Remove from heat, cool for 15 minutes, then transfer into clean glass jars. Seal and refrigerate once fully cooled.
Recipe Video
Notes
- Use a mix of sweet and tart apples such as Fuji and Granny Smith for the best depth of flavor.
- Always cook on low heat after the initial simmer to avoid scorching the bottom of the pot.
- Do not skip the uncovered reduction step after blending — this is what gives apple butter its thick, spreadable consistency.
- Run the cold-plate test to check doneness: drop a spoonful on a cold plate and check that no watery liquid pools around the edges.
- Taste and adjust spices, sweetness, or salt right before jarring — flavors mellow during cooking.
- Store in the refrigerator for up to 3 weeks, freeze for up to 6 months, or process using water bath canning for up to 1 year of shelf-stable storage.
- Always use a clean spoon when serving to extend refrigerator shelf life.
- This recipe doubles or triples easily — use a wider pot for more efficient evaporation when scaling up.