Moist Pumpkin Bread Recipe
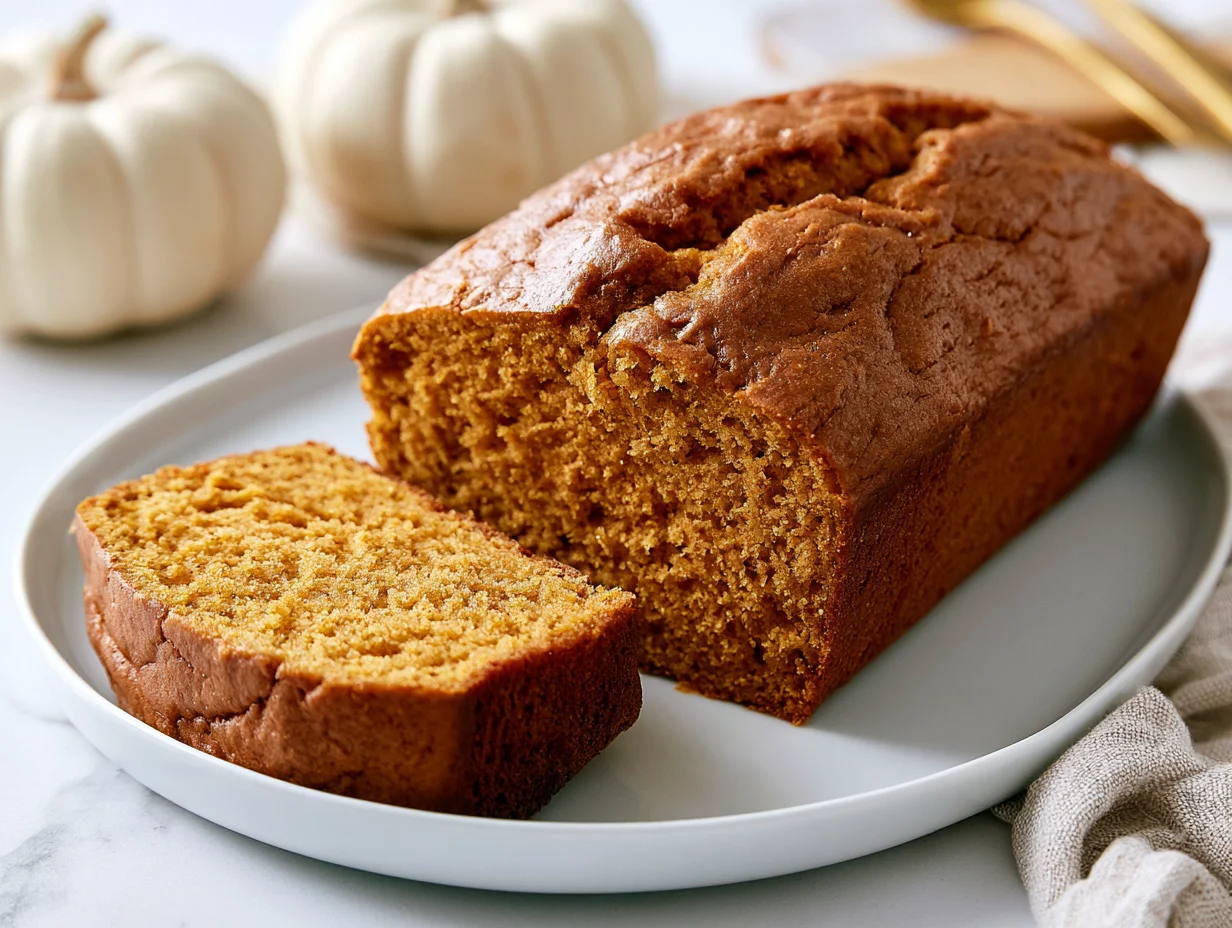
There are baked goods that are pleasant, and then there are baked goods that stop you mid-bite. This moist pumpkin bread belongs firmly in the second category. Dense yet tender, warmly spiced, and rich with real pumpkin flavor, it is the kind of loaf that makes an entire house smell like the best version of autumn.
What makes this recipe stand out is not just the pumpkin — it is everything working together. The ratio of oil to pumpkin puree creates a crumb that stays soft for days. The blend of cinnamon, nutmeg, and clove delivers warmth without overwhelming. Every element is calibrated, not guessed.
This is also a remarkably forgiving recipe. You do not need a stand mixer, special equipment, or advanced baking skills. A bowl, a whisk, a loaf pan, and thirty minutes of active time are all it takes to produce something genuinely exceptional.
Whether you are baking it for a weekend breakfast, a holiday gift, or simply because the season calls for it, this pumpkin bread recipe delivers consistent, bakery-quality results every single time. Let’s get into it.
Ingredients You’ll Need
Pull out your mixing bowl and get ready — this is the kind of recipe that comes together so easily you will want to keep the ingredients stocked all season long.
One of the things I love about this recipe is that it uses simple pantry ingredients. You probably already have most of them in your kitchen.
Base Ingredients
- 1¾ cups all-purpose flour
- 1 cup canned pumpkin puree (not pumpkin pie filling)
- ¾ cup granulated sugar
- ¼ cup packed light brown sugar
- ½ cup vegetable oil (or melted coconut oil)
- 2 large eggs, room temperature
- ¼ cup whole milk (or buttermilk)
- 1 teaspoon pure vanilla extract
- 1 teaspoon baking soda
- ½ teaspoon baking powder
- ½ teaspoon fine sea salt
- 1½ teaspoons ground cinnamon
- ½ teaspoon ground nutmeg
- ¼ teaspoon ground cloves
- ¼ teaspoon ground ginger
Optional Add-ins
- ½ cup chopped walnuts or pecans
- ½ cup semi-sweet chocolate chips
- ¼ cup raisins or dried cranberries
- 1 teaspoon orange zest for brightness
- 2 tablespoons pepitas for topping
- 1 teaspoon espresso powder to deepen flavor
- ¼ cup cream cheese, softened, for a swirl filling
Step-by-Step Instructions
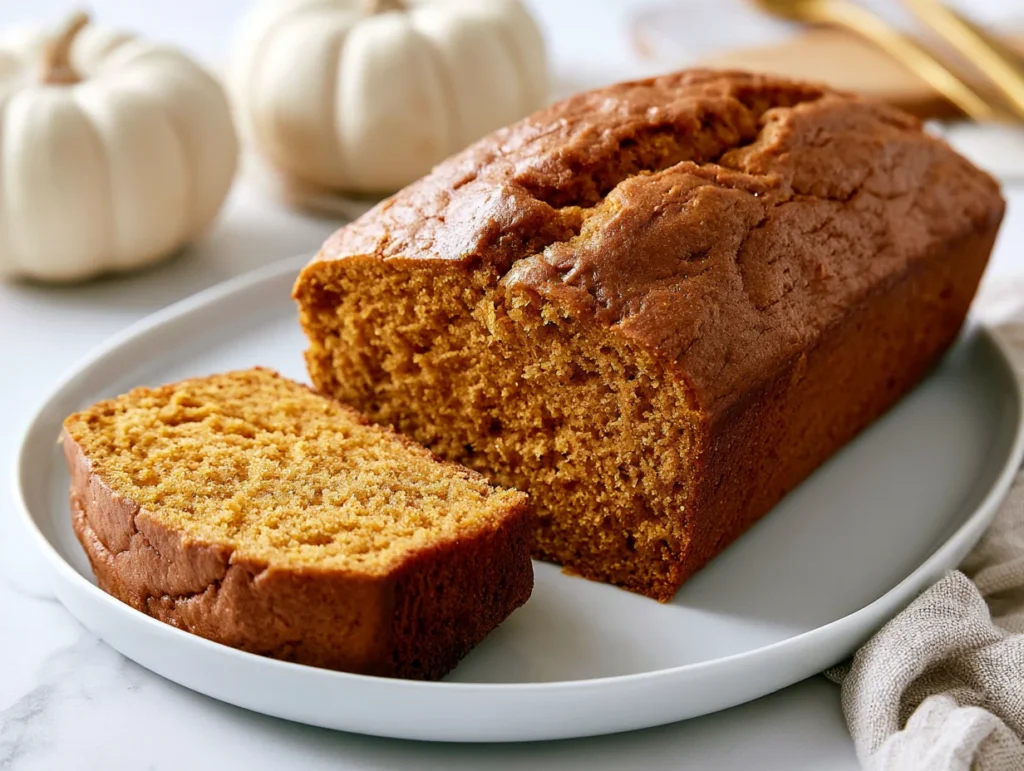
Step 1: Prepare Your Pan and Oven
Begin by preheating your oven to 350°F (175°C). This temperature is deliberately moderate — it allows the loaf to bake through evenly without forming a hard outer crust before the center is cooked. Grease a standard 9×5-inch loaf pan generously with butter or non-stick spray, then dust lightly with flour and tap out any excess. Alternatively, line the pan with parchment paper, leaving an overhang on both sides. This makes lifting the finished loaf clean and effortless. Set the prepared pan aside while you build the batter.
Step 2: Mix the Wet Ingredients
In a large mixing bowl, whisk together the pumpkin puree, vegetable oil, granulated sugar, and brown sugar until fully combined and smooth. The mixture should look glossy and uniform at this stage. Add the eggs one at a time, whisking well after each addition to incorporate fully. Pour in the milk and vanilla extract, then whisk once more until everything is cohesive. Do not rush this step. A well-emulsified wet base is what gives this bread its signature moist, tight crumb that holds together beautifully even when sliced thin.
Step 3: Combine the Dry Ingredients
In a separate bowl, sift together the all-purpose flour, baking soda, baking powder, salt, cinnamon, nutmeg, cloves, and ginger. Sifting is not just a formality — it aerates the flour, breaks up any clumps, and distributes the spices evenly so every bite carries consistent warmth and flavor. Whisk the dry ingredients briefly after sifting to ensure everything is fully integrated. Having a pre-mixed dry blend also prevents overmixing once it meets the wet ingredients, which is one of the most important factors in achieving a perfectly tender, moist loaf.
Step 4: Fold the Batter Together
Add the dry ingredients to the wet ingredients in two additions, folding gently with a rubber spatula rather than whisking. Switch to folding the moment the flour goes in. Overmixing develops gluten and leads to a dense, tough loaf — exactly the opposite of what this recipe is designed to deliver. Fold just until no dry streaks of flour remain. If you are adding any optional mix-ins such as chopped walnuts, chocolate chips, or dried fruit, fold them in at this stage with just two or three additional strokes. The batter will be thick and slightly sticky, which is exactly right.
Step 5: Bake and Cool
Pour the batter into the prepared loaf pan and spread it evenly with a spatula. If using pepitas, scatter them over the top and press them gently into the surface. Bake on the center rack for 55 to 65 minutes. Begin checking at the 55-minute mark by inserting a toothpick or thin skewer into the center of the loaf — it should come out with just a few moist crumbs, not wet batter. If the top is browning too quickly, tent loosely with foil for the final 10 minutes. Once baked, cool in the pan for 15 minutes, then transfer to a wire rack to cool completely before slicing.
Cook Time
Total
Approximately 1 hour 25 minutes (including prep, bake, and initial cooling)
Prep
20 to 25 minutes
Bake
55 to 65 minutes
Servings
This recipe yields one standard 9×5-inch loaf, which is the ideal size for most households and gatherings. Sliced into even portions, it produces a generous yield that works beautifully as a breakfast, an afternoon snack, or a dessert served warm with a pat of butter or a drizzle of honey.
Makes approximately 10 to 12 slices, depending on how thick you cut each portion. For a breakfast setting, thicker slices work well as a standalone item. For a dessert or snack spread alongside other baked goods, thinner slices allow guests to try more without overcommitting.
If you are baking for a larger gathering or want to have extra on hand for the week, this recipe doubles cleanly into two loaves with no adjustments required. Simply divide the batter evenly between two prepared pans and bake simultaneously on the same rack for the same amount of time.
Common Mistakes in This Recipe
The most widespread mistake with pumpkin bread is using pumpkin pie filling instead of pure pumpkin puree. These are not interchangeable. Pumpkin pie filling contains added sugar, spices, and thickeners that throw off the entire balance of the recipe, resulting in an overly sweet, oddly textured loaf that does not bake correctly.
Overmixing the batter is equally damaging. Once the flour is added, every extra stir develops more gluten, which tightens the crumb and produces a tough, rubbery interior. Many home bakers keep stirring until the batter looks perfectly smooth, not realizing that a few small streaks are far better than a few extra folds.
Another frequent error is opening the oven door too early. Pumpkin bread needs an uninterrupted bake during the first 40 minutes to rise properly. Opening the door before that point causes a sudden temperature drop that can make the center sink and the loaf bake unevenly throughout.
Finally, cutting into the loaf while it is still hot destroys the crumb structure. The interior is still setting as the bread cools, and slicing too early results in a gummy, underdone-looking center even when the loaf is fully baked through.
Solutions to Common Mistakes
Always check the label before opening the can. Pure pumpkin puree contains one ingredient — pumpkin. If the label lists sugar, spices, or anything else, put it back and find the right one. This single check eliminates one of the most common and most avoidable baking failures in this recipe.
Stop mixing the moment the flour disappears. Use a rubber spatula and long, deliberate folding strokes rather than a whisk or electric mixer. If a few faint streaks of flour remain, that is perfectly acceptable — they will hydrate and incorporate during baking without any further effort on your part.
Resist opening the oven until at least the 50-minute mark. Use the oven light to check on the loaf visually if you need reassurance. A toothpick test at 55 minutes will tell you everything you need to know without compromising the bake.
Let the loaf cool in the pan for at least 15 minutes, then on a wire rack for a full 30 to 45 minutes before slicing. This patience is what separates a clean, beautifully textured slice from a collapsed, gummy one. Good pumpkin bread is worth the wait.
Nutritional Information (approx. per serving)
- Calories: 245 kcal
- Protein: 4g
- Carbohydrates: 34g
- Total Fat: 11g
- Saturated Fat: 1.5g
- Dietary Fiber: 2g
- Sugar: 18g
- Vitamin A: 70% DV
- Potassium: 130mg
- Iron: 8% DV
- Calcium: 3% DV
- Sodium: 195mg
Pumpkin is one of the most nutrient-dense ingredients you can bake with. It is exceptionally high in beta-carotene, the precursor to Vitamin A, which supports immune function, skin health, and eye health. A single slice of this bread provides a meaningful portion of your recommended daily Vitamin A intake in a genuinely enjoyable form.
The eggs in this recipe contribute high-quality complete protein along with choline, a nutrient that supports brain function and liver health. Combined with the moderate fat content from vegetable oil, they also help the body absorb the fat-soluble vitamins present in the pumpkin more efficiently.
Cinnamon, nutmeg, cloves, and ginger are not just flavor contributors — they are potent sources of antioxidants and anti-inflammatory compounds. Regular consumption of these spices has been linked in research to improved blood sugar regulation and digestive health.
The dietary fiber from pumpkin supports healthy digestion and contributes to a sustained feeling of fullness after eating. Unlike heavily processed baked goods, this pumpkin bread delivers real micronutrient value alongside its comfort and flavor, making it one of the more nutritious quick bread options available.
Storage Instructions
Once the loaf has cooled completely, wrap it tightly in plastic wrap or transfer it to an airtight container. At room temperature, pumpkin bread stays moist and flavorful for up to four days. The oil-based batter is what gives it this extended shelf life — it retains moisture far better than butter-based loaves, which tend to dry out more quickly.
For refrigerator storage, wrap the loaf or individual slices in plastic wrap, then place inside an airtight container or zip-lock bag. Refrigerated pumpkin bread keeps well for up to one week. Bring slices to room temperature before eating, or warm them briefly in a toaster oven or microwave for 15 to 20 seconds for a just-baked feel.
Pumpkin bread also freezes exceptionally well, making it a strong candidate for batch baking. Wrap individual slices or the whole loaf tightly in plastic wrap, then in a layer of aluminum foil. Freeze for up to three months. Label clearly with the date and thaw slices at room temperature for about an hour when ready to serve.
Avoid storing the loaf while it is still warm, as trapped steam inside a sealed container creates condensation that softens the crust and introduces unwanted moisture. Always allow the bread to reach full room temperature on a wire rack before wrapping or storing to preserve both texture and flavor.
Suggestions
Pumpkin bread is complete on its own, but a few intentional additions can elevate it into something truly special. Spread a thick layer of whipped cream cheese or honey butter over a warm slice and serve it alongside a strong cup of coffee or a spiced chai latte. The combination is deeply satisfying and feels far more considered than anything from a coffee shop counter.
For a dessert presentation, slice the loaf thickly and toast each piece until the edges are just golden. Top with a small scoop of vanilla bean ice cream and a light drizzle of salted caramel sauce. It takes the loaf into an entirely different dimension and works beautifully as a casual dinner party dessert that requires almost no additional effort.
If you are gifting this bread during the holiday season, bake it in smaller mini loaf pans instead of a standard size. Divide the batter evenly among four mini pans and reduce the bake time to roughly 30 to 35 minutes. Wrap each finished loaf in parchment, tie with twine, and you have a thoughtful, homemade gift that looks and tastes professionally made.
For a nutritional upgrade without sacrificing the texture, substitute half of the all-purpose flour with whole wheat pastry flour. The loaf will be slightly denser but noticeably more complex in flavor, with a nuttiness that pairs especially well with the warm spice blend and natural sweetness of the pumpkin.
Seasonal Relevance
Pumpkin bread is one of those recipes that is almost inseparable from a specific time of year. The moment temperatures begin to drop and pumpkins appear at every market stand, the craving for warm, spiced baked goods becomes something close to instinct. This recipe answers that craving better than almost anything else in the fall baking canon.
During autumn, this loaf fits naturally into nearly every occasion — weekend brunches, school bake sales, Thanksgiving morning breakfast, or simply a quiet evening at home. The spice blend used in this recipe is specifically calibrated to complement fall produce and warm beverages, making it one of the most seasonally cohesive baked goods you can make from scratch.
In winter, pumpkin bread transitions effortlessly into holiday baking. Canned pumpkin puree is available year-round, so the recipe is never limited by fresh produce availability. Baked in mini loaf pans and wrapped for gifting, it becomes one of the most practical and well-received homemade holiday presents in any baker’s repertoire.
Spring and summer call for lighter bakes, but if a pumpkin bread craving strikes outside of the cooler months, lean into the optional orange zest and reduce the cloves slightly for a brighter, airier flavor profile that feels a little less heavy for warmer weather. The recipe is adaptable enough to work across seasons without losing what makes it special.
Final Words
There is a reason pumpkin bread appears on nearly every fall baking list written by serious home cooks and professional chefs alike. It delivers on every level — flavor, texture, ease of preparation, and versatility — in a way that few quick bread recipes can claim. This version, built around a carefully balanced ratio of pumpkin, oil, and spice, is one I return to every single year without modification.
What I want you to take from this recipe is a sense of confidence in the process. Baking pumpkin bread is not complicated, but it does reward attention. Measure carefully, fold gently, and let the oven do its work without interference. Those three commitments will give you a loaf that is genuinely difficult to improve upon.
The optional add-ins in this recipe exist to give you room to make it your own. Whether you fold in walnuts for texture, chocolate chips for indulgence, or a swirl of cream cheese for richness, the base recipe is strong enough to carry all of it without losing its identity.
Bake this once and it will earn a permanent place in your seasonal rotation. Share it with someone and it will likely earn a request. That is the quiet power of a recipe done right — it does not need to be elaborate to be unforgettable. It just needs to be honest, well-crafted, and made with care.
Frequently Asked Questions
Can I use fresh pumpkin instead of canned puree in this recipe?
Yes, fresh pumpkin puree works, but it requires extra steps. Roast or steam the pumpkin, then blend until completely smooth and strain through a cheesecloth to remove excess water. Fresh puree tends to be wetter than canned, so draining it thoroughly is essential to avoid a dense, underbaked loaf.
Why did my pumpkin bread sink in the middle after baking?
Sinking usually points to one of three causes — underbaking, too much leavening, or opening the oven too early. Always test with a toothpick at the 55-minute mark, measure baking soda and powder precisely, and avoid opening the oven door before the 50-minute mark to prevent premature collapse.
Can I make this pumpkin bread without eggs for a vegan version?
Yes. Replace each egg with a flax egg — one tablespoon ground flaxseed mixed with three tablespoons water, rested for five minutes. Use plant-based milk instead of whole milk. The texture will be slightly denser, but the loaf will still be moist and flavorful with the same warm spice character.
Moist Pumpkin Bread Recipe
10
servings25
minutes1
hour5
minutes245
kcal1
hour30
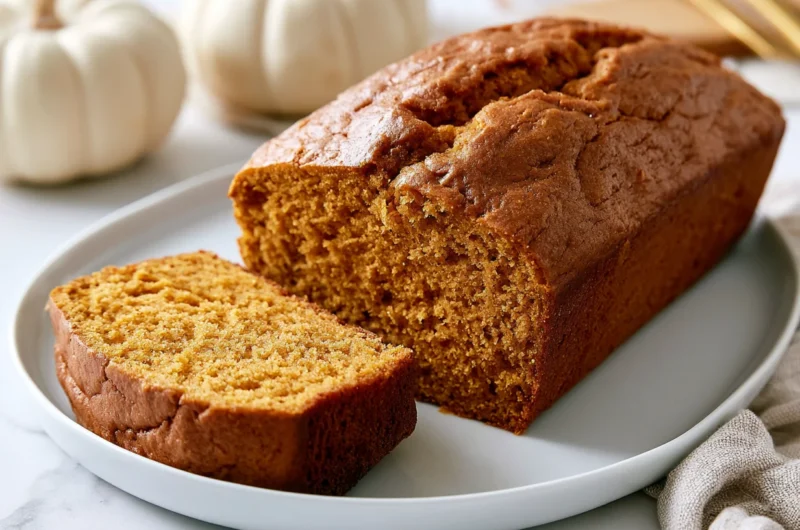
minutesThis moist pumpkin bread is warmly spiced, tender, and packed with real pumpkin flavor. Made with simple pantry staples, it bakes up perfectly every time — ideal for breakfast, snacking, or gifting throughout the fall season.
Ingredients
Base Ingredients:
1¾ cups all-purpose flour
1 cup canned pumpkin puree (not pumpkin pie filling)
¾ cup granulated sugar
¼ cup packed light brown sugar
½ cup vegetable oil (or melted coconut oil)
2 large eggs, room temperature
¼ cup whole milk (or buttermilk)
1 teaspoon pure vanilla extract
1 teaspoon baking soda
½ teaspoon baking powder
½ teaspoon fine sea salt
1½ teaspoons ground cinnamon
½ teaspoon ground nutmeg
¼ teaspoon ground cloves
¼ teaspoon ground ginger
Optional Add-ins:
½ cup chopped walnuts or pecans
½ cup semi-sweet chocolate chips
¼ cup raisins or dried cranberries
1 teaspoon orange zest
2 tablespoons pepitas for topping
1 teaspoon espresso powder
¼ cup cream cheese, softened, for a swirl filling
Directions
- Preheat oven to 350°F (175°C). Grease a 9×5-inch loaf pan with butter or non-stick spray, dust lightly with flour, and tap out the excess. Alternatively, line with parchment paper leaving an overhang on both sides for easy removal.
- In a large mixing bowl, whisk together pumpkin puree, vegetable oil, granulated sugar, and brown sugar until smooth and glossy. Add eggs one at a time, whisking well after each. Stir in milk and vanilla extract until fully combined.
- In a separate bowl, sift together flour, baking soda, baking powder, salt, cinnamon, nutmeg, cloves, and ginger. Whisk briefly to distribute evenly.
- Add the dry ingredients to the wet ingredients in two additions, folding gently with a rubber spatula just until no dry streaks remain. Do not overmix. Fold in any optional add-ins with two to three final strokes.
- Pour batter into the prepared loaf pan and spread evenly. Scatter pepitas over the top if using, pressing them gently into the surface.
- Bake on the center rack for 55 to 65 minutes. Check at the 55-minute mark with a toothpick inserted into the center — it should come out with a few moist crumbs. If the top is browning too fast, tent loosely with foil for the final 10 minutes.
- Cool in the pan for 15 minutes, then transfer to a wire rack. Allow to cool fully for 30 to 45 minutes before slicing.
Recipe Video
Notes
- Always use pure canned pumpkin puree, not pumpkin pie filling. Pie filling contains added sugar and spices that will throw off the entire recipe.
- Do not overmix once the flour is added. Fold gently and stop the moment dry streaks disappear to keep the crumb tender and moist.
- Do not open the oven door before the 50-minute mark. Early temperature drops can cause the center of the loaf to sink.
- Always cool the loaf completely before slicing. Cutting too early results in a gummy center even if the bread is fully baked through.
- Store at room temperature wrapped tightly for up to 4 days, refrigerated for up to 1 week, or frozen for up to 3 months.
- This recipe doubles cleanly into two loaves with no adjustments needed. Bake both pans on the same center rack simultaneously.
- For a vegan version, substitute each egg with a flax egg (1 tablespoon ground flaxseed + 3 tablespoons water) and use plant-based milk.