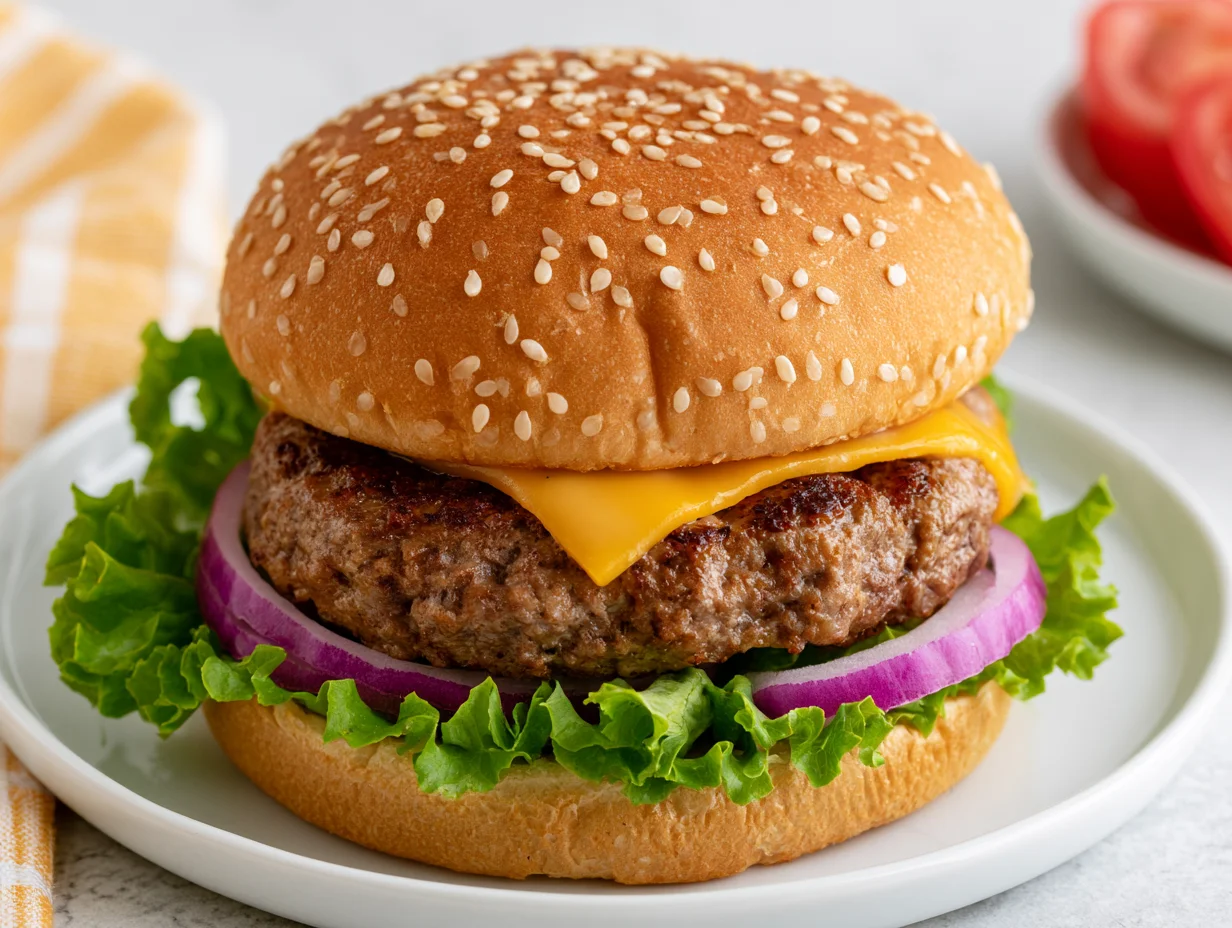
Juicy Homemade Burger Patty Recipe
There is something deeply satisfying about biting into a burger you made yourself — one where you chose every ingredient, seasoned it exactly to your taste, and cooked it just the way you like it. No shortcuts, no fillers, no mystery ingredients.
The secret to a truly great burger patty isn’t some fancy trick or an expensive cut of meat. It comes down to understanding a few core principles: the right fat ratio, minimal handling, and proper heat management. Once you get those right, everything else falls into place.
This recipe is built for home cooks who want restaurant-quality results without the guesswork. Whether you’re grilling outdoors on a summer evening or using a cast iron skillet on a Wednesday night, these patties deliver every single time.
If you’ve ever been disappointed by a dry, flat, or flavorless homemade burger, this is the recipe that changes that. Let’s build the best burger patty you’ve ever made.
Ingredients You’ll Need
Most burger recipes sound impressive on paper but require a trip to three different specialty stores. Not this one — everything here is straightforward, easy to find, and already doing its job before it hits the heat.
One of the things I love about this recipe is that it uses simple pantry ingredients. You probably already have most of them in your kitchen.
Base Ingredients:
- 500 g ground beef (80/20 fat ratio, preferably chuck)
- 1 tsp kosher salt
- 1/2 tsp freshly ground black pepper
- 1/2 tsp garlic powder
- 1/2 tsp onion powder
- 1 tsp Worcestershire sauce
- 1 tbsp olive oil (for cooking)
Optional Add-ins:
- 1 tsp smoked paprika
- 1/2 tsp mustard powder
- 1 tbsp finely grated parmesan cheese
- 1/4 tsp cayenne pepper
- 1 tbsp finely minced fresh parsley
- 1 tsp soy sauce (adds umami depth)
Step-by-Step Instructions

Step 1: Choose and Prepare Your Beef
Start with ground beef that has an 80/20 lean-to-fat ratio. This is non-negotiable if you want juicy patties. Leaner beef dries out, no matter how carefully you cook it. Ground chuck is ideal because the fat is evenly distributed throughout the meat. Take the beef out of the refrigerator about 15 minutes before you start. Cold meat doesn’t cook evenly — letting it come slightly toward room temperature ensures a better sear and more even doneness throughout.
Step 2: Season and Mix Gently
Place the ground beef in a large mixing bowl. Add the salt, black pepper, garlic powder, onion powder, and Worcestershire sauce. Use your hands to incorporate the seasonings, but work quickly and gently. Overmixing compacts the proteins and creates a dense, rubbery patty instead of a tender one. Mix just until the seasonings are evenly distributed — ten to fifteen seconds of gentle folding is all you need. If you’re adding any optional ingredients, fold them in now before shaping.
Step 3: Shape the Patties
Divide the seasoned beef into four equal portions, roughly 125 g each. Roll each portion loosely into a ball, then press it flat between your palms to form a disc about 1.5 cm thick. Here’s a critical step most home cooks skip: use your thumb to press a shallow dimple into the center of each patty. This prevents the infamous burger puff — that dome-shaped patty that cooks unevenly and doesn’t sit flat in the bun. The dimple evens out as the patty cooks.
Step 4: Chill the Patties Before Cooking
Place the shaped patties on a plate or baking sheet lined with parchment paper. Cover loosely with plastic wrap and refrigerate for at least 20 minutes before cooking. This step firms up the fat, helps the patties hold their shape on the heat, and gives the seasonings time to penetrate deeper into the meat. If you’ve got more time, 30 to 60 minutes is even better. Well-chilled patties develop a better crust and are far less likely to fall apart during cooking.
Step 5: Cook to Perfection
Heat a cast iron skillet or grill pan over high heat until it’s very hot. Add a light drizzle of olive oil and let it shimmer. Place the patties gently into the pan, dimple side up. Do not press them down with a spatula — this squeezes out all the precious juices you’ve worked to keep inside. Cook undisturbed for 3 to 4 minutes until a deep brown crust forms on the bottom. Flip once and cook for another 3 to 4 minutes for medium doneness. Add cheese in the final minute if desired.
Step 6: Rest Before Serving
Once the patties are cooked to your desired doneness, transfer them to a warm plate and let them rest for 3 to 5 minutes before assembling. Resting allows the internal juices to redistribute throughout the meat rather than spilling out the moment you cut or bite into the patty. This single step is the difference between a burger that tastes dry and one that drips with flavor. Use this time to toast your buns and prepare your toppings so everything comes together at once.
Cook Time
Total:
Approximately 45 to 50 minutes (including chilling time)
Prep:
15 minutes (plus 20 to 30 minutes chilling)
Bake:
8 to 10 minutes (stovetop or grill cook time)
Servings
This recipe makes four well-sized burger patties, each approximately 125 g before cooking. After cooking, you can expect a natural shrinkage of around 15 to 20 percent due to the fat rendering out, which is completely normal and expected with an 80/20 blend.
Each patty is sized to fit a standard burger bun comfortably without overwhelming it. If you prefer larger, restaurant-style smash burgers, you can divide the mixture into two or three portions instead of four and adjust your cooking time accordingly.
Makes approximately 4 burger patties (125 g each, pre-cook weight).
Common Mistakes in This Recipe
One of the most common errors home cooks make is using lean ground beef. Anything below 80/20 fat content will produce a dry, tough patty that no amount of toppings can rescue. Fat is what carries flavor and creates that juicy bite everyone is chasing.
Overworking the meat is another critical mistake. When you mix ground beef too aggressively or for too long, the proteins bind too tightly and the texture becomes dense and almost meatball-like. A burger patty should be tender, not chewy.
Skipping the dimple step might seem minor, but it causes the patty to puff up in the center during cooking. This leads to uneven doneness and a patty that literally rolls around in your bun.
Pressing the patty down with a spatula while it cooks is probably the most widespread burger mistake of all. It seems intuitive — you want a flat patty, after all — but what you’re actually doing is forcing the juices straight out of the meat and into the pan, leaving you with a dry, sad burger.
Solutions to Common Mistakes
Always choose 80/20 ground beef, ideally ground chuck. If your butcher offers freshly ground beef, ask for it — the texture is noticeably superior to pre-packaged options. Fat content is the foundation of every great burger patty.
Mix your seasonings in with a light, brief touch. Think of it less like kneading dough and more like folding laundry — gentle, purposeful, and quick. Stop the moment you can no longer see dry seasoning in the meat.
Press that dimple firmly into the center of each patty before chilling. It may look a little strange before cooking, but it will save the patty’s shape entirely once heat is applied.
Resist the urge to press. Trust the process, leave the patty alone, and let the heat do its job. If the patty sticks slightly when you try to flip, give it another 30 to 60 seconds — it will release naturally once the crust has properly formed.
Nutritional Information (approx. per serving)
- Calories: 290 kcal
- Protein: 22 g
- Total Fat: 21 g
- Saturated Fat: 8 g
- Carbohydrates: 1 g
- Dietary Fiber: 0 g
- Sugar: 0 g
- Sodium: 380 mg
- Iron: 15% of Daily Value
- Zinc: 30% of Daily Value
Ground beef at an 80/20 ratio is a strong source of complete protein, delivering all nine essential amino acids necessary for muscle repair and growth. Each patty provides a meaningful percentage of daily protein needs with minimal carbohydrates.
The iron content in beef is in the heme form, which is absorbed far more efficiently by the body compared to plant-based iron. This makes these patties a valuable meal choice for people managing iron intake, including athletes and those prone to deficiency.
Zinc, present in significant amounts here, plays a critical role in immune function, wound healing, and cellular repair. Many people unknowingly fall short of their daily zinc needs, and a quality beef patty is one of the most efficient ways to address that gap.
Worcestershire sauce and garlic contribute small but meaningful amounts of antioxidants and compounds known to support cardiovascular health. When paired with a balanced set of toppings — fresh vegetables, quality cheese, and whole-grain buns — this burger becomes a genuinely well-rounded meal.
Storage Instructions
Cooked burger patties can be stored in an airtight container in the refrigerator for up to three days. Allow them to cool completely before sealing the container to prevent condensation from softening the crust and making the patties soggy. Store them in a single layer or separated by parchment paper if stacking.
To reheat without drying them out, place the patties in a covered skillet over low to medium heat with a small splash of water or beef broth. Cover with a lid and heat for two to three minutes per side. This gentle steam method preserves moisture far better than a microwave, which tends to toughen the exterior and dry out the center.
Raw, unshaped ground beef seasoning mixture can be prepared up to 24 hours in advance and kept tightly covered in the refrigerator. Shaped raw patties can also be refrigerated for up to 24 hours before cooking, which actually improves flavor as the seasonings have more time to infuse.
For longer storage, raw patties freeze beautifully. Stack them between sheets of parchment paper, seal in a freezer-safe bag, and freeze for up to three months. Thaw overnight in the refrigerator before cooking — never on the counter — for the best texture and food safety.
Suggestions
These patties pair beautifully with brioche buns, which add a slight sweetness that complements the savory, umami-forward beef. Toast the buns in the same skillet you used for the patties to pick up all those rendered drippings — it adds an incredible layer of flavor that store-bought toasting simply can’t replicate.
For toppings, think in terms of contrast: something creamy (aioli or aged cheddar), something acidic (pickles, caramelized onion, or sliced tomato), something fresh (crisp lettuce or arugula), and something rich (avocado or a fried egg). Each element should add to the burger without competing with the patty itself.
If you’re cooking for a crowd, consider making sliders instead of full-sized patties. Divide the mixture into 8 smaller portions and cook them the same way. Serve on soft potato rolls with sharp cheddar and a quick burger sauce made from mayo, ketchup, a dash of hot sauce, and a splash of pickle brine.
On the grill, these patties perform exceptionally well over direct medium-high heat. Brush the grates lightly with oil before placing the patties down, and resist moving them until they release naturally. A light wood chip addition — hickory or applewood — adds a subtle smokiness that takes these patties to an entirely different level.
Seasonal Relevance
Summer is the undisputed peak season for burgers. There’s something culturally embedded about the smell of beef sizzling over hot coals in warm weather, and these patties are built for that moment. Pair them with corn on the cob, a cold slaw, and a pitcher of something refreshing for the definitive summer cookout plate.
In autumn, these patties take on a different personality. Serve them with caramelized onions, gruyère, and a smear of whole-grain mustard on a toasted pretzel bun. The deeper, warmer flavors of the season complement the natural richness of the beef beautifully, making this just as compelling indoors over a cast iron as it is on an outdoor grill.
Winter is no reason to put burgers on hold. A good cast iron skillet delivers an even better crust than most grills, and the warmth of a fresh burger on a cold day is genuinely comforting. Add blue cheese and crispy bacon, and you have something that belongs on a gastropub menu.
Spring cookouts, family gatherings, game days, and weeknight dinners — this recipe fits every occasion and every season without modification. Once you have the base recipe down, it becomes the kind of thing you make from memory, adjusting the toppings and sides to suit whatever the moment calls for.
Final Words
Making a great burger patty at home is one of those cooking skills that looks deceptively simple but rewards patience and attention to detail. The difference between a mediocre patty and an outstanding one comes down to a handful of deliberate choices — the right beef, gentle handling, a good chill, and the discipline to leave it alone in the pan.
This recipe isn’t about reinventing the burger. It’s about doing the fundamentals so well that you don’t need to. When the quality of the beef shines through and the seasoning enhances rather than masks, you end up with something genuinely better than most of what you’d order at a restaurant.
The beauty of a homemade burger is also the freedom it gives you. Once you’re comfortable with this base recipe, it becomes a canvas. Add bold spices, swap in lamb or a beef-pork blend, or press them thin for smash burgers. The technique remains the same; the possibilities expand endlessly.
Cook this recipe once and you’ll understand why so many people never go back to frozen patties. There is simply no comparison. Share it at your next cookout, feed it to people who think they don’t care about food, and watch what happens. This burger patty has a way of making people pay attention.
Frequently Asked Questions
What is the best fat-to-lean ratio for a homemade burger patty?
An 80/20 ratio (80% lean, 20% fat) is widely considered the gold standard for juicy, flavorful burger patties. It provides enough fat to keep the meat moist and tender during cooking without making the patty greasy or causing excessive flare-ups on the grill.
Can I make the patties ahead of time and freeze them?
Yes. Shape the raw patties, separate each one with a sheet of parchment paper, place them in a freezer-safe bag, and freeze for up to three months. Thaw overnight in the refrigerator before cooking. Do not thaw at room temperature, as this creates uneven defrosting and raises food safety concerns.
Why does my burger patty shrink so much when cooking?
Shrinkage is normal and primarily caused by fat and moisture releasing as the meat cooks. With an 80/20 blend, expect around 15 to 20 percent shrinkage. Pressing the dimple into the center before cooking helps the patty shrink more evenly, preventing the dome shape that causes uneven cooking and an awkward fit in the bun.
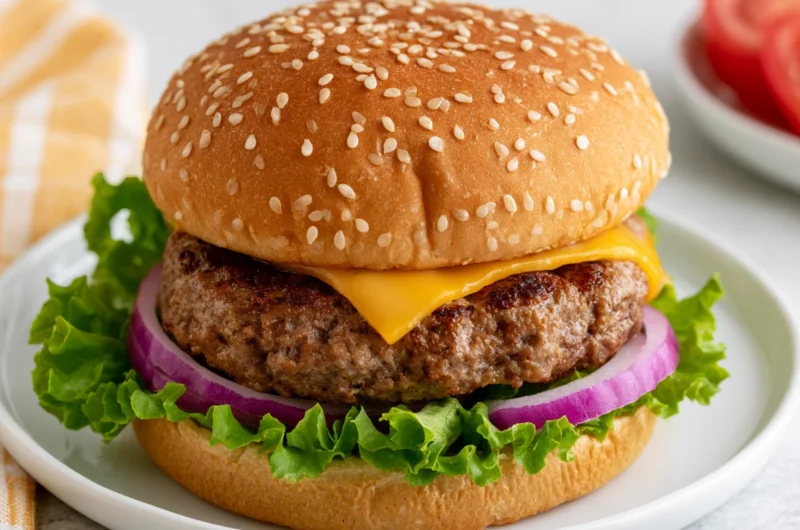
Juicy Homemade Burger Patty Recipe
4
servings30
minutes40
minutes300
kcal1
hour10
minutesA foolproof homemade burger patty made with 80/20 ground chuck, bold seasoning, and a simple technique that guarantees a juicy, deeply flavored bite every single time — on the grill or stovetop.
Ingredients
Base ingredients
500 g ground beef, 80/20 fat ratio (preferably chuck)
1 tsp kosher salt
½ tsp freshly ground black pepper
½ tsp garlic powder
½ tsp onion powder
1 tsp Worcestershire sauce
1 tbsp olive oil, for cooking
Optional add-ins
1 tsp smoked paprika
½ tsp mustard powder
1 tbsp finely grated parmesan cheese
¼ tsp cayenne pepper
1 tbsp finely minced fresh parsley
1 tsp soy sauce
Directions
- Remove ground beef from the fridge 15 minutes before starting. In a large bowl, combine beef with kosher salt, black pepper, garlic powder, onion powder, and Worcestershire sauce. Mix gently for 10–15 seconds until just combined — do not overwork the meat.
- Divide the mixture into 4 equal portions (approx. 125 g each). Shape each into a flat disc about 1.5 cm thick and press a shallow dimple into the center with your thumb to prevent puffing during cooking.
- Place shaped patties on a parchment-lined plate, cover loosely, and refrigerate for at least 20 minutes. This firms up the fat and helps the patties hold their shape on the heat.
- Heat a cast iron skillet or grill pan over high heat until very hot. Add olive oil and let it shimmer. Place patties dimple-side up and cook undisturbed for 3–4 minutes until a deep brown crust forms on the bottom.
- Flip once and cook for another 3–4 minutes for medium doneness. Do not press down with a spatula at any point. Add cheese in the final minute if desired.
- Transfer cooked patties to a warm plate and rest for 3–5 minutes before assembling. Use this time to toast buns and prepare toppings.
Recipe Video
Notes
- Always use 80/20 ground beef. Anything leaner produces a dry patty that no topping can rescue.
- The dimple in the center is not optional — it prevents the patty from puffing into a dome shape as it cooks.
- Never press the patty with a spatula while cooking. This forces the juices out and leaves you with a dry burger.
- Chilling the shaped patties for at least 20 minutes before cooking is key to keeping them intact on the heat.
- Rest the cooked patties for 3–5 minutes before serving — this redistributes the juices for a much juicier bite.
- Raw patties freeze well for up to 3 months. Separate each with parchment paper and thaw overnight in the fridge before cooking.
- For smash burgers, use smaller portions (60–70 g each), press thin on a very hot surface, and cook for 2 minutes per side.