Simple Chocolate Chip Cookie Recipe
There are certain recipes that never go out of style — and a perfectly baked chocolate chip cookie is at the very top of that list. Whether you’re a seasoned home baker or someone who’s just beginning to find their rhythm in the kitchen, this recipe meets you exactly where you are.
What makes this version stand out isn’t a secret ingredient or a complicated technique. It’s the careful balance of everyday pantry staples, a few trusted baking principles, and a method refined through experience. Every element in this recipe earns its place.
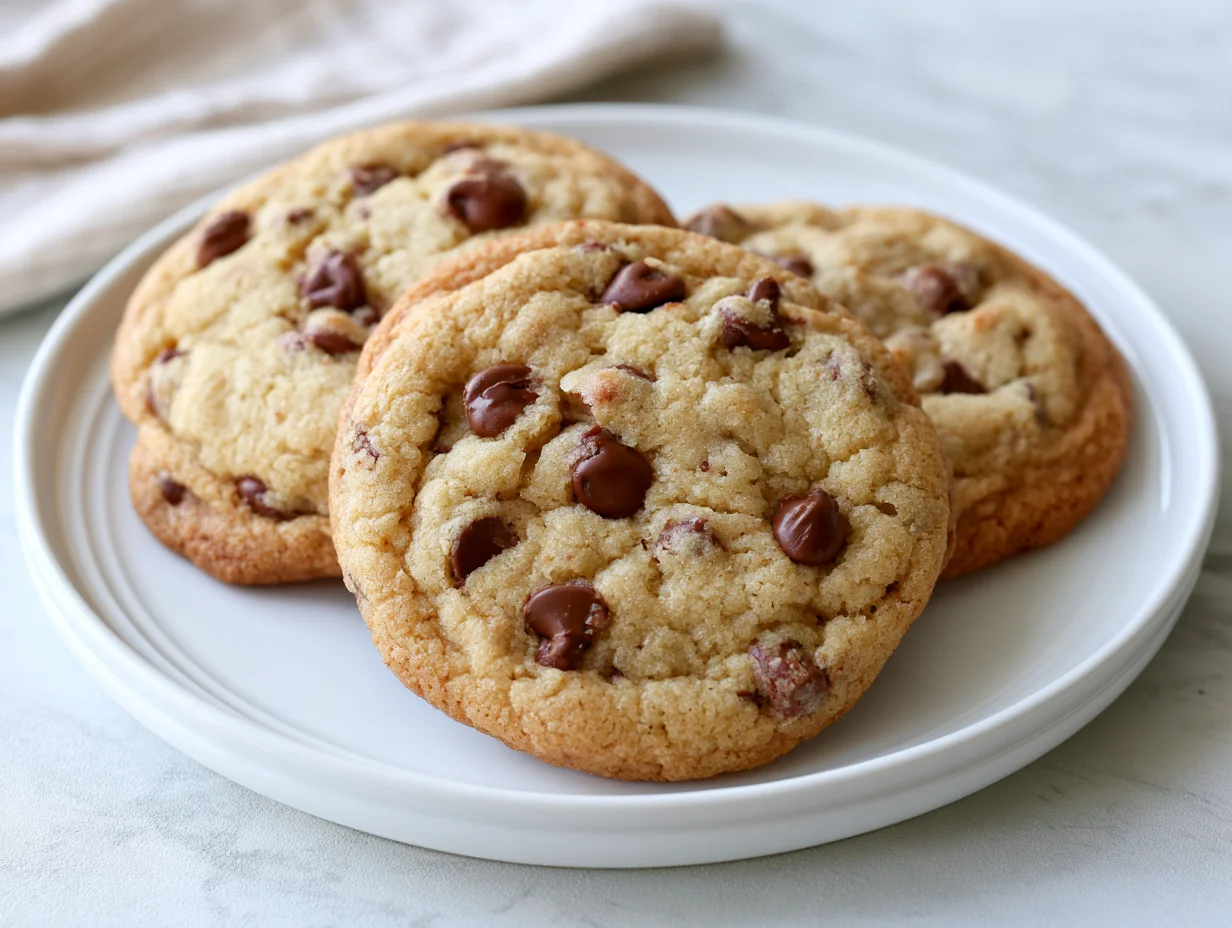
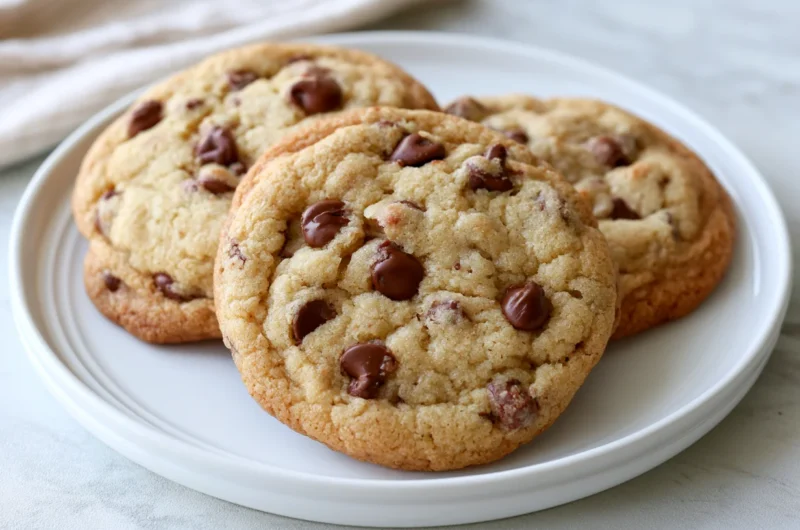
These cookies come out of the oven with crisp golden edges, a soft and chewy center, and pools of melted chocolate in every bite. They’re the kind of cookies that make people ask for the recipe before they’ve even finished eating one.
Whether you’re baking for a family gathering, a school event, or simply because the craving hit on a quiet Tuesday afternoon, this recipe delivers consistent, crowd-pleasing results every single time.
Ingredients You’ll Need
You don’t need to raid a specialty grocery store or stock a professional pantry to make these cookies — everything on this list is accessible, affordable, and worth having on hand for any day baking strikes.
One of the things I love about this recipe is that it uses simple pantry ingredients. You probably already have most of them in your kitchen.
Base Ingredients:
- 2 1/4 cups all-purpose flour
- 1 tsp baking soda
- 1 tsp fine sea salt
- 1 cup (2 sticks) unsalted butter, softened to room temperature
- 3/4 cup granulated white sugar
- 3/4 cup packed light brown sugar
- 2 large eggs, at room temperature
- 2 tsp pure vanilla extract
- 2 cups semi-sweet chocolate chips
Optional Add-ins:
- 1/2 cup chopped walnuts or pecans
- 1/2 tsp espresso powder (enhances chocolate flavor)
- 1/4 tsp ground cinnamon
- 1/2 cup dark chocolate chunks (in addition to or instead of chips)
- 1 tbsp flaky sea salt (for finishing)
Step-by-Step Instructions

Step 1: Prepare Your Workspace
Preheat your oven to 375°F (190°C). Line two large baking sheets with parchment paper and set them aside. Take your butter and eggs out of the refrigerator at least 30 minutes before you begin — room temperature ingredients blend more evenly and produce a better texture. Having everything measured and ready before you start mixing makes the process smoother and more enjoyable.
Step 2: Whisk the Dry Ingredients
In a medium mixing bowl, whisk together the all-purpose flour, baking soda, and fine sea salt. Whisking rather than stirring ensures that the leavening agent is evenly distributed throughout the flour. This step takes less than a minute but plays a significant role in how your cookies rise and develop flavor during baking. Set the bowl aside.
Step 3: Cream the Butter and Sugars
Using a stand mixer or a handheld electric mixer, beat the softened butter, granulated sugar, and brown sugar on medium-high speed for about 3 to 4 minutes. You’re looking for a mixture that’s noticeably lighter in color and fluffy in texture. This creaming process builds air into the dough, which contributes to a tender, well-structured cookie. Don’t rush this step — it makes a real difference in the final result.
Step 4: Add the Eggs and Vanilla
With the mixer running on low, add the eggs one at a time, allowing each one to fully incorporate before adding the next. Then pour in the vanilla extract. Scrape down the sides and bottom of the bowl with a rubber spatula to make sure everything is evenly mixed. The dough should look smooth and slightly glossy at this point. Overmixing after the eggs are added can develop too much gluten, so keep it gentle.
Step 5: Combine Wet and Dry Ingredients
Gradually add the dry ingredient mixture to the butter mixture, mixing on low speed just until the flour disappears into the dough. As soon as you no longer see streaks of flour, stop the mixer. Overmixing at this stage will make the cookies tough rather than tender. The dough will be thick and slightly stiff — that’s exactly what you want. Resist the urge to keep mixing.
Step 6: Fold in the Chocolate Chips
Switch to a rubber spatula or wooden spoon and fold in the chocolate chips by hand. If you’re using any optional add-ins like chopped nuts or dark chocolate chunks, add them at this stage as well. Folding by hand gives you control and helps prevent overworking the dough. Make sure the chips are evenly distributed throughout so every cookie gets a generous amount of chocolate in each bite.
Step 7: Scoop and Bake
Drop rounded tablespoons of dough onto the prepared baking sheets, spacing them about 2 inches apart to allow room for spreading. For uniform cookies, a medium cookie scoop works beautifully. Bake in the preheated oven for 9 to 11 minutes, or until the edges are set and lightly golden. The centers may look slightly underdone — that’s intentional. They’ll firm up as they cool on the pan.
Step 8: Cool and Serve
Remove the baking sheets from the oven and let the cookies rest on the pan for 5 minutes before transferring them to a wire cooling rack. This resting time allows the cookies to finish setting without crumbling when moved. If you’re using flaky sea salt, sprinkle it on immediately after pulling the cookies from the oven, while they’re still warm. Serve once cooled, or enjoy them slightly warm for that irresistible melty chocolate experience.
Cook Time
Total:
Approximately 30 to 35 minutes
Prep:
20 minutes
Bake:
9 to 11 minutes per batch
Servings
This recipe is scaled for a standard home baking session and yields a generous batch that’s perfect for sharing, gifting, or stashing away for the week. The dough portions easily and bakes consistently, so you won’t end up with a mix of overdone and underdone cookies in the same batch.
Makes approximately 48 medium-sized cookies, depending on how generously you scoop the dough. If you prefer larger bakery-style cookies, use a larger scoop and add 2 to 3 extra minutes to the baking time, watching the edges carefully.
For smaller households, the dough freezes exceptionally well. You can scoop the full batch, freeze the unbaked balls on a tray, then transfer them to a zip-lock bag and bake straight from frozen whenever the craving strikes — just add 2 to 3 minutes to your bake time.
Common Mistakes in This Recipe
One of the most frequent errors home bakers make is using butter that’s too cold or, conversely, melted all the way through. Butter that hasn’t been softened properly won’t cream with the sugars effectively, and fully melted butter changes the structure of the dough entirely.
Measuring flour incorrectly is another common culprit behind dense, cakey, or dry cookies. Scooping directly from the flour bag compacts the flour into the measuring cup, which often means you’re adding significantly more than the recipe calls for. Spooning flour into the measuring cup and leveling it off gives a more accurate result.
Skipping the step of allowing the dough to rest — even briefly — can affect how the cookies spread during baking. While this recipe doesn’t require a long chill, rushing directly from mixing to baking in a warm kitchen can cause excessive spreading.
Pulling the cookies out too late is perhaps the most common mistake of all. Cookies should look slightly underbaked in the center when they come out of the oven. Waiting until they look fully done through the glass almost always means they’ll be overbaked by the time they cool.
Solutions to Common Mistakes
For properly softened butter, remove it from the refrigerator about 30 to 45 minutes before you plan to bake. Pressing your finger into the butter should leave an indentation easily but the butter should still hold its shape. If you’re short on time, cut it into small cubes to speed up the softening process.
To measure flour accurately, use the spoon-and-level method every time. Spoon flour into your measuring cup until it’s heaped, then sweep a straight edge across the top to level it off. Better yet, invest in a kitchen scale — baking by weight removes this variable entirely.
If your kitchen is particularly warm or your dough feels very soft, refrigerate it for 20 to 30 minutes before baking. This firms up the fat in the dough and helps the cookies hold their shape and develop better flavor.
Trust the visual cues over the clock. Every oven runs slightly differently. Check your cookies at the 9-minute mark — golden edges with a center that still looks slightly glossy is the sweet spot. They will firm up beautifully as they cool on the pan.
Nutritional Information (approx. per serving)
- Calories: 160 kcal
- Total Fat: 8g
- Saturated Fat: 5g
- Cholesterol: 25mg
- Sodium: 95mg
- Total Carbohydrates: 21g
- Dietary Fiber: 0.5g
- Total Sugars: 13g
- Protein: 2g
- Iron: 4% DV
- Calcium: 1% DV
These cookies, enjoyed in moderation, offer a meaningful dose of genuine comfort — and that has value in its own right. The butter in this recipe provides fat-soluble vitamins, and the eggs contribute a small amount of quality protein and essential amino acids to each serving.
Dark or semi-sweet chocolate chips contain flavonoids, a group of antioxidant compounds associated with heart health and reduced oxidative stress. Choosing chips with a higher cacao percentage amplifies this effect without requiring any changes to the recipe.
The combination of complex carbohydrates and fats in each cookie also provides a quick and satisfying source of energy — making these a reasonable treat after physical activity or as a mindful midday indulgence.
When paired with a glass of cold milk or a cup of black coffee, the nutritional profile rounds out a bit further, and the eating experience becomes something genuinely satisfying rather than purely indulgent.
Storage Instructions
Once completely cooled to room temperature, store your cookies in an airtight container at room temperature. They’ll stay soft and chewy for up to 5 days. Placing a slice of white sandwich bread in the container with the cookies is a well-known baker’s trick — the cookies absorb moisture from the bread rather than drying out, keeping them soft much longer.
For longer storage, transfer cooled cookies to a freezer-safe zip-lock bag or container and freeze for up to 3 months. Thaw at room temperature for about 15 to 20 minutes before serving, or pop them in a 300°F oven for 5 minutes to restore that just-baked warmth.
Unbaked cookie dough can also be refrigerated for up to 72 hours before baking. Chilling the dough actually improves the depth of flavor, so this is a great option if you’re prepping ahead for an event or simply want a better cookie.
Avoid storing cookies in the refrigerator unless your kitchen is particularly warm — refrigeration dries them out faster than room temperature storage. For best results, keep them sealed and at room temperature away from direct sunlight or heat sources.
Suggestions
These cookies are wonderful on their own, but pairing them thoughtfully can elevate the experience. Serve them warm alongside a tall glass of whole milk for the classic combination, or pair with a single-origin pour-over coffee to highlight the deeper notes in the chocolate chips.
For a simple dessert platter, arrange a mix of cookies with fresh strawberries and a small bowl of whipped cream. The brightness of the fruit cuts through the richness of the cookie in a way that makes both taste even better than they would alone.
If you want to use these cookies as the base for something a little more special, sandwich a scoop of vanilla bean ice cream between two cookies and press gently. Freeze for 30 minutes and serve as ice cream sandwiches — they’re a guaranteed crowd pleaser at any gathering.
You can also crumble slightly overbaked or broken cookies over yogurt or vanilla ice cream as a topping. The texture contrast is excellent, and it’s a great way to ensure nothing goes to waste. These cookies are versatile, generous, and easy to work into almost any occasion.
Seasonal Relevance
Chocolate chip cookies transcend seasons, but how you enjoy them often shifts with the time of year. In fall and winter, there’s nothing quite like pulling a fresh batch from the oven while the house fills with the warm scent of butter and vanilla. These are the cookies people reach for during the holidays, at bake sales, and on cozy evenings in.
During spring, they pair beautifully with lighter accompaniments — fresh berries, lemon curd, or a cold glass of lemonade. Bake a batch for Easter gatherings, springtime picnics, or end-of-school celebrations and they’ll be the first thing to disappear from the table.
In summer, the ice cream sandwich suggestion becomes particularly appealing. Keep a batch of baked cookies in the freezer and they’re ready at a moment’s notice for hot afternoon snacking or backyard dessert spreads without needing to turn the oven on in peak heat.
Regardless of the season, these cookies feel appropriate. They’re a year-round constant in most households for good reason. The recipe is flexible enough to adapt — swap in peppermint chips for the holidays, add toasted coconut in summer, or fold in cinnamon chips for a cozy autumn variation.
Final Words
If there’s one recipe every home baker should have memorized, this is a strong contender for that spot. The simple chocolate chip cookie recipe is a foundational bake — approachable enough for beginners, yet satisfying enough that even experienced bakers return to it again and again without looking for something more complex.
What makes a recipe like this truly great isn’t just the ingredients or even the technique. It’s the reliability. Knowing that you can walk into your kitchen on any given day, with no special preparation, and produce something genuinely delicious — that’s the real value of a well-crafted cookie recipe.
I encourage you to bake this recipe as written the first time, and then make it your own. Tweak the chocolate chips, experiment with the sugar ratio, add a pinch of espresso powder, or try browning the butter for a nuttier depth of flavor. The recipe is forgiving and responds well to creativity.
Thank you for spending time with this recipe. Whether this is your hundredth batch or your very first, I hope these cookies bring exactly the kind of warmth and joy that only a really good homemade cookie can.
Frequently Asked Questions
Can I use salted butter instead of unsalted butter in this recipe?
Yes, you can substitute salted butter, but reduce the added salt in the recipe to 1/2 teaspoon to avoid an overly salty cookie. Keep in mind that different brands vary in saltiness, so the flavor may shift slightly, but the texture and structure of the cookie will remain the same.
Why did my cookies turn out flat and greasy instead of thick and chewy?
Flat cookies are almost always caused by butter that was too warm or melted, incorrect flour measurement, or dough that was placed on a hot baking sheet. Make sure your butter is softened but not melted, measure flour using the spoon-and-level method, and always use a cool or room-temperature baking sheet between batches.
Can I make the dough ahead of time and bake later?
Absolutely, and it’s highly recommended. The dough can be refrigerated for up to 72 hours before baking. Chilling the dough allows the flavors to deepen and improves the overall texture of the finished cookie. You can also freeze pre-scooped dough balls for up to 3 months and bake directly from frozen as needed.
Simple Chocolate Chip Cookie Recipe
48
servings20
minutes10
minutes160
kcal30
minutesThese classic chocolate chip cookies deliver perfectly crisp edges, a soft chewy center, and pools of melted chocolate in every bite — made with simple pantry staples and ready in under 35 minutes.
Ingredients
Base Ingredients:
2 1/4 cups all-purpose flour
1 tsp baking soda
1 tsp fine sea salt
1 cup (2 sticks) unsalted butter, softened to room temperature
3/4 cup granulated white sugar
3/4 cup packed light brown sugar
2 large eggs, at room temperature
2 tsp pure vanilla extract
2 cups semi-sweet chocolate chips
Optional Add-ins:
1/2 cup chopped walnuts or pecans
1/2 tsp espresso powder
1/4 tsp ground cinnamon
1/2 cup dark chocolate chunks
1 tbsp flaky sea salt (for finishing)
Directions
- Preheat oven to 375°F (190°C). Line two baking sheets with parchment paper. Bring butter and eggs to room temperature before starting.
- In a medium bowl, whisk together flour, baking soda, and salt until evenly combined. Set aside.
- Beat softened butter, granulated sugar, and brown sugar on medium-high speed for 3 to 4 minutes until light and fluffy.
- Add eggs one at a time, mixing well after each addition. Pour in vanilla extract and mix until smooth. Scrape down the bowl as needed.
- Add the dry ingredient mixture gradually on low speed, mixing just until no streaks of flour remain. Do not overmix.
- Fold in chocolate chips by hand using a rubber spatula. Add any optional add-ins at this stage.
- Drop rounded tablespoons of dough onto prepared baking sheets, spacing 2 inches apart.
- Bake for 9 to 11 minutes until edges are golden. Centers should appear slightly underdone.
- Cool on the baking sheet for 5 minutes, then transfer to a wire rack. Sprinkle flaky salt immediately after baking if using.
Recipe Video
Notes
- Always use room temperature butter and eggs for the best dough consistency and cookie texture.
- Measure flour using the spoon-and-level method or a kitchen scale to avoid dense, dry cookies.
- If your kitchen is warm, refrigerate the dough for 20 to 30 minutes before baking to prevent excess spreading.
- Do not overbake — cookies should look slightly underdone in the center when pulled from the oven; they firm up as they cool.
- For make-ahead convenience, freeze pre-scooped dough balls for up to 3 months and bake straight from frozen, adding 2 to 3 extra minutes.
- Store baked cookies in an airtight container at room temperature for up to 5 days. Add a slice of bread to keep them soft.
- For larger bakery-style cookies, use a larger scoop and increase baking time by 2 to 3 minutes, watching the edges closely.