No-Bake Peanut Butter Pie Recipe
There are desserts you make when you want to impress. Then there are desserts you make when you want to actually enjoy the process — and still impress everyone at the table. This No-Bake Peanut Butter Pie is exactly that kind of recipe.
It comes together without ever turning on your oven, which means less heat, less stress, and more time doing what actually matters — savoring every rich, creamy, peanut-buttery bite. Whether you’re hosting a dinner party, prepping something special for the weekend, or simply craving a dessert that feels indulgent without being complicated, this pie delivers on every front.
The filling is silky smooth, the crust is perfectly crisp, and the flavor? Pure peanut butter bliss layered over a buttery graham cracker base. It’s the kind of dessert that disappears before you even get a second slice.
If you’ve been searching for a crowd-pleasing, make-ahead dessert that looks like it took hours but comes together in under 20 minutes of active prep, you’re in exactly the right place. This is the only no-bake peanut butter pie recipe you’ll ever need.
Ingredients You’ll Need
Not every great recipe starts with a long grocery list — some of the most unforgettable desserts are built entirely from ingredients you already trust, and this pie is proof of that.
One of the things I love about this recipe is that it uses simple pantry ingredients. You probably already have most of them in your kitchen.
Base Ingredients:
- 1½ cups graham cracker crumbs
- ⅓ cup granulated sugar
- 6 tablespoons unsalted butter, melted
- 8 oz cream cheese, softened to room temperature
- 1 cup creamy peanut butter
- 1 cup powdered sugar, sifted
- 1 teaspoon pure vanilla extract
- 1½ cups heavy whipping cream, cold
- 2 tablespoons powdered sugar (for whipping the cream)
Optional Add-ins:
- ¼ cup mini chocolate chips, for folding into the filling
- 2 tablespoons honey-roasted peanuts, roughly chopped, for topping
- ¼ cup hot fudge sauce, drizzled on top before serving
- 1 teaspoon espresso powder, dissolved in the cream for a mocha twist
- 2 tablespoons crushed Oreo cookies, mixed into the crust for extra depth
Step-by-Step Instructions

Step 1: Make the Graham Cracker Crust
In a medium mixing bowl, combine the graham cracker crumbs, granulated sugar, and melted butter. Stir until the mixture resembles wet sand and holds together when pressed between your fingers. Transfer the crumb mixture into a 9-inch pie dish and press it firmly and evenly across the bottom and up the sides using the flat bottom of a measuring cup. This step matters — a well-packed crust holds its shape beautifully when sliced. Place the crust in the freezer for at least 15 minutes to set while you prepare the filling.
Step 2: Whip the Heavy Cream
Pour the cold heavy whipping cream and 2 tablespoons of powdered sugar into a large, chilled mixing bowl. Using a hand mixer or stand mixer fitted with the whisk attachment, beat on medium-high speed until stiff peaks form — this takes about 3 to 4 minutes. Be careful not to overbeat, as the cream can turn grainy. Once done, set the whipped cream aside in the refrigerator. Working with cold cream and a cold bowl makes a significant difference in volume and stability, so don’t skip that detail.
Step 3: Prepare the Peanut Butter Filling
In a separate large bowl, beat the softened cream cheese on medium speed until completely smooth and lump-free, about 2 minutes. Add the creamy peanut butter, sifted powdered sugar, and vanilla extract. Beat everything together on medium speed until the mixture is thick, smooth, and well combined — roughly 2 to 3 minutes. Scrape down the sides of the bowl as needed. The filling should look dense and slightly glossy at this point. Taste it. Adjust sweetness with a pinch more powdered sugar if needed. This is your moment to get the balance just right.
Step 4: Fold in the Whipped Cream
Add the chilled whipped cream to the peanut butter mixture in two additions. Using a large rubber spatula, gently fold the whipped cream in with slow, sweeping motions from the bottom of the bowl upward. Do not stir vigorously — the goal is to preserve as much of the airy volume as possible. The finished filling should be light, fluffy, and mousse-like in texture. Folding instead of mixing keeps it cloud-soft, which is exactly the contrast you want against the firm, buttery crust. Take your time with this step — it’s what separates a good pie from a great one.
Step 5: Assemble and Chill
Remove the crust from the freezer and spoon the peanut butter filling into it. Spread it evenly using an offset spatula or the back of a large spoon, smoothing the top into a clean, level surface. For an elegant finish, use the spatula to create gentle swirls across the top. Cover the pie loosely with plastic wrap and refrigerate for a minimum of 4 hours, though overnight is strongly preferred. The longer it chills, the more the filling firms up and the flavors meld together. When ready to serve, top with whipped cream, chopped peanuts, or a drizzle of chocolate sauce.
Cook Time
Total:
4 hours 20 minutes (including chilling time)
Prep:
20 minutes
Bake:
No baking required
Servings
This No-Bake Peanut Butter Pie is made in a standard 9-inch pie dish, which means it slices cleanly into generous portions without much fuss. Whether you’re serving it at a family gathering, a weekend dinner, or a potluck, it holds up well and presents beautifully every single time.
Makes approximately 8 to 10 servings, depending on how generously you slice. For a dinner party, 10 neat slices work perfectly. For a more casual setting where seconds are expected — and they will be — plan for 8.
Leftovers store beautifully in the refrigerator, so there’s no pressure to finish it all in one sitting. In fact, most people agree that this pie tastes even better the next day, once the filling has had more time to set and the flavors have fully settled in.
Common Mistakes in This Recipe
One of the most common errors is using cold cream cheese straight from the refrigerator. When cream cheese isn’t softened to room temperature first, it doesn’t blend smoothly — you end up with lumps in the filling that no amount of extra mixing will fully fix.
Another frequent mistake is using natural or drippy peanut butter. While natural peanut butter is great on toast, its high oil content makes the filling unstable and loose. The pie may struggle to hold its shape after chilling, resulting in a soft, almost soupy center.
Many home bakers also underestimate the importance of whipping the cream to stiff peaks. If the whipped cream is too soft when folded in, the filling won’t have enough structure to hold together properly once sliced, leading to a pie that collapses rather than cuts cleanly.
Finally, rushing the chilling process is a mistake that’s easy to make and hard to recover from. Pulling the pie out of the refrigerator after just an hour or two means the filling hasn’t had enough time to firm up, and the result is a messy, soft slice that doesn’t showcase the recipe at its best.
Solutions to Common Mistakes
The fix for lumpy filling is simple: always take your cream cheese out of the refrigerator at least 45 minutes before you start. Room-temperature cream cheese blends into a perfectly smooth, silky base that combines effortlessly with the peanut butter and sugar.
For peanut butter, stick with a standard commercial brand like Jif or Skippy. These have a consistent, stable texture that emulsifies well into the filling and holds its shape beautifully after chilling. Save the natural varieties for other recipes.
To ensure your whipped cream reaches the right consistency, chill both your mixing bowl and beaters in the freezer for 10 minutes before you start. Cold equipment helps the cream whip faster and hold stiff peaks reliably, giving the filling that signature airy, mousse-like lift.
When it comes to chilling time, plan ahead. Make the pie the night before you need it. Overnight refrigeration gives the filling ample time to set completely, making it easy to slice, serve, and enjoy without any of the structural issues that come from rushing.
Nutritional Information (approx. per serving)
- Calories: 480 kcal
- Total Fat: 34g
- Saturated Fat: 16g
- Unsaturated Fat: 14g
- Carbohydrates: 36g
- Dietary Fiber: 2g
- Total Sugars: 24g
- Protein: 9g
- Sodium: 230mg
- Calcium: 60mg
- Iron: 1.2mg
- Potassium: 210mg
Peanut butter is one of the most nutrient-dense ingredients in this recipe. It provides a solid hit of plant-based protein and heart-healthy monounsaturated fats, both of which help keep you full and satisfied long after the last bite. It also contains vitamin E, niacin, and magnesium — nutrients that support muscle function and energy metabolism.
Cream cheese contributes calcium and fat-soluble vitamins, including vitamin A, which plays an important role in immune function and skin health. While it’s an indulgent ingredient, it’s worth knowing that a small amount goes a long way in delivering that rich, creamy texture.
The graham cracker crust, while modest in nutritional density, provides a source of carbohydrates for quick energy. When paired with the protein and fat in the filling, it creates a more balanced macronutrient profile than most traditional desserts.
Heavy whipping cream adds essential fatty acids and helps the body absorb fat-soluble vitamins from the other ingredients. In reasonable portions, the fat content in this pie supports satiety and slows the release of sugar into the bloodstream, making each slice feel genuinely satisfying rather than leaving you reaching for more.
Storage Instructions
Once assembled, this pie should be covered loosely with plastic wrap or transferred to an airtight container and stored in the refrigerator. It keeps well for up to 4 days without any significant change in texture or flavor. In fact, the filling continues to firm up slightly over the first 24 hours, making Day 2 arguably the best day to eat it.
If you need to prepare this pie further in advance, it freezes exceptionally well. Wrap the entire pie tightly in two layers of plastic wrap followed by a layer of aluminum foil. Freeze for up to 2 months. When you’re ready to serve, transfer it to the refrigerator the night before and let it thaw slowly overnight.
Avoid storing slices at room temperature for extended periods. The cream cheese and whipped cream in the filling are perishable, and leaving the pie out for more than 2 hours at room temperature is not recommended from a food safety standpoint.
For best results when freezing, add any fresh toppings — whipped cream, crushed peanuts, or chocolate drizzle — after the pie has thawed and just before serving. Toppings added before freezing tend to weep or lose their texture during the thaw process, which affects both appearance and flavor.
Suggestions
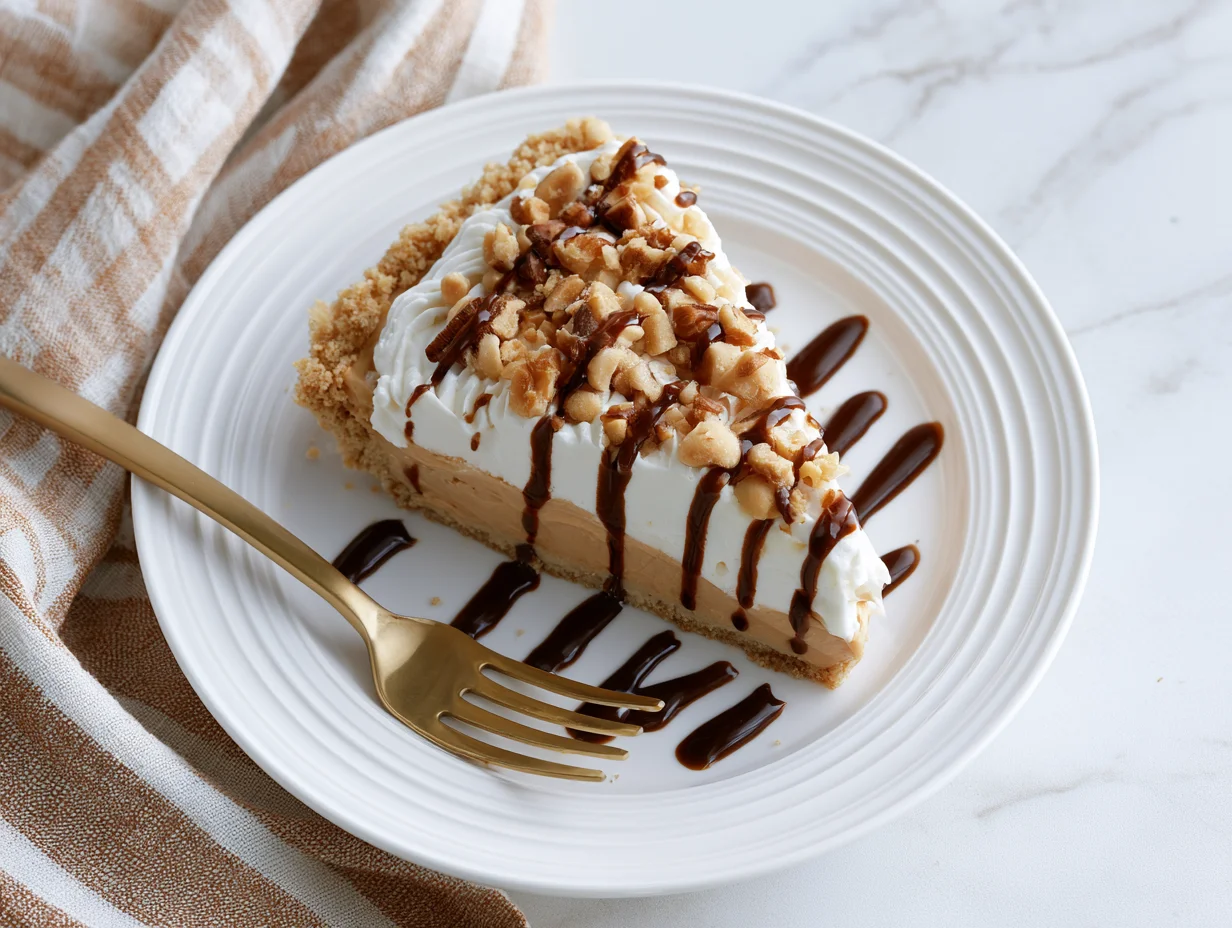
This pie pairs beautifully with a drizzle of warm chocolate ganache or a generous spoonful of hot fudge sauce right before serving. The bittersweet chocolate cuts through the richness of the peanut butter filling and adds a visual drama that makes every slice look like it came straight from a bakery display case.
For a textural contrast, top each slice with a small handful of lightly salted, honey-roasted peanuts. The crunch against the creamy filling is deeply satisfying, and the salt enhances the peanut butter flavor in a way that sweetness alone never could. A flaky sea salt finish works beautifully here as well.
If you’re serving this at a party and want to make individual portions, press the crust mixture into a standard muffin tin lined with cupcake papers and fill each cup with the peanut butter filling. Mini versions are easier to serve, easier to eat, and frankly, much harder to resist.
You can also experiment with the crust. Crushed chocolate sandwich cookies like Oreos make an outstanding alternative to graham crackers and complement the peanut butter filling with a cookies-and-cream flavor profile that never fails to get compliments. Pretzel crumbs are another fantastic option for anyone who loves the salty-sweet combination.
Seasonal Relevance
While this No-Bake Peanut Butter Pie is genuinely a year-round dessert, it shines especially bright during the warmer months. Spring gatherings, summer cookouts, and backyard barbecues all call for a dessert that doesn’t require turning on the oven — and this pie fits that need perfectly. It can be made the night before and pulled straight from the refrigerator when it’s time to serve.
During the fall and winter holiday season, this pie earns its place on dessert tables right alongside pumpkin pie and pecan pie. The rich, nutty flavor feels indulgent and festive, and its make-ahead nature takes one major task off your plate during an already busy cooking season. A drizzle of caramel sauce in the fall makes it feel particularly seasonal.
Around the holidays, consider topping it with crushed candy canes and a chocolate drizzle for a peppermint-peanut butter variation that feels entirely festive. Small changes in toppings are all it takes to make this pie feel tailored to any occasion without changing the core recipe.
On a practical level, no-bake desserts are ideal for any moment when oven space is at a premium — which is to say, almost every holiday or large gathering. This pie’s ability to be made 24 hours in advance and stored without any quality loss makes it one of the most reliable desserts in a host’s repertoire, regardless of the season.
Final Words
If there’s one recipe that belongs in your permanent dessert rotation, this is it. The No-Bake Peanut Butter Pie is the kind of recipe that becomes part of your personal cooking story — the one you bring to potlucks and dinner parties, the one family members request by name, and the one you quietly make for yourself on a Tuesday when nothing else will do.
It’s a recipe built on restraint in the right places and indulgence exactly where it counts. The ingredients are humble, the technique is straightforward, and the result is a dessert that punches far above its weight in both flavor and presentation. That’s the kind of recipe worth holding onto.
What makes this pie truly special isn’t any single ingredient — it’s the balance. The creamy, airy filling. The firm, buttery crust. The deep peanut butter flavor that doesn’t overwhelm but lingers just long enough to keep you thinking about the next slice. Every element earns its place.
So go ahead — make it the night before, let it chill while you rest, and serve it with confidence. Whether it’s your first time making a no-bake dessert or your fiftieth, this recipe will meet you exactly where you are and deliver something genuinely worth sharing.
Frequently Asked Questions
Can I use natural peanut butter in this recipe?
It’s best to avoid natural or drippy peanut butter here. The high oil content makes the filling unstable, which means the pie may not set properly after chilling. Stick with a commercial creamy peanut butter like Jif or Skippy for a firm, sliceable result every time.
Can I make this pie ahead of time for a party or event?
Absolutely — in fact, making it ahead is strongly encouraged. Prepare the pie the night before your event and let it chill in the refrigerator overnight. The filling sets more firmly with extended chilling, making it easier to slice cleanly and present beautifully. Add any fresh toppings just before serving.
What can I use instead of a graham cracker crust?
Several alternatives work wonderfully here. Crushed Oreo cookies create a rich chocolate base that pairs perfectly with the peanut butter filling. Crushed pretzels offer a satisfying salty-sweet contrast. Vanilla wafers are a classic, mellow option. All three bind well with melted butter and set firmly after chilling in the freezer.
No-Bake Peanut Butter Pie Recipe
8
servings20
minutes480
kcal20
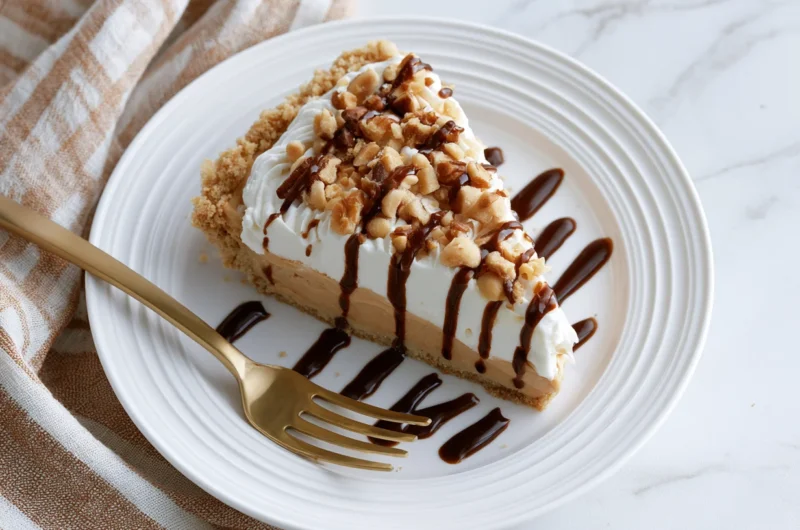
minutesA silky, no-bake peanut butter pie with a buttery graham cracker crust and a light, mousse-like filling. Comes together in 20 minutes of prep, chills overnight, and delivers bakery-level results every single time.
Ingredients
Base ingredients
1½ cups graham cracker crumbs
⅓ cup granulated sugar
6 tablespoons unsalted butter, melted
8 oz cream cheese, softened to room temperature
1 cup creamy peanut butter
1 cup powdered sugar, sifted
1 teaspoon pure vanilla extract
1½ cups heavy whipping cream, cold
2 tablespoons powdered sugar (for whipping the cream)
Optional add-ins
¼ cup mini chocolate chips
2 tablespoons honey-roasted peanuts, roughly chopped
¼ cup hot fudge sauce, for drizzling
1 teaspoon espresso powder
2 tablespoons crushed Oreo cookies
Directions
- Combine graham cracker crumbs, granulated sugar, and melted butter. Press firmly into a 9-inch pie dish and freeze for 15 minutes to set.
- 2Beat cold heavy whipping cream with 2 tablespoons powdered sugar until stiff peaks form. Refrigerate while preparing the filling.
- 3Beat softened cream cheese until completely smooth. Add peanut butter, sifted powdered sugar, and vanilla extract. Mix until thick and well combined.
- 4Gently fold the chilled whipped cream into the peanut butter mixture in two additions using a rubber spatula. Do not stir — fold to preserve volume.
- 5Spoon the filling into the chilled crust, smooth the top, cover with plastic wrap, and refrigerate for a minimum of 4 hours or overnight before serving.
- 6When ready to serve, add toppings of your choice — whipped cream, chopped peanuts, or a chocolate drizzle — and slice cleanly with a sharp knife.
Recipe Video
Notes
- Always use commercial creamy peanut butter (Jif or Skippy). Natural peanut butter is too oily and will prevent the filling from setting properly.
- Cream cheese must be at room temperature before mixing. Cold cream cheese creates lumps that won’t blend out, no matter how long you beat it.
- Chill your mixing bowl and beaters in the freezer for 10 minutes before whipping the cream — it whips faster and holds stiff peaks more reliably.
- Overnight chilling is strongly recommended. The pie slices cleanest and tastes best after a full night in the refrigerator.
- Add fresh toppings (whipped cream, chopped peanuts, chocolate drizzle) just before serving, not before storing or freezing.
- The pie freezes well for up to 2 months. Wrap tightly in plastic wrap and foil. Thaw overnight in the refrigerator before serving.