Easy Apple Pie Recipe
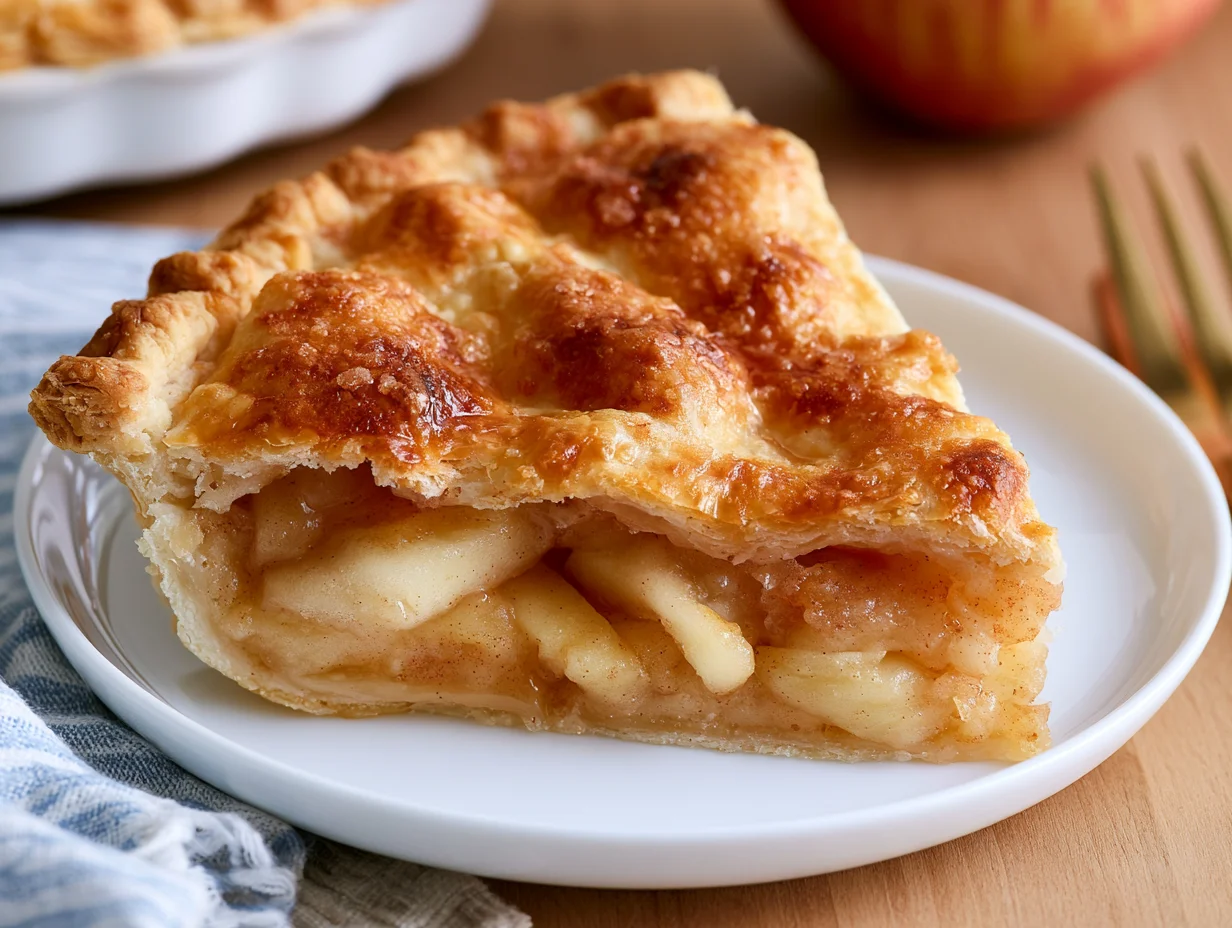
There is a reason apple pie has never gone out of style. It is the kind of dessert that stops people mid-conversation the moment it comes out of the oven — golden crust, bubbling filling, the warm scent of cinnamon drifting through every corner of the kitchen.
This recipe is my go-to version. The kind I reach for on a Sunday afternoon when I want something that looks impressive but does not require an all-day commitment. It is straightforward, reliable, and deeply satisfying every single time.
What makes this apple pie stand apart is the balance. The filling is sweet but not cloying, spiced but not overdone, and the crust bakes up buttery, flaky, and just sturdy enough to hold everything together without turning stiff. It is the kind of pie people ask you to bring to every gathering from that point forward.
Whether you are baking this for a holiday table, a casual weekend dinner, or simply because you have a bag of apples sitting on the counter and good intentions — this recipe will not let you down.
Ingredients You’ll Need
Here is everything laid out before we begin, because the best pies start with knowing exactly what you are working with — no mid-recipe scrambles, no surprises.
One of the things I love about this recipe is that it uses simple pantry ingredients. You probably already have most of them in your kitchen.
Base Ingredients:
- 2 ½ cups all-purpose flour
- 1 cup unsalted butter, cold and cubed
- 6 to 7 medium apples (Granny Smith or Honeycrisp, peeled and thinly sliced)
- ¾ cup granulated sugar
- ¼ cup brown sugar, packed
- 2 tablespoons cornstarch
- 1 teaspoon ground cinnamon
- ¼ teaspoon ground nutmeg
- 1 tablespoon fresh lemon juice
- ½ teaspoon salt
- 6 to 8 tablespoons ice-cold water
- 1 large egg (for egg wash)
- 1 tablespoon milk (for egg wash)
- 1 tablespoon coarse sugar (for topping)
Optional Add-ins:
- ¼ teaspoon ground allspice
- ½ teaspoon pure vanilla extract
- 1 tablespoon bourbon or dark rum
- 2 tablespoons salted caramel sauce (drizzled over filling)
- ¼ cup golden raisins
- 1 teaspoon orange zest
Step-by-Step Instructions

Step 1: Make the Pie Dough
Combine the flour and salt in a large mixing bowl. Add the cold cubed butter and use your fingertips or a pastry cutter to work it into the flour until the mixture resembles coarse crumbs with a few pea-sized pieces remaining. Do not overwork it. Drizzle in ice-cold water, one tablespoon at a time, mixing gently until the dough just comes together. Divide it into two equal discs, wrap each in plastic wrap, and refrigerate for at least one hour.
Step 2: Prepare the Apple Filling
Peel, core, and thinly slice the apples to about ¼-inch thickness for even cooking. Place them in a large bowl and toss with the granulated sugar, brown sugar, cornstarch, cinnamon, nutmeg, and lemon juice. Stir until every slice is evenly coated. Let the mixture sit for about 15 minutes so the apples begin to release their juices. This step prevents a watery filling and ensures the spices are fully absorbed into every layer.
Step 3: Roll Out the Crust
Remove the chilled dough from the refrigerator and let it sit at room temperature for about 5 minutes before rolling. On a lightly floured surface, roll the first disc into a circle roughly 12 inches in diameter. Transfer it carefully to a 9-inch pie dish, pressing it gently into the edges without stretching. Trim any excess dough, leaving about a half-inch overhang. Place the lined pie dish back in the refrigerator while you roll out the second disc for the top crust.
Step 4: Assemble the Pie
Pour the apple filling into the chilled bottom crust, mounding the slices slightly in the center. Lay the top crust over the filling and press the edges together to seal. Tuck the overhang under and crimp the edges using your fingers or a fork. Cut four or five small vents into the top crust to allow steam to escape during baking. Brush the entire surface with egg wash — one egg whisked with a tablespoon of milk — then sprinkle generously with coarse sugar.
Step 5: Bake to Golden Perfection
Preheat your oven to 425°F (220°C). Place the assembled pie on a rimmed baking sheet to catch any drips. Bake for 20 minutes at this higher temperature to set the crust, then reduce the heat to 375°F (190°C) and continue baking for 35 to 40 minutes, until the crust is a deep golden brown and the filling is bubbling through the vents. If the edges brown too quickly, shield them with strips of foil or a pie shield partway through baking.
Step 6: Cool Before Slicing
This step requires patience, but it is non-negotiable. Remove the pie from the oven and place it on a wire cooling rack. Allow it to cool for at least 2 hours before slicing. The filling needs this time to set properly. Cutting into it too soon will result in a runny, loose filling that pools rather than holds its shape. Trust the process — the wait is completely worth it when that first clean slice lifts out perfectly.
Cook Time
Total:
Approximately 3 hours 30 minutes (including chilling and cooling time)
Prep:
45 minutes (plus 1 hour chill time for the dough)
Bake:
55 to 60 minutes
Servings
This recipe yields one standard 9-inch apple pie, which slices beautifully into 8 generous portions. It is the right size for a family dinner, a holiday table, or a gathering where you want to make sure everyone gets a proper piece without rationing.
If you are baking for a larger crowd, the recipe scales well. Simply prepare two separate batches of dough and filling rather than doubling everything in one bowl, as working with smaller quantities gives you better control over the texture of the crust and the consistency of the filling.
Makes approximately 8 slices per 9-inch pie.
Common Mistakes in This Recipe
One of the most frequent issues home bakers run into is using apples that are too soft or too watery. Varieties like Red Delicious or McIntosh break down quickly in the oven, releasing excess liquid that makes the filling soupy and prevents the crust from crisping on the bottom.
Another common mistake is skipping the chill time for the dough. Warm butter melts before the crust even hits the oven, and the result is a dense, greasy bottom rather than the light, flaky layers that make a great pie crust worth eating.
Many bakers also overload the filling with too much sugar or not enough thickener, leading to a pie that either tastes flat or leaks a watery liquid the moment it is sliced. The balance between sweetness, acidity, and starch matters more than most people realize.
Finally, slicing the pie too soon is a mistake that undoes all the careful work that went into it. The filling needs time to firm up after baking. Cutting into a hot pie creates a collapsed, runny center rather than the clean, set filling that holds each slice together.
Solutions to Common Mistakes
Choose firm, tart apples like Granny Smith or Honeycrisp, or use a combination of both. These varieties hold their structure through the full bake time while contributing layers of flavor that sweet apples alone cannot achieve. Avoid soft varieties entirely.
Always work with cold butter and cold water when making the dough, and never skip the refrigeration step. Once the dough is shaped into discs, it needs at minimum one hour in the refrigerator. This keeps the fat solid, which is what creates the flaky layers during baking.
Use the correct amount of cornstarch — two tablespoons is the right measure for this quantity of apples. Also, allow the sliced apples to macerate with the sugar for 15 minutes before assembling. This draws out excess juice in advance so you can account for it before it ends up in the crust.
After baking, give the pie a full two hours to cool at room temperature. Set a timer if needed. The cooling period is when the cornstarch fully sets and the filling transitions from loose and hot to sliceable and stable.
Nutritional Information (approx. per serving)
- Calories: 420 kcal
- Total Fat: 18g
- Saturated Fat: 11g
- Cholesterol: 65mg
- Sodium: 190mg
- Total Carbohydrates: 62g
- Dietary Fiber: 3g
- Total Sugars: 32g
- Protein: 4g
- Vitamin C: 6% DV
- Iron: 8% DV
- Calcium: 2% DV
Apples are a meaningful source of dietary fiber, particularly pectin, which supports healthy digestion and helps maintain steady blood sugar levels. A single serving of this pie provides a portion of your daily fruit intake alongside naturally occurring plant compounds that have antioxidant properties.
The cinnamon used in this recipe is not just a flavoring agent. Research continues to support its role in helping regulate blood glucose response, which is a worthwhile consideration when enjoying a naturally sweetened dessert made with whole fruit.
Homemade pie, unlike store-bought alternatives, gives you complete control over the ingredient list. There are no artificial preservatives, no high-fructose corn syrup, and no hydrogenated fats hiding in the crust. What you put in is exactly what ends up on the plate.
Apples also contain quercetin and other flavonoids linked to cardiovascular and immune support. Enjoying this pie in reasonable portions means you are getting genuine nutritional value alongside the pleasure of a beautifully crafted dessert.
Storage Instructions
Once the pie has cooled completely to room temperature, it can be covered loosely with plastic wrap or aluminum foil and stored at room temperature for up to two days. The crust will maintain its texture better at room temperature than in the refrigerator during this window.
For longer storage, place the pie in the refrigerator. It will keep well for up to five days when covered tightly. Before serving refrigerated pie, allow individual slices to come to room temperature for 20 to 30 minutes, or warm them briefly in a 300°F oven for about 10 minutes to refresh the crust.
Apple pie also freezes exceptionally well, both baked and unbaked. To freeze a fully baked pie, cool it completely, wrap it tightly in plastic wrap followed by a layer of aluminum foil, and freeze for up to three months. Thaw overnight in the refrigerator before reheating.
To freeze an unbaked assembled pie, skip the egg wash, wrap it well, and freeze directly. When ready to bake, brush with egg wash and place straight from the freezer into a preheated oven, adding 15 to 20 extra minutes to the total bake time.
Suggestions
Apple pie is one of those desserts that pairs beautifully with simple accompaniments. A scoop of good-quality vanilla ice cream served alongside a warm slice is the most classic pairing for a reason — the contrast of cold and warm, creamy and flaky, is nearly impossible to improve upon.
If you prefer something a little more elevated, a drizzle of salted caramel sauce over the top just before serving adds both richness and visual appeal. A small dollop of lightly whipped cream with a pinch of cinnamon folded through is another option that feels effortlessly refined without any extra effort.
For a brunch-style presentation, serve thin slices at room temperature alongside a sharp cheddar cheese. The combination might sound unconventional, but it is a long-standing tradition in certain parts of the country, and once you try it, it tends to change how you think about savory-sweet pairings.
This pie also works well as a base for other desserts. Crumble a slice over vanilla custard or layer it into a trifle with whipped cream and toasted pecans. Leftover apple pie rarely needs to be eaten as-is — it transforms easily into something entirely new with very little effort.
Seasonal Relevance
Apple pie belongs to fall in a way that very few other foods do. The moment the first crates of Honeycrisp and Granny Smith apples appear at the market in late September, this recipe comes back into regular rotation. There is something about the cooling air and shorter days that makes a warm, spiced pie feel exactly right.
Through October and November, this pie earns its place at almost every occasion. Halloween gatherings, Friendsgiving tables, Thanksgiving dinners — it fits each one naturally, which is part of why it has remained such a central fixture in seasonal baking for generations.
That said, apple pie is not a recipe that needs to wait for autumn. Winter is an equally good time for it. Apples store well and remain available through the colder months, and a hot slice of pie is particularly welcome on a cold evening when something warming and homemade is exactly what the table needs.
Spring and summer bring lighter baking preferences, but apple pie holds its own here too. Thinly sliced apples, a slightly less spiced filling, and a lighter dusting of sugar on the crust can give this classic a more relaxed, seasonal feel that works just as comfortably at a backyard gathering as it does at a formal winter table.
Final Words
Every cook has a handful of recipes they return to without hesitation, the ones that require no decision-making because the outcome is always reliable. This apple pie recipe is one of mine. It has come out of my oven more times than I can count, and it has never once disappointed.
What I appreciate most about it is how forgiving it is once you understand the underlying principles. Keep the butter cold, choose the right apples, give the filling time to set, and the recipe takes care of the rest. There is no complicated technique required — just attention to a few details that make the difference between a good pie and a great one.
This is the kind of baking that connects people to something real. The process is tactile, the results are tangible, and the moment you slide a pie onto the table and watch people reach for a slice, there is a satisfaction that no amount of restaurant dining quite replicates. It is one of the clearest reminders of why home cooking matters.
Make this pie with whatever apples are freshest and best where you are right now. Adjust the sugar slightly to match their tartness. Put your own stamp on it. Then share it with someone, because apple pie made from scratch was never really meant to be eaten alone.
Frequently Asked Questions
What are the best apples to use for apple pie?
Granny Smith apples are the most reliable choice for apple pie because of their firm texture and sharp acidity, which balances the sugar in the filling perfectly. Honeycrisp is an excellent alternative or complement. Mixing two varieties — one tart, one slightly sweet — gives the filling more depth and complexity.
Can I use store-bought pie crust instead of homemade?
Yes, a store-bought refrigerated pie crust works as a practical substitute and produces a respectable result. That said, homemade crust made with cold butter provides noticeably better flavor and texture. If time is limited, a quality refrigerated crust is a perfectly acceptable option without compromising the filling.
Why is my apple pie filling watery after baking?
A watery filling is usually caused by one of three things: apples that released too much liquid, insufficient cornstarch to thicken the filling, or cutting into the pie before it has fully cooled. Allow the apples to macerate for 15 minutes before assembling, use the full amount of cornstarch, and always cool the pie for at least 2 hours before slicing.
Easy Apple Pie Recipe
8
servings45
minutes55
minutes420
kcal1
hour40
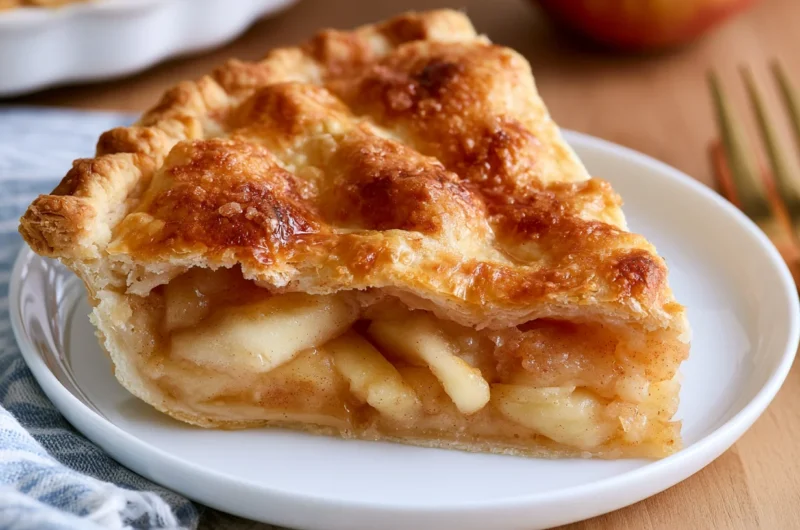
minutesA classic homemade apple pie with a buttery, flaky crust and a perfectly spiced, tender filling. Simple pantry ingredients, reliable results every time — the kind of dessert that earns a standing request at every table.
Ingredients
Base Ingredients
2 ½ cups all-purpose flour
1 cup unsalted butter, cold and cubed
6–7 medium apples (Granny Smith or Honeycrisp), peeled and thinly sliced
¾ cup granulated sugar
¼ cup brown sugar, packed
2 tablespoons cornstarch
1 teaspoon ground cinnamon
¼ teaspoon ground nutmeg
1 tablespoon fresh lemon juice
½ teaspoon salt
6–8 tablespoons ice-cold water
1 large egg (for egg wash)
1 tablespoon milk (for egg wash)
1 tablespoon coarse sugar (for topping)
Optional Add-ins
¼ teaspoon ground allspice
½ teaspoon pure vanilla extract
1 tablespoon bourbon or dark rum
2 tablespoons salted caramel sauce
¼ cup golden raisins
1 teaspoon orange zest
Directions
- Mix flour and salt, cut in cold butter until crumbly. Add ice water one tablespoon at a time until dough just comes together. Divide into two discs, wrap, and refrigerate for at least 1 hour.
- Toss peeled, thinly sliced apples with both sugars, cornstarch, cinnamon, nutmeg, and lemon juice. Let sit 15 minutes to release excess juices and absorb the spices evenly.
- Roll first dough disc into a 12-inch circle on a floured surface. Transfer to a 9-inch pie dish, press in gently, and trim to a ½-inch overhang. Refrigerate while rolling the top crust.
- Pour filling into the chilled bottom crust. Cover with the top crust, seal and crimp the edges, then cut 4–5 steam vents. Brush with egg wash and sprinkle with coarse sugar.
- Bake at 425°F (220°C) for 20 minutes, then reduce to 375°F (190°C) and bake 35–40 minutes more until the crust is deep golden and the filling is bubbling through the vents.
- Transfer to a wire rack and cool for a full 2 hours before slicing. This allows the cornstarch to set the filling so each slice holds its shape cleanly.
Recipe Video
Notes
- Use Granny Smith, Honeycrisp, or a blend of both — avoid soft varieties like Red Delicious that turn mushy during baking.
- Keep all dough ingredients cold. Warm butter prevents flaky layers from forming in the crust.
- Do not skip the 15-minute maceration step — it draws out excess moisture from the apples before they go into the crust.
- If crust edges brown too quickly, shield them with foil or a pie crust shield from the 30-minute mark onward.
- Always cool for the full 2 hours before slicing. Cutting into a hot pie collapses the filling.
- Store at room temperature for up to 2 days, refrigerated up to 5 days, or freeze (baked or unbaked) for up to 3 months.
- Serve warm with vanilla ice cream, whipped cream, salted caramel drizzle, or a slice of sharp cheddar for a classic pairing.