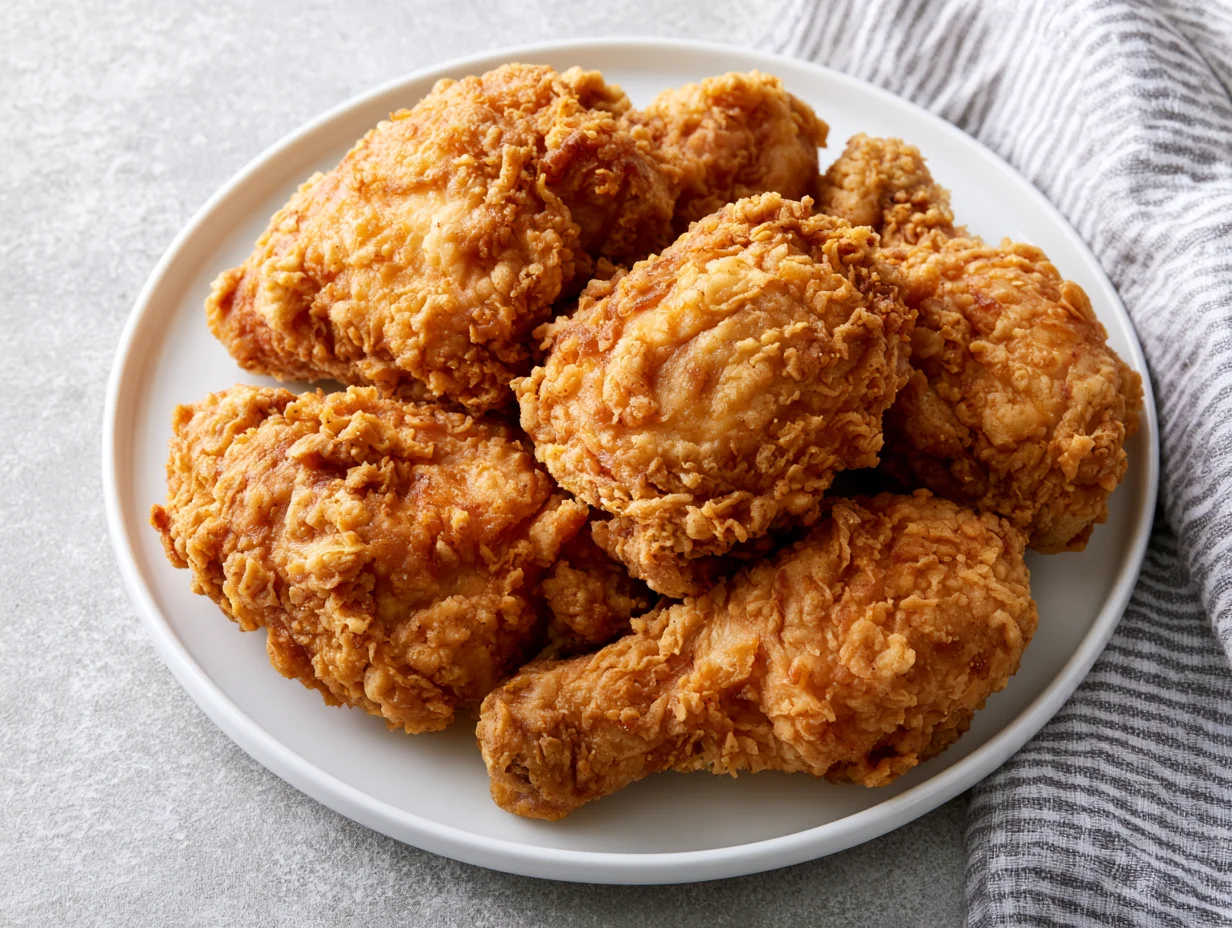
Crispy Fried Chicken Recipe
There are few things in cooking that deliver the same level of pure, uncomplicated satisfaction as a perfectly fried piece of chicken. That first bite — the audible crunch of the crust, the rush of seasoned steam, the tender, juicy meat underneath — is one of those sensory experiences that no other dish quite replicates. This crispy fried chicken recipe is built to deliver exactly that, every single time.
The difference between good fried chicken and great fried chicken comes down to a handful of decisions made before the chicken ever touches the oil. The brine, the coating, the seasoning ratios, the oil temperature — each one matters, and each one is addressed in this recipe with the precision and care the dish deserves.
I have spent years perfecting this recipe across different cuts, different oils, and different coating techniques. The version here is the result of that process: a deeply seasoned buttermilk brine, a double-dredge coating that shatters on contact, and a frying method that produces consistent results whether you are cooking for two or feeding a crowd.
This is not a quick weeknight shortcut — it is a commitment to doing fried chicken properly. Make it once, follow every step, and you will understand immediately why this recipe belongs in your permanent collection.
Ingredients You’ll Need
There is a certain satisfaction in reading a great fried chicken ingredient list — everything on it has a clear and purposeful role, and the final result is proof that classic technique and well-chosen ingredients need nothing else.
One of the things I love about this recipe is that it uses simple pantry ingredients. You probably already have most of them in your kitchen.
Base Ingredients
- 3 pounds bone-in, skin-on chicken pieces (drumsticks, thighs, and breasts)
- 2 cups full-fat buttermilk
- 1 large egg
- 2 teaspoons fine sea salt (for the brine)
- 1 teaspoon black pepper (for the brine)
- 1 teaspoon garlic powder (for the brine)
- 1 teaspoon onion powder (for the brine)
- 1 teaspoon hot sauce (for the brine)
- 2 cups all-purpose flour
- ½ cup cornstarch
- 1½ teaspoons fine sea salt (for the coating)
- 1 teaspoon black pepper (for the coating)
- 1 teaspoon smoked paprika
- 1 teaspoon garlic powder (for the coating)
- 1 teaspoon onion powder (for the coating)
- ½ teaspoon cayenne pepper
- ½ teaspoon dried thyme
- ½ teaspoon baking powder
- Neutral frying oil (peanut, vegetable, or canola) — enough to fill 3 inches deep in the pan
Optional Add-ins
- 1 teaspoon dried oregano (adds herbal depth to the coating)
- ½ teaspoon white pepper (layered heat alongside black pepper)
- 1 tablespoon pickle juice added to the brine (tenderizes and adds tang)
- ½ teaspoon celery salt (classic Southern flavor note)
- 1 teaspoon mustard powder (sharpness that cuts through the fat beautifully)
- 1 tablespoon hot sauce drizzled over finished chicken (for heat lovers)
Step-by-Step Instructions
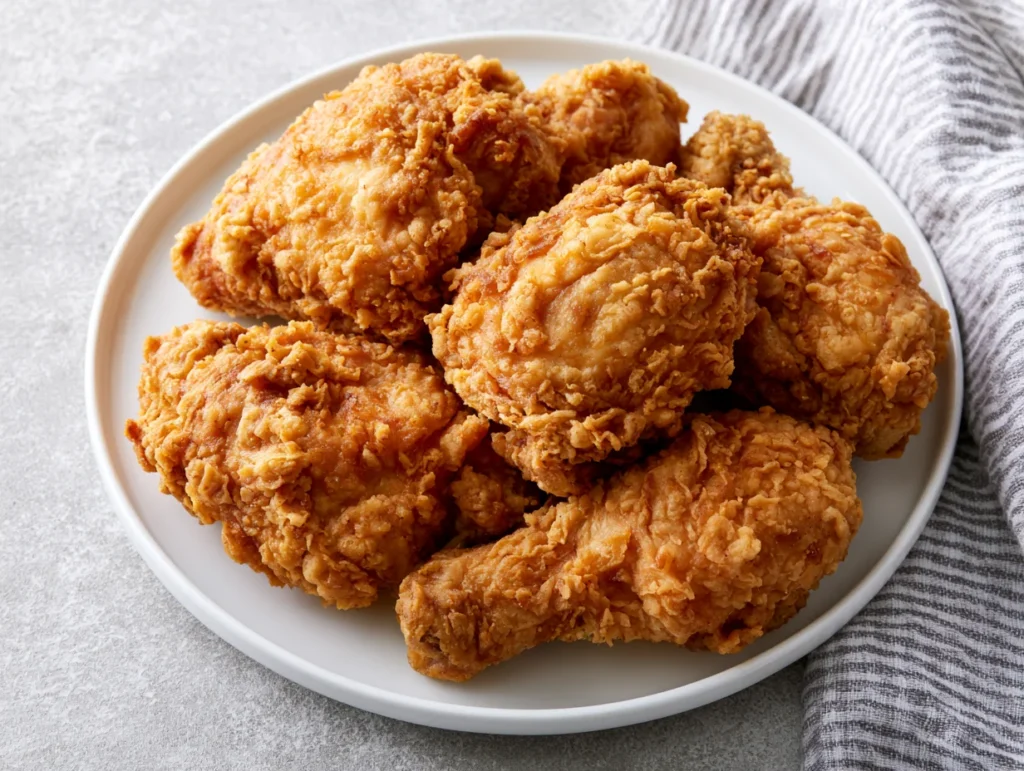
Step 1: Prepare the Buttermilk Brine
In a large bowl, whisk together the buttermilk, egg, fine sea salt, black pepper, garlic powder, onion powder, and hot sauce until fully combined. Add the chicken pieces and ensure each piece is fully submerged. Cover the bowl tightly with plastic wrap and refrigerate for a minimum of 4 hours — overnight is strongly preferred and produces noticeably more flavorful, tender results. The buttermilk works as both a tenderizer and a flavor carrier, breaking down the surface proteins in the meat while the seasonings penetrate deeply into every piece during the rest.
Step 2: Prepare the Seasoned Coating
In a wide, shallow bowl or baking dish, whisk together the all-purpose flour, cornstarch, fine sea salt, black pepper, smoked paprika, garlic powder, onion powder, cayenne pepper, dried thyme, and baking powder. Whisk thoroughly until every spice is evenly distributed throughout the flour — uneven coating means uneven seasoning in the crust. The cornstarch is the critical ingredient for maximum crispiness: it inhibits gluten development and creates a lighter, crunchier coating than flour alone. The baking powder introduces microscopic air pockets into the crust as it fries, contributing to that distinctive shatter when you bite through.
Step 3: Set Up Your Dredging Station
Remove the brined chicken from the refrigerator 20 minutes before frying to take the chill off. Cold chicken dropped into hot oil drops the oil temperature sharply and results in uneven cooking. Set up your dredging station: bowl of brined chicken on the left, seasoned flour mixture in the center, a wire rack set over a baking sheet on the right. Work systematically from left to right. Before dredging, drizzle 2 to 3 tablespoons of the buttermilk brine directly into the flour mixture and toss lightly — this creates the craggy, irregular surface that produces extra-crispy shards in the finished crust.
Step 4: Double-Dredge the Chicken
Remove a piece of chicken from the brine, allowing the excess to drip off for a few seconds — but do not shake it completely dry. You want a wet surface for the flour to adhere to. Press the chicken firmly into the seasoned flour, turning and pressing repeatedly to build up a thick, even layer. Return it briefly to the brine — just a 3-second dip — then press back into the flour a second time. This double-dredge technique is the foundation of an exceptionally thick, craggy crust that clings to the skin and does not separate during frying. Place each coated piece on the wire rack and rest for 10 minutes before frying.
Step 5: Heat the Oil to Temperature
Pour neutral frying oil into a large, heavy-bottomed pot or deep cast iron skillet to a depth of at least 3 inches. Heat over medium-high heat until the oil reaches 325°F to 335°F (163°C to 168°C). Use a clip-on thermometer for accuracy — frying by feel alone produces inconsistent results. Do not rush this step. Oil that is too hot will brown the exterior before the interior is cooked through. Oil that is too cool results in greasy, soggy chicken that absorbs oil rather than crisping in it. A steady, controlled oil temperature is the single most important variable in achieving restaurant-quality fried chicken at home.
Step 6: Fry in Batches
Carefully lower the coated chicken pieces into the hot oil one at a time, placing them away from you to prevent splashing. Do not overcrowd the pot — fry a maximum of 3 to 4 pieces at a time depending on the size of your vessel. Overcrowding drops the oil temperature dramatically and causes the chicken to steam rather than fry. Fry bone-in thighs and drumsticks for 13 to 15 minutes, turning once halfway through. Bone-in breasts require 15 to 17 minutes. The crust should be a deep, rich golden brown and the internal temperature should reach 165°F (74°C) at the thickest point.
Step 7: Drain, Rest, and Serve
Using tongs or a spider strainer, transfer the fried chicken to a clean wire rack set over a fresh baking sheet. Never drain fried chicken on paper towels — paper traps steam underneath the crust, softening the very crispiness you worked to achieve. The wire rack allows air to circulate beneath the chicken, keeping the crust intact on all sides. Allow the chicken to rest for 5 minutes before serving. This brief rest allows the internal juices to redistribute and the crust to firm up to its final texture. Finish with a small pinch of flaky sea salt over the top immediately after it comes out of the oil.
Cook Time
Total
5 to 9 hours (including minimum 4-hour brine and frying time)
Prep
20 minutes (active prep, excluding brine rest time)
Bake
13 to 17 minutes per batch depending on cut size
Servings
This recipe is designed to feed a proper gathering — not a token portion, but a full, satisfying spread that holds up as the centerpiece of a meal. The yield scales naturally with the size of your chicken pieces and the depth of your frying vessel.
Makes approximately 6 to 8 servings, based on a 3-pound mix of bone-in, skin-on thighs, drumsticks, and breast pieces. For a family dinner, this yield covers four to six people comfortably when served alongside two or three sides. For a party or gathering, consider doubling the recipe and frying in sequential batches.
To keep the first batch warm and crisp while subsequent batches fry, place the finished pieces on a wire rack in a 200°F (93°C) oven. This holding method maintains both temperature and crust integrity for up to 45 minutes without any loss of quality — a practical technique worth knowing for any occasion where timing matters.
Common Mistakes in This Recipe
Skipping or shortening the buttermilk brine is the most consequential mistake a home cook can make with this recipe. A minimum of four hours is not a suggestion — it is the window the buttermilk needs to tenderize the meat, allow the seasonings to penetrate beyond the surface, and create the tacky, adherent layer that holds the double-dredge coating in place during frying.
Frying at the wrong oil temperature is the second most damaging error. Many home cooks fry at too high a temperature, producing chicken that is dark and crisp on the outside while remaining pink and undercooked at the bone. Without a thermometer, this variable is entirely uncontrolled — and uncontrolled oil temperature is the root cause of nearly every fried chicken disappointment.
Crowding the frying vessel forces the oil temperature down rapidly and creates steam between the pieces, which prevents the crust from crisping properly. The result is a pale, oily coating that lacks structure and separates from the skin when handled. Patience between batches is not optional — it is the technique.
Resting fried chicken on paper towels instead of a wire rack softens the bottom crust within minutes of leaving the oil. Steam has nowhere to escape, it condenses against the paper, and the crust absorbs it from below. This single substitution — rack versus paper — makes a visible and textural difference in the finished product that is impossible to reverse once it happens.
Solutions to Common Mistakes
Commit to the brine time without exception. If a 4-hour brine is not possible, a minimum of 2 hours is the absolute floor — below that, the buttermilk has not had sufficient contact time to make a meaningful difference to either tenderness or flavor. Plan ahead: brine the chicken the night before, and the next day’s prep becomes effortless and unhurried.
Invest in a reliable frying thermometer and clip it to the side of your pot before the oil goes in. Maintain the temperature between 325°F and 335°F throughout the frying process. Between batches, allow the oil to return fully to temperature before the next round goes in — this typically takes 2 to 3 minutes and should never be rushed.
Fry in small batches without exception. Three to four pieces at a time in a standard 5-quart Dutch oven or deep skillet is the maximum. If the oil temperature drops below 300°F when the chicken is added, your pot is too small or your batch is too large. Adjust accordingly rather than attempting to compensate through extended fry time.
Switch from paper towels to a wire rack permanently. Place the rack over a rimmed baking sheet to catch drips, and position it near the stove so the transition from oil to rack takes no more than a few seconds. This setup also makes it straightforward to move finished batches into a warm oven while subsequent pieces finish frying.
Nutritional Information (approx. per serving)
- Calories: 420 kcal
- Total Fat: 22g (of which saturated fat: 5g)
- Carbohydrates: 26g
- Dietary Fiber: 1g
- Protein: 32g
- Sodium: 680mg
- Potassium: 310mg
- Iron: 12% of Daily Value
- Calcium: 6% of Daily Value
- Vitamin B6: 18% of Daily Value
- Phosphorus: 22% of Daily Value
- Zinc: 14% of Daily Value
Chicken, particularly bone-in thighs and drumsticks, is one of the most complete protein sources available — delivering all nine essential amino acids in a single serving. The protein content here supports muscle repair and maintenance, immune function, and satiety in a way that makes this dish genuinely sustaining rather than merely indulgent.
Dark meat chicken, which dominates this recipe, contains a meaningful concentration of zinc, iron, and B vitamins — particularly B6 and B12, which play central roles in energy metabolism and neurological health. These nutrients are often under-consumed in modern diets, and a meal built around bone-in dark meat addresses that gap effectively.
The frying process, when executed at the correct oil temperature, does not result in excessive oil absorption. Chicken fried at 325°F to 335°F develops a sealed crust quickly, which acts as a barrier preventing significant oil penetration. The result is a fried food that is far less oily than its reputation suggests when technique is sound.
Smoked paprika and garlic, used generously in the coating, contribute more than flavor. Paprika contains capsanthin and beta-carotene — antioxidants with anti-inflammatory properties. Garlic powder retains many of the sulfur compounds found in raw garlic that support cardiovascular health. Even in a fry coating, these ingredients add measurable nutritional value beyond seasoning.
Storage Instructions
Allow the fried chicken to cool completely at room temperature before storing — placing hot chicken in a sealed container traps steam, which softens the crust irreversibly. Once cooled, store in an airtight container lined with a paper towel to absorb any residual moisture. At room temperature, fried chicken is safe to eat for up to two hours after cooking.
Refrigerate cooled fried chicken in an airtight container for up to four days. The crust will soften during refrigeration, which is unavoidable, but it can be substantially restored with the right reheating method. Never microwave fried chicken if crispiness matters — the microwave generates steam and produces a rubbery, pale coating that bears little resemblance to what came out of the fryer.
To reheat and restore crispiness, place refrigerated pieces on a wire rack over a baking sheet in a preheated 375°F (190°C) oven for 12 to 15 minutes. This method evaporates surface moisture and re-crisps the coating without drying out the meat. An air fryer at 375°F for 8 to 10 minutes produces an equally excellent result and is particularly effective for smaller pieces like drumsticks.
For freezing, allow the chicken to cool completely, then wrap each piece individually in plastic wrap followed by a layer of foil. Place wrapped pieces in a zip-top freezer bag and store for up to three months. Reheat directly from frozen at 375°F in the oven for 20 to 25 minutes, flipping once halfway through. The crust will re-crisp beautifully and the meat will heat through evenly without drying out.
Suggestions
Crispy fried chicken is one of the most versatile dishes in any cook’s repertoire, and how you serve it matters as much as how you cook it. The classic pairing — coleslaw, mashed potatoes, and hot honey on the side — exists because it works perfectly. The cool crunch of slaw against the hot, seasoned crust is a contrast that has earned its place at the table permanently.
For a more elevated weeknight presentation, slice the fried chicken off the bone and serve it over a bed of dressed watercress with sliced pickled jalapeños, thinly shaved radish, and a drizzle of chili-infused honey. This combination takes the same chicken in a completely different direction — bright, acidic, and restaurant-worthy with minimal additional effort.
To build a fried chicken sandwich that genuinely rivals the best fast casual versions, stack a boneless thigh between a toasted brioche bun with a thick layer of dill pickle chips, shredded iceberg lettuce, and a smear of spicy mayo. Press the bun down gently, let the juices settle for 30 seconds, and serve immediately. The result is architecture as much as it is a sandwich.
For entertaining, set up a fried chicken board: arrange pieces on a wooden board surrounded by small bowls of dipping sauces — honey mustard, ranch, hot sauce, and garlic aioli — alongside waffle wedges, pickles, and fresh herbs. This format encourages sharing, looks visually abundant, and allows guests to build their own preferred combination without any additional plating work on your part.
Seasonal Relevance
Fried chicken has an undeniable summer identity — it is the centerpiece of Fourth of July spreads, backyard gatherings, tailgates, and picnic baskets from June through August. It travels well, tastes exceptional at room temperature, and feeds a crowd without requiring plating or utensils. Few dishes perform as reliably in an outdoor setting as a well-made batch of crispy fried chicken.
In autumn, the recipe adapts naturally to warmer, spicier flavor profiles. Adding celery salt, mustard powder, and an extra pinch of cayenne to the coating creates a version that leans into the season’s appetite for bold, comforting flavors. Serve it alongside roasted sweet potatoes and braised collard greens for a plate that reads as genuinely seasonal and considered.
Winter is when fried chicken earns its place as a serious comfort food rather than a casual warm-weather dish. A cold Sunday evening, a hot cast iron pan, and a piece of beautifully seasoned fried chicken served with creamy mashed potatoes and gravy creates a meal that addresses the season’s craving for warmth and richness in the most direct way possible.
Spring brings the opportunity to lighten the accompaniments without changing the recipe itself. Pair the chicken with a bright herb salad, pickled spring vegetables, and a squeeze of lemon over the finished plate. The juxtaposition of the rich, heavy crust against fresh, acidic elements makes the chicken taste more vibrant and the overall plate feel seasonally appropriate regardless of the cooking method involved.
Final Words
Truly great fried chicken is not the result of a single secret ingredient or an obscure regional technique. It is the result of discipline: a proper brine, a thoughtful coating, controlled oil temperature, and the patience to let every step complete before moving to the next. This recipe teaches all of those things without requiring professional equipment or prior experience.
What I find most rewarding about perfecting this dish is how transferable the knowledge becomes. Once you understand why oil temperature matters, why the double-dredge creates a better crust, and why resting on a wire rack preserves the crispiness you worked to achieve, those lessons follow you into every other frying project you ever attempt. Fried chicken is as much a curriculum as it is a recipe.
There is also something deeply communal about this dish that few others match. Fried chicken is not private food — it is made to be shared, piled high on a platter, passed around a table, and eaten with the kind of uninhibited enthusiasm that most meals do not inspire. It brings people together in a way that is entirely its own.
Make this recipe when you have the time to do it properly. Brine overnight, fry with attention, and serve it to people who will appreciate the work behind it. And when they inevitably ask how you made it, tell them — because the best food is always worth talking about.
Frequently Asked Questions
Can I make this crispy fried chicken recipe without a deep fryer?
Yes. A heavy-bottomed Dutch oven or a deep cast iron skillet works perfectly. Fill it with at least 3 inches of neutral oil and use a clip-on thermometer to monitor the temperature throughout frying. The vessel retains heat well and produces results identical to a dedicated deep fryer when managed carefully.
What is the best oil for frying chicken at home?
Peanut oil is the top choice for its high smoke point of 450°F and clean, neutral flavor that does not transfer to the food. Vegetable oil and canola oil are excellent alternatives with similarly high smoke points. Avoid olive oil, butter, or any oil with a smoke point below 375°F for deep frying.
How do I know the chicken is cooked through without cutting into it?
Use an instant-read thermometer inserted into the thickest part of the meat, away from the bone. The internal temperature must reach 165°F (74°C) for safe consumption. Bone-in thighs and drumsticks often taste best at 175°F to 180°F, where the collagen has fully broken down for maximum juiciness and tenderness.
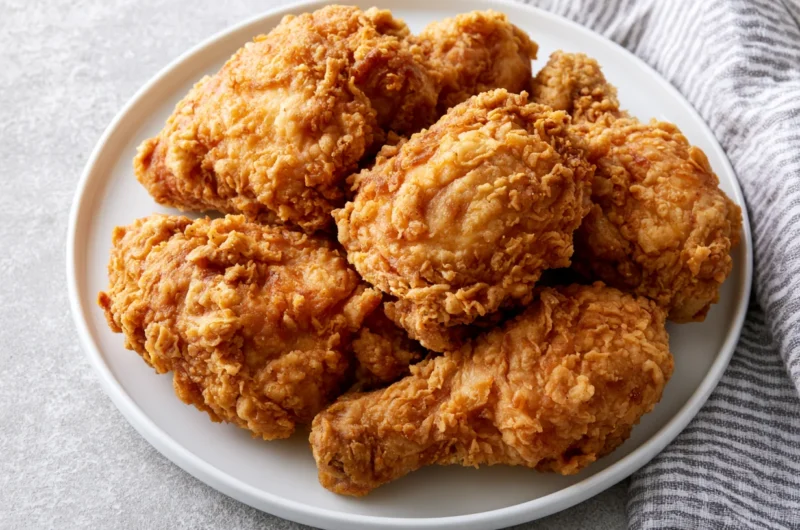
Crispy Fried Chicken Recipe
6
servings20
minutes17
minutes420
kcal37
minutesDeeply seasoned, shatteringly crispy, and irresistibly juicy — this crispy fried chicken recipe uses a buttermilk brine, a double-dredge coating, and the right frying technique to deliver restaurant-quality results every single time at home.
Ingredients
Base Ingredients:
3 pounds bone-in, skin-on chicken pieces (drumsticks, thighs, and breasts)
2 cups full-fat buttermilk
1 large egg
2 teaspoons fine sea salt (for the brine)
1 teaspoon black pepper (for the brine)
1 teaspoon garlic powder (for the brine)
1 teaspoon onion powder (for the brine)
1 teaspoon hot sauce (for the brine)
2 cups all-purpose flour
½ cup cornstarch
1½ teaspoons fine sea salt (for the coating)
1 teaspoon black pepper (for the coating)
1 teaspoon smoked paprika
1 teaspoon garlic powder (for the coating)
1 teaspoon onion powder (for the coating)
½ teaspoon cayenne pepper
½ teaspoon dried thyme
½ teaspoon baking powder
Neutral frying oil — peanut, vegetable, or canola — enough to fill 3 inches deep in the pan
Optional Add-ins:
1 teaspoon dried oregano
½ teaspoon white pepper
1 tablespoon pickle juice (added to the brine)
½ teaspoon celery salt
1 teaspoon mustard powder
1 tablespoon hot sauce (drizzled over finished chicken)
Directions
- Whisk together the buttermilk, egg, sea salt, black pepper, garlic powder, onion powder, and hot sauce in a large bowl. Add the chicken pieces, submerge fully, cover, and refrigerate for a minimum of 4 hours or overnight for best results.
- Remove the chicken from the refrigerator 20 minutes before frying to take the chill off. Set up a dredging station with the brined chicken on one side, the seasoned flour in the center, and a wire rack over a baking sheet on the other side.
- In a wide shallow bowl, whisk together the all-purpose flour, cornstarch, sea salt, black pepper, smoked paprika, garlic powder, onion powder, cayenne pepper, dried thyme, and baking powder until evenly combined. Drizzle 2 to 3 tablespoons of the buttermilk brine into the flour and toss lightly to create a craggy surface.
- Remove each chicken piece from the brine, let the excess drip off briefly, and press firmly into the seasoned flour. Dip back into the brine for 3 seconds, then press into the flour a second time for a thick, even double-dredge coating.
- Place all dredged pieces on the wire rack and rest for 10 minutes before frying.
- Pour neutral frying oil into a large heavy-bottomed pot or deep cast iron skillet to a depth of 3 inches. Heat over medium-high heat until the oil reaches 325°F to 335°F (163°C to 168°C). Use a clip-on thermometer for accuracy throughout frying.
- Carefully lower 3 to 4 pieces of chicken into the hot oil at a time. Do not overcrowd the pot. Fry thighs and drumsticks for 13 to 15 minutes and breasts for 15 to 17 minutes, turning once halfway through, until deep golden brown and the internal temperature reaches 165°F (74°C).
- Transfer fried chicken to a clean wire rack set over a baking sheet — never paper towels. Allow the oil to return to temperature between batches before frying the next round.
- Rest the finished chicken on the wire rack for 5 minutes before serving. Finish with a pinch of flaky sea salt immediately after it comes out of the oil.
Recipe Video
Notes
- Brine the chicken for a minimum of 4 hours — overnight produces the most flavorful, tender, and well-seasoned result. Do not shorten this step.
- Always use a frying thermometer to monitor oil temperature. Maintain between 325°F and 335°F throughout the entire frying process for consistent results.
- Drizzle 2 to 3 tablespoons of the buttermilk brine into the flour mixture before dredging — this creates the craggy, irregular crust that produces extra-crispy shards in the finished coating.
- The double-dredge technique — flour, brief brine dip, flour again — is what creates the thick, structured crust that holds together and does not separate from the skin during frying.
- Never crowd the frying pot. Fry 3 to 4 pieces at a time maximum and allow the oil to fully return to temperature between each batch.
- Always rest fried chicken on a wire rack — never on paper towels. Paper traps steam underneath and softens the crust immediately after frying.
- To keep early batches warm and crisp while subsequent batches fry, hold finished pieces on a wire rack in a 200°F (93°C) oven for up to 45 minutes.
- Reheat leftovers at 375°F in the oven for 12 to 15 minutes on a wire rack — never in the microwave — to restore the crust without drying out the meat.
- Freeze individually wrapped pieces for up to 3 months and reheat directly from frozen at 375°F for 20 to 25 minutes, flipping once halfway through.