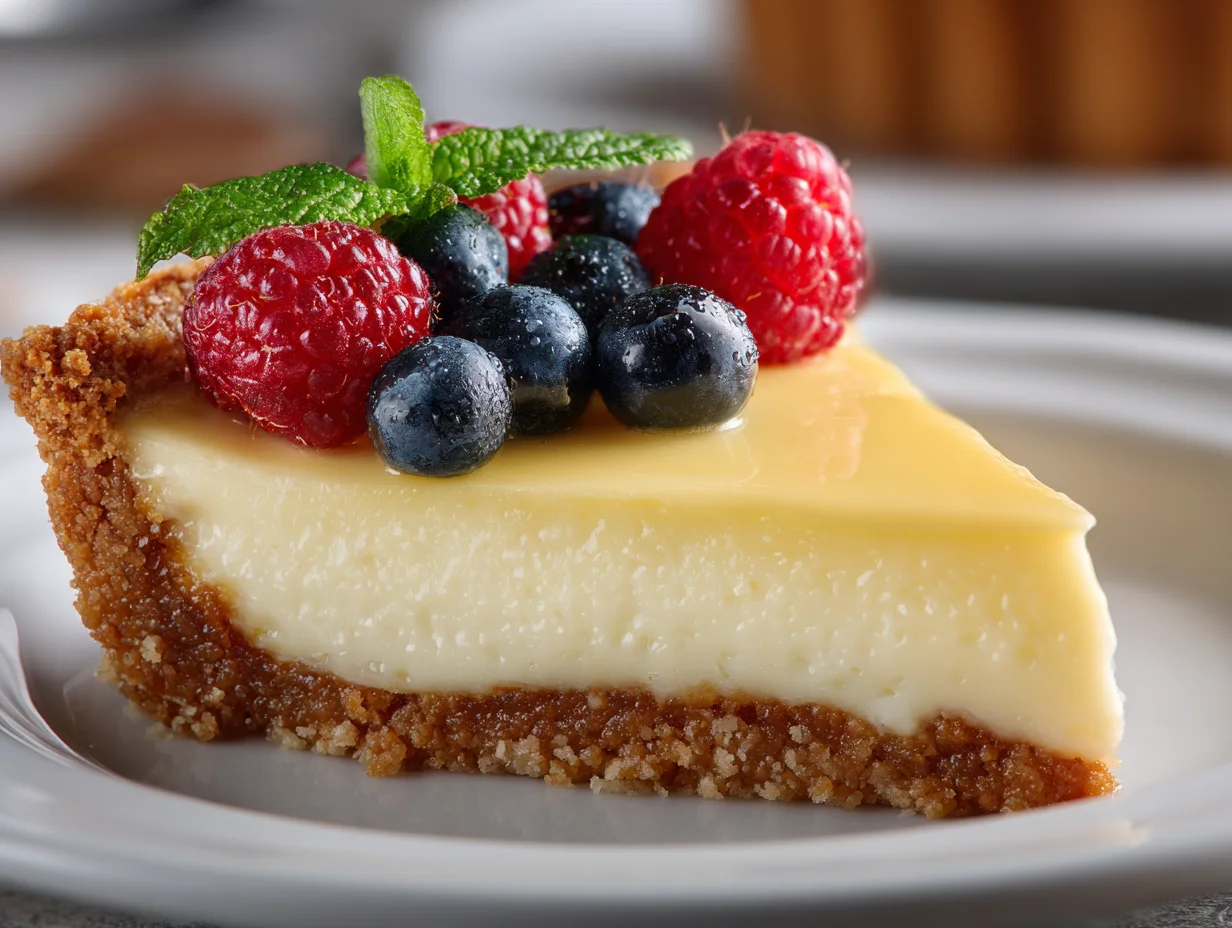
As a chef who has spent years perfecting desserts, I can confidently say that a well-made cheesecake tart is one of the most satisfying creations in baking. It’s not just about combining ingredients,it’s about control, timing, and understanding texture.
I’ve seen many home bakers struggle to achieve that perfectly smooth, creamy finish, but once you learn the right techniques, everything changes.
This cheesecake tart recipe reflects the same standards I use in professional kitchens: a crisp, buttery base paired with a rich, velvety filling that melts effortlessly in every bite. If you follow my method carefully, you won’t just bake a dessert,you’ll create something refined, elegant, and truly memorable that stands out every single time.
? If you enjoy creamy desserts, you’ll definitely love our Easy Strawberry Cheesecake Cupcakes for a quick and delicious mini version.
The Hidden Error I See Bakers Repeat Often
In my experience, the most common mistake people make with cheesecake tart is overworking the batter. I’ve watched this happen countless times people think more mixing means a smoother result, but it actually does the opposite.
When you overmix, especially after adding eggs, you incorporate too much air, which leads to cracks and a slightly spongy texture instead of that silky finish we want. Another issue I often notice is using cold ingredients.
When cream cheese, eggs, or cream are not at room temperature, the mixture doesn’t blend properly, leaving small lumps behind. These small details may seem minor, but they significantly impact the final outcome, turning what should be a smooth, creamy dessert into something uneven and disappointing.
My Proven Method for a Perfect Creamy Texture
When I prepare a cheesecake tart, I always focus on control and patience. First, I ensure all ingredients are at room temperature,this step alone makes a noticeable difference in achieving a smooth batter. While mixing, I keep the speed low and stop as soon as everything is combined.
I never rush this process. Eggs are added one at a time, gently incorporated to avoid trapping air. During baking, I prefer a steady, moderate temperature and often use a water bath or add moisture to the oven environment.
After baking, I never remove the tart immediately,I let it cool gradually inside the oven. This slow cooling prevents cracks and preserves that luxurious texture. These are small professional habits, but they guarantee consistently perfect results.
Ingredients List

Base Ingredients:
- Digestive biscuits or graham crackers (crushed)
- Unsalted butter (melted)
- Cream cheese (full-fat, softened)
- Granulated sugar
- Eggs (room temperature)
- Fresh cream or heavy cream
- Vanilla extract
- Lemon zest (optional)
Optional Add-ins:
- Fresh berries
- Chocolate ganache
- Caramel drizzle
- Chopped nuts
- Fruit compote
- Whipped cream
Step-by-Step Instructions

Preparing the Base My Way
Whenever I start a cheesecake tart, I give special attention to the base because it sets the foundation for everything else. I crush the biscuits finely so the texture is even, then mix them thoroughly with melted butter until the consistency resembles damp sand. I press this mixture firmly into the tart pan, making sure it’s compact and evenly distributed.
I always use the back of a glass to smooth it out—this ensures a professional finish. After shaping, I place it in the refrigerator for at least 30 minutes. From my experience, skipping this step leads to a crumbly base that won’t hold its shape when sliced. A properly set base gives the tart structure and enhances the contrast with the creamy filling.
? For a classic variation, don’t miss our Classic Strawberry Cheesecake that delivers rich flavor with a fruity twist.
Creating a Smooth Filling
For me, the filling is where precision truly matters. I begin by beating the cream cheese until it’s completely smooth no lumps at all. Then I slowly add sugar, keeping the mixer speed low. I’ve learned that patience here makes all the difference.
Eggs are added one at a time, and I mix gently after each addition to maintain a silky consistency. Finally, I incorporate cream, vanilla, and lemon zest. I never overmix at this stage because it can introduce air bubbles. The batter should look glossy, thick, and perfectly uniform. This step defines the quality of the final dessert, and I always take my time to ensure it’s flawless before moving forward.
Baking with Control
When it comes to baking, I rely on consistency rather than guesswork. I pour the filling over the chilled base and smooth the surface carefully. My oven is always preheated to a moderate temperature,never too high. I often place a tray of hot water in the oven to create a gentle, humid environment. This helps the cheesecake bake evenly without cracking.
I watch closely as it bakes; the edges should be set, but the center should still have a slight jiggle. That jiggle is the key indicator of a creamy texture. Overbaking is something I always avoid because it dries out the filling and ruins the smooth consistency I aim for.
Cooling with Patience
One of the most important steps, in my opinion, is cooling. I never rush this part. Once the baking is done, I turn off the oven and leave the door slightly open, allowing the tart to cool gradually. This prevents sudden temperature changes that cause cracks.
After about an hour, I take it out and let it cool completely at room temperature before transferring it to the refrigerator. I usually chill it overnight because it enhances both texture and flavor. From my experience, this patience pays off,the tart slices cleanly, holds its shape, and delivers that perfect creamy bite every time.
Cook Time
Total: 5 hours
Prep: 30 minutes
Bake: 45 minutes
Servings
When I prepare this cheesecake tart, I typically portion it into 8 to 10 servings, depending on the occasion. I find this size ideal because the dessert is rich and satisfying, so even a smaller slice feels indulgent. For clean slices, I always use a warm knife and wipe it between cuts,it’s a simple technique that makes a big difference in presentation. Whether I’m serving guests at a dinner or sharing it with family, this tart consistently delivers the right balance of portion and flavor. You can adjust the slice size based on preference, but in my experience, moderate portions allow everyone to fully appreciate its creamy texture without feeling overwhelmed.
Nutritional Information (approx. per serving)
- Calories: 320–380 kcal
- Protein: 5–7g
- Carbohydrates: 25–30g
- Fat: 22–26g
- Sugar: 18–22g
- Calcium: Moderate
- Sodium: Controlled
From my perspective, desserts should be enjoyed mindfully, and this cheesecake tart is no exception. While it is rich, it also provides a good source of calcium and energy. I often recommend pairing it with fresh fruits to add natural nutrients and balance the sweetness. Using high-quality ingredients also enhances both taste and nutritional value. When enjoyed in moderation, this dessert can absolutely be part of a well-balanced lifestyle.
? Want something even more indulgent? Try our Cinnamon Roll Honey Bun Cheesecake for a sweet and decadent upgrade.
Storage Instructions
In my kitchen, proper storage is just as important as preparation. Once the cheesecake tart has fully cooled, I always cover it carefully or place it in an airtight container before refrigerating. This prevents it from absorbing unwanted odors and helps maintain its fresh flavor. It stays in excellent condition for up to 4 to 5 days. If I need to store it longer, I slice it and wrap each piece individually before freezing. When serving again, I let it thaw slowly in the refrigerator rather than at room temperature. This method preserves the creamy texture I worked hard to achieve. I always avoid repeated freezing, as it affects both taste and consistency.
Suggestions
Over the years, I’ve found that small finishing touches can elevate a cheesecake tart from good to exceptional. I often top mine with fresh berries or a light fruit glaze for a refreshing contrast. For a richer variation, I sometimes add a drizzle of chocolate ganache or caramel. If I want a lighter version, I slightly reduce the sugar or experiment with a yogurt blend. Presentation also matters—I prefer serving it slightly chilled for the best texture and flavor. Occasionally, I experiment with different crusts, such as chocolate or nut-based versions, to create variety while keeping the creamy core intact. These subtle changes allow you to personalize the dessert while maintaining its classic appeal.
Seasonal Relevance
I always appreciate how adaptable this cheesecake tart is throughout the year. In summer, I like pairing it with fresh berries or citrus flavors to keep it light and refreshing. During autumn, I often incorporate caramel or nut-based toppings for a warmer, richer feel. In winter, chocolate and festive spices become my go-to additions, making it perfect for celebrations. Spring inspires me to use fresh strawberries and delicate flavors that complement the creamy base. This versatility is one of the reasons I continue to make this dessert regularly,it evolves with the seasons while maintaining its signature elegance and smooth texture.
From my professional experience, mastering a cheesecake tart is all about discipline and attention to detail. Every step,from preparing the base to cooling the final product,plays a critical role in achieving that perfect result. I’ve shared the same techniques I rely on in my own kitchen, and if you follow them carefully, you will consistently produce a dessert that looks and tastes exceptional. This cheesecake tart is more than just a recipe,it’s a refined approach to baking that delivers elegance, flavor, and satisfaction in every slice. With practice and patience, you’ll not only improve your skills but also create a dessert that truly stands out.
? If you prefer no-bake options, check out our Easy no bake cheesecake recipe that tastes rich and creamy for a quicker alternative.
Frequently Asked Questions
1. Can I make this cheesecake tart ahead of time?
Yes, I often prepare it a day in advance. In fact, I find that chilling it overnight improves both texture and flavor, making it an excellent make-ahead dessert for gatherings or special occasions.
2. What should I do if my cheesecake cracks?
In my experience, cracks usually come from sudden temperature changes or overmixing. Even if it happens, you can easily cover it with toppings like fruit or ganache without affecting the taste.
3. Is it necessary to use a water bath?
While not mandatory, I highly recommend it. I’ve found that it helps maintain even heat and prevents cracking, resulting in a smoother and more professional finish.
4. Can I experiment with flavors in this recipe?
Absolutely. I often add citrus zest, chocolate, or even coffee flavors. The base recipe is versatile, allowing you to customize it while maintaining its creamy consistency.
5. How do I know when the cheesecake is perfectly baked?
I always look for slightly set edges and a gentle jiggle in the center. That slight movement indicates a creamy texture, which will firm up perfectly after chilling.