Classic Apple Pie Recipe
There are very few things in the world of baking that carry the same weight as a homemade apple pie. The moment that golden crust comes out of the oven, filling the kitchen with the scent of warm spices and caramelized fruit, something shifts. It feels less like dessert and more like a moment worth sitting down for.
This recipe doesn’t chase trends or lean on shortcuts. It’s built on the fundamentals: a buttery, flaky double crust, a spiced apple filling with just the right balance of sweet and tart, and a technique that’s been refined to work consistently in any home kitchen.
What you’ll find here is precision without complication. Every component is explained clearly, from how to handle the dough without overworking it to which apples hold their shape best under heat, so that your first attempt and your fifteenth look equally impressive.
By the end of this article, you’ll have everything you need to bake a classic apple pie that tastes exactly the way it’s supposed to, deeply comforting, beautifully structured, and made entirely from scratch.
Ingredients You’ll Need
There’s something quietly satisfying about pulling a pie together from ingredients you already have sitting on the shelf, nothing extravagant, nothing obscure, just good, honest baking staples that know exactly what they’re there to do.
One of the things I love about this recipe is that it uses simple pantry ingredients. You probably already have most of them in your kitchen.
Base Ingredients
- 2 1/2 cups all-purpose flour
- 1 cup unsalted butter, cold and cubed
- 1/4 cup ice-cold water (plus more as needed)
- 1 teaspoon fine sea salt
- 1 tablespoon granulated sugar (for the dough)
- 6 cups peeled, cored, and sliced apples (about 6 medium apples)
- 3/4 cup granulated sugar (for the filling)
- 2 tablespoons all-purpose flour (for the filling)
- 1 teaspoon ground cinnamon
- 1/4 teaspoon ground nutmeg
- 1 tablespoon fresh lemon juice
- 1 tablespoon unsalted butter, cut into small pieces (for dotting the filling)
- 1 egg (for egg wash)
- 1 tablespoon milk (for egg wash)
Optional Add-ins
- 1/4 teaspoon ground allspice
- 1/4 teaspoon ground cardamom
- 1 teaspoon pure vanilla extract
- 1/3 cup brown sugar (in place of some granulated sugar for a deeper flavor)
- 2 tablespoons caramel sauce, drizzled over the filling before topping
- 1 tablespoon cornstarch (as an alternative thickener to flour)
- 1 teaspoon apple cider vinegar (added to the crust for extra flakiness)
Step-by-Step Instructions
Make the Pie Dough
Combine the flour, salt, and sugar in a large mixing bowl. Add the cold, cubed butter and work it into the flour using your fingertips or a pastry cutter until the mixture resembles coarse crumbs with a few pea-sized butter pieces remaining. Those visible butter chunks are intentional; they’re what create distinct flaky layers once the crust bakes.
Add ice-cold water one tablespoon at a time, mixing gently after each addition. Stop as soon as the dough just comes together without crumbling. Overworking develops gluten and leads to a tough crust, so handle it as little as possible.
Chill the Dough
Divide the dough into two equal discs, wrap each tightly in plastic wrap, and refrigerate for at least one hour. This resting period is not optional; it relaxes the gluten and solidifies the butter back into the dough, which is what makes rolling smooth and the final crust tender rather than rubbery.
If you’re planning ahead, the dough can rest in the refrigerator for up to two days, or freeze well for up to three months. Remove it from the fridge about five minutes before rolling so it softens just enough to work with.
Prepare the Apple Filling
Peel, core, and slice the apples into roughly quarter-inch pieces, keeping the slices uniform so they cook evenly. Combine the sliced apples in a large bowl with the sugar, flour, cinnamon, nutmeg, and lemon juice. Toss until every slice is well coated.
Let the filling sit for ten minutes so the apples begin releasing their juices. This short maceration period deepens flavor and allows you to see exactly how much liquid you’re working with, giving you better control over the final texture of the filling once it bakes.
Assemble the Pie
Preheat your oven to 425°F (220°C). Roll one disc of chilled dough on a lightly floured surface into a circle about twelve inches in diameter. Carefully transfer it to a nine-inch pie dish, pressing gently to fit without stretching.
Spoon the apple filling into the crust, mounding it slightly in the center since the apples will shrink as they cook. Dot the top with small pieces of butter. Roll out the second disc and lay it over the filling. Trim the overhang, tuck the edges under, and crimp to seal. Cut a few steam vents in the top crust.
Egg Wash and Bake
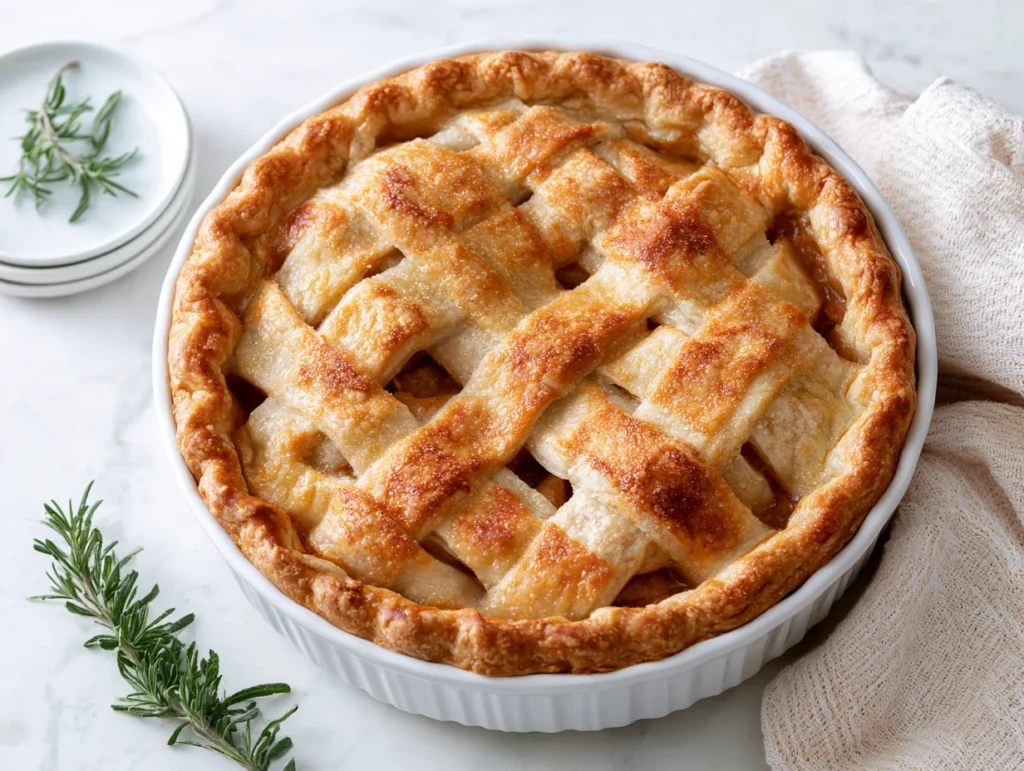
Whisk together the egg and milk, then brush the mixture evenly over the top crust. This gives the pie its golden, glossy finish once baked. Sprinkle a light layer of granulated sugar over the surface if you prefer a slightly crunchy, sparkling top.
Place the pie on a baking sheet to catch any drips, then bake at 425°F for the first fifteen minutes. Reduce the heat to 375°F (190°C) and continue baking for another forty to forty-five minutes until the crust is deep golden and the filling bubbles visibly through the vents.
Cool Before Slicing
Remove the pie from the oven and set it on a wire rack. Allow it to cool for a minimum of two hours before slicing. This cooling window is critical, not merely a suggestion, because the filling continues to set as the temperature drops.
Cutting into a hot apple pie releases all the built-up filling as liquid, turning a beautifully structured slice into a soupy mess. Patience here pays off with clean slices, a properly thickened filling, and a pie that holds its shape from the first cut to the last.
Cook Time
Total
1 hour 20 minutes (plus 1 hour chill time)
Prep
20 minutes (plus 1 hour dough resting)
Bake
55 to 60 minutes
Servings
This recipe makes approximately eight generous slices, which is the standard yield from a nine-inch pie and enough to serve a full table comfortably. Each slice is substantial, with a well-structured filling and enough crust to give you that satisfying, flaky bite in every forkful.
Serving size depends somewhat on how you cut and who you’re feeding. For a dinner party dessert, eight equal slices works perfectly. For a casual family setting where some guests may want seconds, cutting ten slightly thinner slices gives everyone a little more flexibility without the pie running short.
If you’re making this pie for a gathering or holiday table, the recipe doubles well and bakes in two standard pie dishes without any adjustments to the method.
Common Mistakes in This Recipe
The most frequent issue home bakers encounter is a soggy bottom crust. This usually happens when the filling releases too much juice during baking and the bottom crust doesn’t get enough direct heat to crisp properly before the liquid soaks in.
Another common mistake is using the wrong apple variety. Apples that are too soft, like Red Delicious or McIntosh, break down entirely during baking, turning the filling into an unpleasant mush instead of distinct, tender slices with texture.
Many bakers also skip the resting step after assembling the pie and send it straight into the oven from room temperature. Warm dough going into a hot oven melts the butter before the structure sets, resulting in a flat, dense crust rather than a lifted, flaky one.
Slicing the pie too soon after baking is another mistake that affects the final result significantly. Without adequate cooling time, the filling remains liquid and runs out the moment the crust is broken, making it impossible to serve a clean, attractive slice.
Solutions to Common Mistakes
Place the pie on the lowest oven rack for the first half of baking so the bottom crust gets direct heat. Alternatively, par-bake the bottom crust for eight to ten minutes before adding the filling to give it a head start.
Choose firm baking apples like Granny Smith, Honeycrisp, Braeburn, or a combination of two varieties. Their firmer flesh holds shape during the long bake time and provides a natural balance of tartness and sweetness that suits the filling well.
Always chill the assembled pie in the refrigerator for twenty to thirty minutes before baking. Cold butter going into a hot oven creates steam rapidly and produces the distinct layers that define a truly flaky crust.
After baking, rest the pie on a wire rack for at least two hours. If you genuinely cannot wait that long, a minimum of ninety minutes still helps significantly. The filling sets as it cools, and slicing at the right time is the difference between a presentable slice and a collapsed one.
Nutritional Information (approx. per serving)
- Calories: 380 kcal
- Carbohydrates: 52g
- Protein: 4g
- Fat: 18g
- Saturated Fat: 11g
- Fiber: 3g
- Sugar: 28g
- Vitamin C: 6% DV
- Iron: 8% DV
- Potassium: 150mg
Apples are a genuinely valuable source of dietary fiber, particularly pectin, which supports healthy digestion and contributes to a feeling of fullness after eating.
The cinnamon used throughout the filling goes beyond flavor. Research consistently links cinnamon to improved blood sugar regulation, making it one of the most functionally useful spices in any baker’s pantry.
Homemade pie made from scratch contains no artificial preservatives, stabilizers, or hydrogenated fats that often appear in commercial alternatives, making it a far cleaner option when a treat is called for.
Apples also contain quercetin and other plant compounds associated with anti-inflammatory activity, meaning this dessert carries more nutritional depth than its reputation as an indulgence might suggest.
Storage Instructions
Allow the pie to cool completely to room temperature before storing, which typically takes two to three hours after it comes out of the oven. Covering a warm pie traps steam inside and softens the crust significantly.
Once fully cooled, the pie can be stored at room temperature, loosely covered with foil or a pie dome, for up to two days. Beyond that, refrigeration is recommended to keep the filling fresh and prevent any bacterial growth in the egg-washed crust.
In the refrigerator, well-covered apple pie stays in good condition for up to five days. To restore some of that fresh-baked crispness to the crust, reheat individual slices in a 350°F oven for ten to twelve minutes rather than using a microwave.
For longer storage, apple pie freezes beautifully for up to three months. Wrap it tightly in plastic wrap followed by a layer of foil, then thaw overnight in the refrigerator and warm in the oven before serving.
Suggestions
For a more complex flavor in the filling, use a mix of apple varieties rather than a single type. Combining tart Granny Smith with sweeter Honeycrisp creates a filling that’s nuanced and layered without requiring any extra ingredients.
A small drizzle of caramel sauce over the apple filling before placing the top crust on adds a deep, buttery sweetness that elevates the entire pie without overpowering the natural apple flavor.
This pie pairs beautifully with a scoop of good vanilla ice cream or a spoonful of lightly sweetened whipped cream. The contrast between warm filling and cold cream is one of those combinations that never gets old regardless of how many times you’ve tasted it.
If you’re serving the pie at a gathering, consider dusting the top crust with cinnamon sugar before baking for a visually attractive finish that also adds a delicate crunch to every bite of the top crust.
Seasonal Relevance
Apple pie is most naturally associated with autumn, and for good reason. The apple harvest peaks between September and November, bringing the freshest, most flavorful fruit of the year to markets and farm stands across the country.
During fall, this recipe becomes especially fitting for Thanksgiving tables, harvest dinners, and weekend baking projects when the air turns cool and the appetite for something warm and spiced feels completely natural.
In winter, apple pie transitions easily into a festive dessert. A well-decorated top crust, whether latticed or cut with leaf-shaped vents, carries a visual elegance that suits holiday gatherings and celebratory dinners throughout December and January.
Even in spring and summer, this recipe holds up. Stored apples retain their quality well into the warmer months, and serving a room-temperature slice alongside cold ice cream makes classic apple pie one of the few desserts that genuinely works across every season.
Final Words
A classic apple pie is one of those rare recipes where the effort and the outcome feel perfectly proportional. It asks for your attention and a little patience, and in return it delivers something that’s genuinely hard to replicate from a box or a bakery shelf.
What this recipe teaches more than anything is the value of slowing down in the kitchen. The chilling steps, the cooling time, the choice of apple variety, none of these are afterthoughts. Each one contributes to a final result that actually looks and tastes like it was made with care.
Once you’ve made this pie from scratch, you’ll understand why it holds the place it does in the world of home baking. It’s not just a dessert. It’s a skill, a tradition, and for many people, a deeply personal ritual tied to memory and season.
Come back to this recipe often, and don’t hesitate to make it your own. Add a spice, change an apple, try a lattice top. The classic is just the starting point.
Frequently Asked Questions
Do I need to pre-cook the apple filling before adding it to the pie? No, pre-cooking the filling is not required for this recipe. The apples cook fully during the baking time inside the crust. However, allowing the filling to macerate for ten minutes before assembly helps release juice and deepen the flavor without any extra cooking step.
How do I prevent the pie crust edges from over-browning before the filling is done? Cover the crust edges loosely with strips of aluminum foil or a pie shield after the first twenty to twenty-five minutes of baking. This slows browning on the edges while allowing the center of the crust and the filling to continue cooking through to completion.
Can I use store-bought pie crust instead of making it from scratch? Yes, a quality refrigerated pie crust works as a practical substitute if time is limited. The flavor and texture won’t match a homemade butter crust, but the filling recipe and baking method remain exactly the same and will still produce an excellent result.
Classic Apple Pie Recipe
8
servings20
minutes1
hour380
kcal1
hour20
minutesA from-scratch classic apple pie with a buttery, flaky double crust and warmly spiced filling. Made with simple pantry staples, this timeless dessert bakes up golden, fragrant, and perfectly structured every single time.
Ingredients
Base Ingredients:
2 1/2 cups all-purpose flour
1 cup unsalted butter, cold and cubed
1/4 cup ice-cold water (plus more as needed)
1 teaspoon fine sea salt
1 tablespoon granulated sugar (for the dough)
6 cups peeled, cored, and sliced apples (about 6 medium apples)
3/4 cup granulated sugar (for the filling)
2 tablespoons all-purpose flour (for the filling)
1 teaspoon ground cinnamon
1/4 teaspoon ground nutmeg
1 tablespoon fresh lemon juice
1 tablespoon unsalted butter, cut into small pieces
1 egg (for egg wash)
1 tablespoon milk (for egg wash)
Optional Add-ins:
1/4 teaspoon ground allspice
1/4 teaspoon ground cardamom
1 teaspoon pure vanilla extract
1/3 cup brown sugar (in place of some granulated sugar)
2 tablespoons caramel sauce
1 tablespoon cornstarch (alternative thickener)
1 teaspoon apple cider vinegar (for extra flakiness)
Directions
- Mix flour, salt, and sugar; cut in cold butter until the mixture resembles coarse crumbs with pea-sized butter pieces.
- Add ice-cold water one tablespoon at a time until the dough just comes together; do not overwork.
- Divide into two discs, wrap in plastic wrap, and refrigerate for at least one hour.
- Preheat oven to 425°F (220°C).
- Peel, core, and slice apples; toss with sugar, flour, cinnamon, nutmeg, and lemon juice. Let sit for 10 minutes.
- Roll one dough disc into a 12-inch circle and fit it into a 9-inch pie dish.
- Add the apple filling, mounding slightly in the center; dot with small pieces of butter.
- Roll out the second disc, place over the filling, trim, tuck, and crimp edges to seal; cut steam vents.
- Brush the top crust with egg wash; sprinkle with sugar if desired.
- Bake at 425°F for 15 minutes, then reduce to 375°F (190°C) and bake for 40 to 45 minutes until golden and bubbly.
- Cool on a wire rack for at least 2 hours before slicing.
Recipe Video
Notes
- Use firm baking apples like Granny Smith, Honeycrisp, or Braeburn for best results; soft apples break down and turn mushy.
- Keep all butter and water ice-cold throughout the dough-making process for the flakiest crust.
- Chill the fully assembled pie for 20 to 30 minutes before baking to help the crust hold its shape.
- Place the pie on the lowest oven rack for the first half of baking to prevent a soggy bottom crust.
- Do not slice until the pie has cooled for at least 2 hours; the filling continues to set as it cools.
- Store leftovers covered in the refrigerator for up to 5 days; reheat slices in a 350°F oven for best texture.