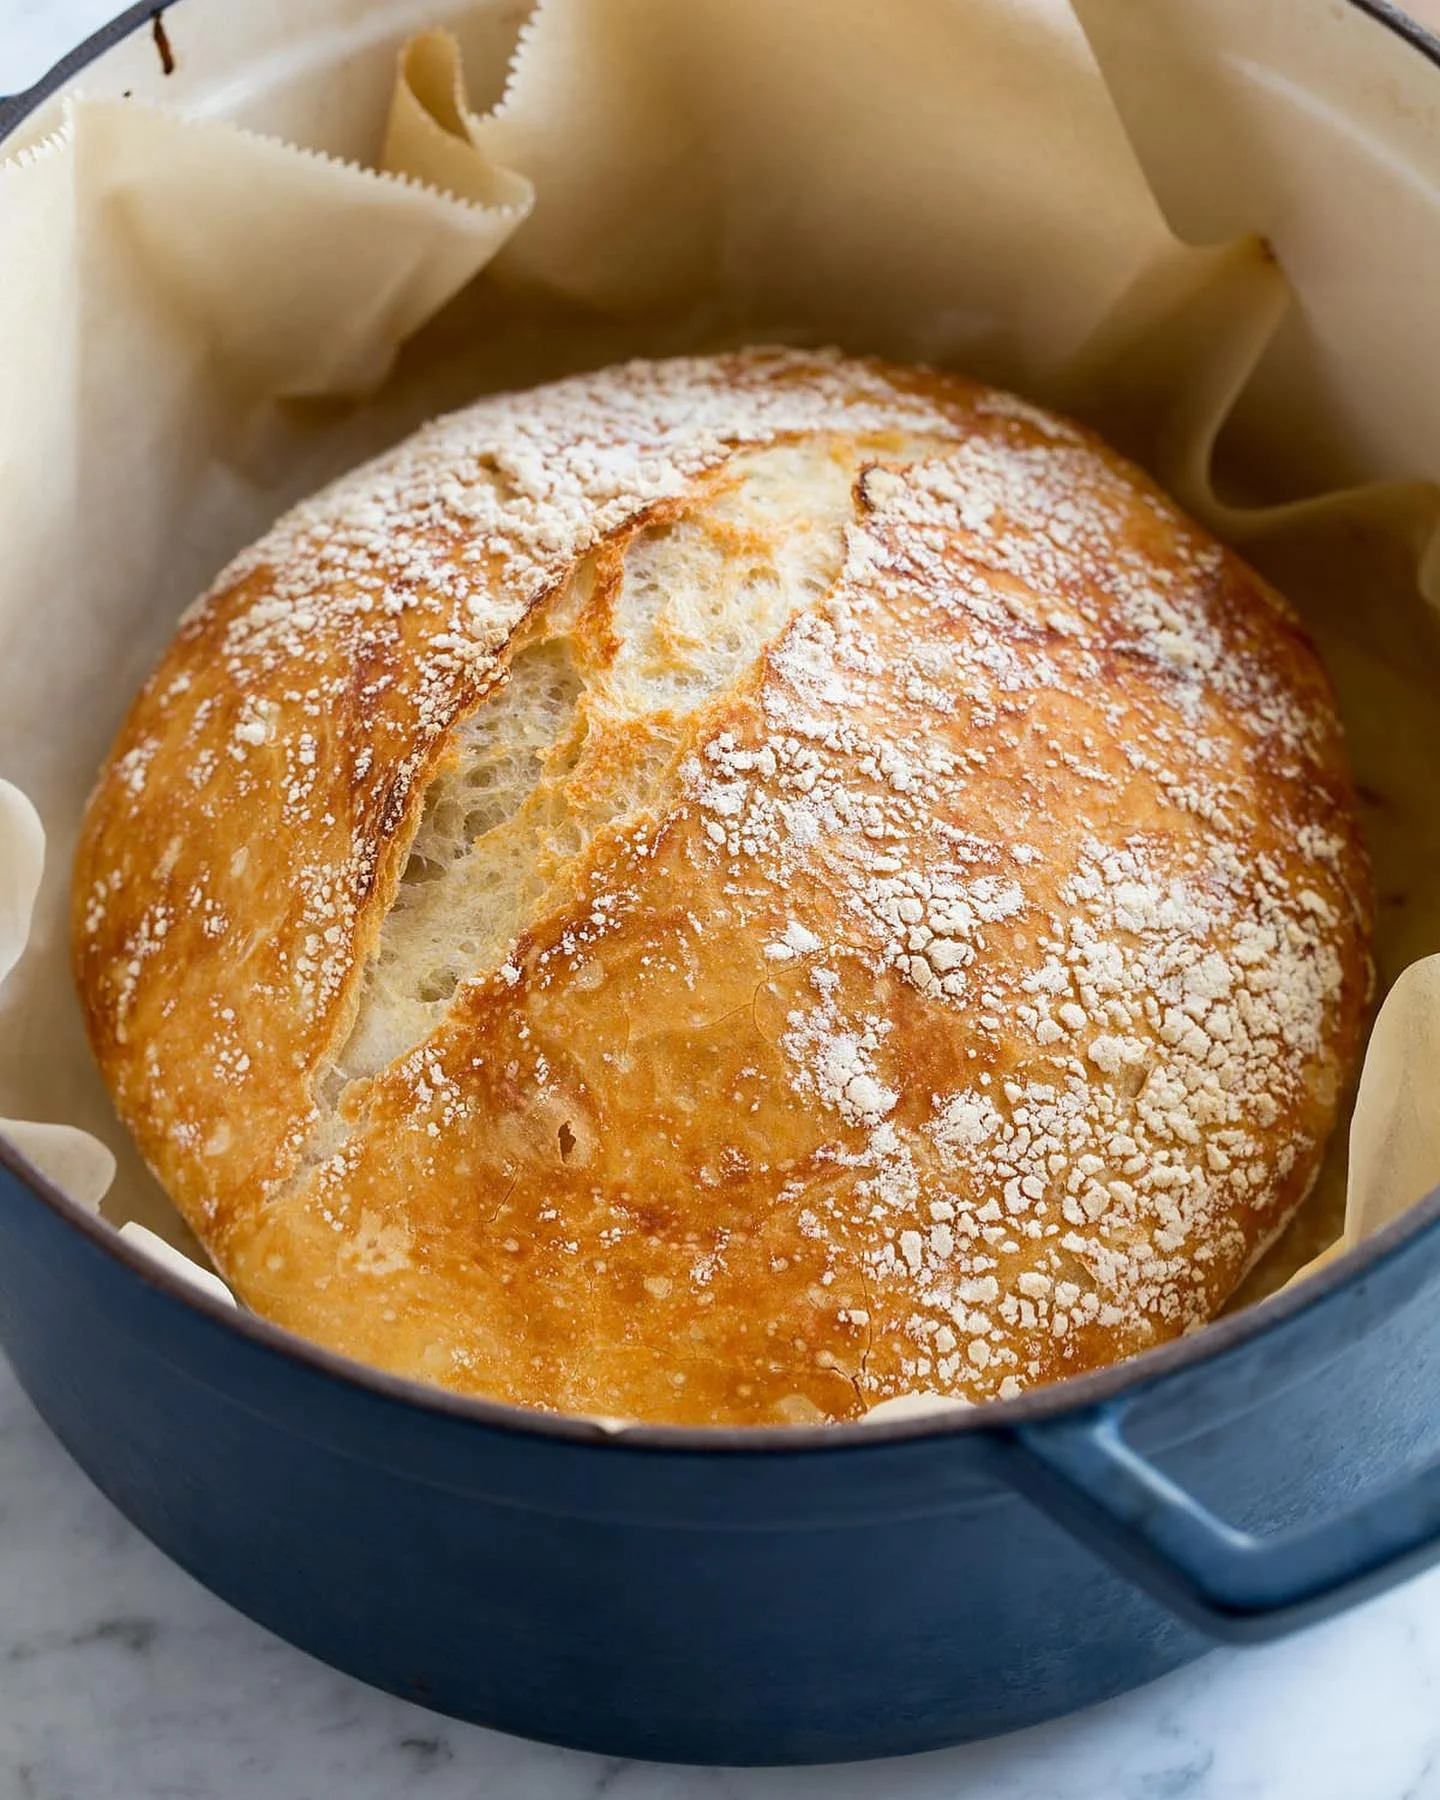
There is a particular kind of quiet satisfaction that comes from pulling a golden loaf out of your own oven. No preservatives, no mystery ingredients, just flour, water, yeast, and time working together the way they have for thousands of years. This recipe strips away the intimidation factor that keeps so many home cooks from ever attempting bread.
I developed this method after years of testing dozens of variations, chasing that perfect balance of a crackling crust and a soft, pillowy interior. What I landed on is a foolproof formula that requires no stand mixer, no bread machine, and no previous baking experience.
Whether you are baking for a Sunday family dinner or simply craving the smell of fresh bread filling your kitchen, this recipe delivers consistent results every single time. It is forgiving enough for beginners yet satisfying enough that experienced bakers will want to keep it in rotation.
By the end of this article, you will have a complete, tested roadmap: ingredients, technique, timing, storage, and troubleshooting. Let’s get your hands into some dough.
Ingredients You’ll Need
Great bread starts long before the oven, and it begins right here on your counter with a short list of honest, humble ingredients that have no business tasting this good together.
One of the things I love about this recipe is that it uses simple pantry ingredients. You probably already have most of them in your kitchen.
Base Ingredients
- 4 cups all-purpose flour
- 2 teaspoons active dry yeast
- 1 ½ teaspoons salt
- 1 ½ cups warm water
- 1 tablespoon sugar
- 2 tablespoons olive oil
Optional Add-ins
- 1 tablespoon dried rosemary
- 2 tablespoons grated parmesan cheese
- ¼ cup chopped sun-dried tomatoes
- 1 teaspoon garlic powder
- 2 tablespoons sesame or poppy seeds
- ¼ cup rolled oats for topping
Step-by-Step Instructions
Activate the Yeast
In a small bowl, combine the warm water with sugar, then sprinkle the yeast on top. Let it sit undisturbed for about 8 to 10 minutes. You are looking for a foamy, bubbly surface, which confirms the yeast is alive and active. If nothing happens after ten minutes, your yeast is likely expired, and you should start again with a fresh packet before wasting your flour.
Mix the Dough
In a large mixing bowl, whisk together the flour and salt. Create a well in the center and pour in the activated yeast mixture along with the olive oil. Stir with a wooden spoon or your hand until a shaggy, rough dough forms. It should feel slightly sticky but hold together. Avoid adding extra flour too quickly, since the dough will firm up naturally as you knead it.
Knead Until Smooth
Turn the dough out onto a lightly floured surface and knead for 8 to 10 minutes. Use the heel of your hand to push the dough away, then fold it back over itself, rotating a quarter turn each time. The dough is ready when it becomes smooth, elastic, and springs back slowly when poked. This step builds the gluten structure that gives bread its chewy, satisfying texture.
First Rise
Shape the dough into a ball and place it in a lightly oiled bowl, turning once to coat the surface. Cover with a damp towel or plastic wrap and set it in a warm, draft-free spot. Let it rise for about 1 to 1.5 hours, or until doubled in size. Resist the urge to rush this stage with excess heat, as a slow, natural rise develops deeper flavor.
Shape the Loaf
Gently punch down the risen dough to release trapped air. Turn it onto a floured surface and shape it into a tight oval or round loaf, tucking the edges underneath as you go. Place the shaped dough onto a parchment-lined baking sheet or into a greased loaf pan. This step determines your final crumb structure, so handle the dough firmly but without deflating it completely.
Second Rise and Bake
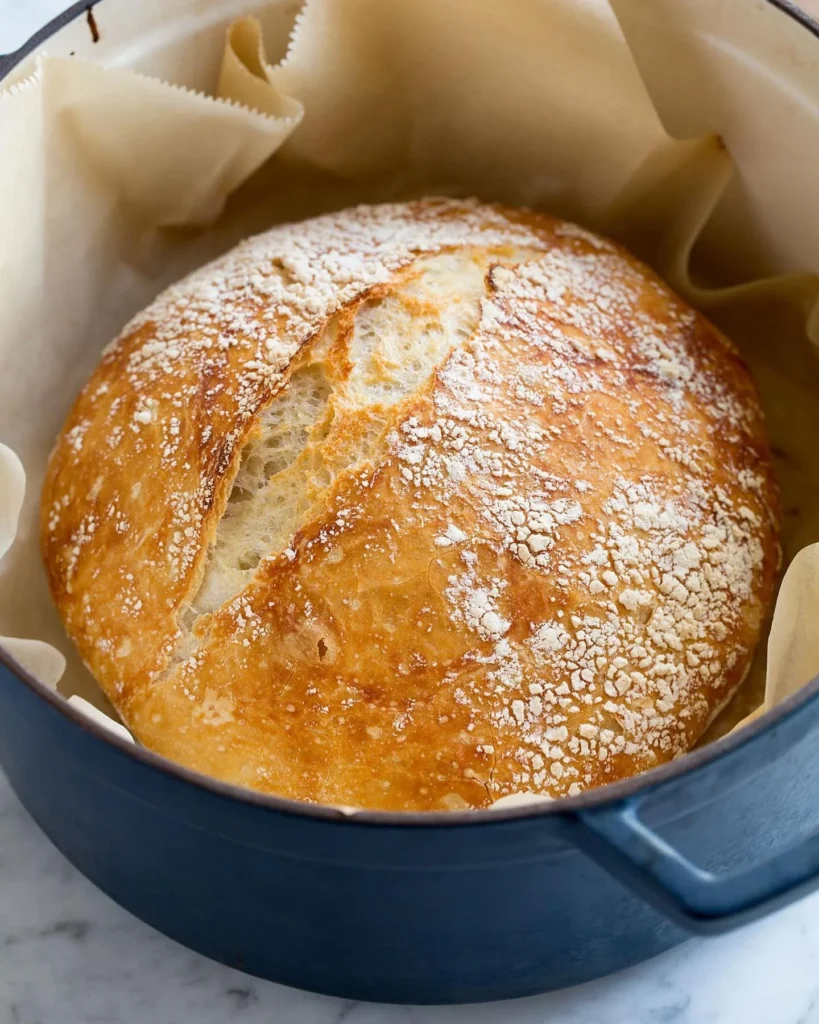
Cover the shaped loaf and let it rise again for 30 to 45 minutes, until noticeably puffy. Preheat your oven to 425°F during this time. Score the top with a sharp knife, then bake for 25 to 30 minutes, until deeply golden and hollow-sounding when tapped. Cool on a wire rack for at least 20 minutes before slicing to let the crumb fully set.
Cook Time
Total
Approximately 2 hours 45 minutes, including rising time
Prep
20 minutes, plus 1.5 to 2 hours for rising
Bake
25 to 30 minutes at 425°F
Servings
This recipe makes approximately one standard loaf, yielding about 12 generous slices. It is ideally portioned for a family breakfast, a weeknight dinner side, or a batch of sandwiches that will carry you through the workweek without needing store-bought bread.
If you are hosting guests or meal-prepping for a larger household, the recipe doubles beautifully. Simply use two separate bowls for kneading rather than combining everything into one, which keeps the gluten development even and prevents overworking the dough.
For smaller households, this loaf freezes exceptionally well in individual slices, so nothing goes to waste. You can portion out exactly what you need and thaw slices on demand, making this a genuinely practical recipe rather than a one-time weekend project.
Common Mistakes in This Recipe
The most frequent mistake is using water that is too hot when activating the yeast. Anything above 115°F can kill the yeast instantly, leaving you with a dense, flat loaf and no clear explanation why. Many first-time bakers also skip the foam test entirely, assuming any yeast will work regardless of freshness or water temperature, which sets the whole recipe up to fail before it even begins.
Another common issue is under-kneading the dough, which results in weak gluten structure and a crumbly, dense texture rather than that classic chewy pull. Bakers often stop kneading too early because the dough feels tiring to work with.
Rushing the rise time is equally problematic. Placing dough in a hot oven or near direct heat to speed things up often kills the yeast or creates uneven texture.
Finally, slicing the bread too soon while it is still hot causes the crumb to turn gummy and compress unevenly, ruining the texture you worked hard to build.
Solutions to Common Mistakes
Always test your water temperature before adding yeast; it should feel warm to the touch, similar to bathwater, roughly between 100°F and 110°F. Using a kitchen thermometer removes all guesswork and guarantees consistent results every time you bake.
To fix under-kneading, set a timer for a full 8 to 10 minutes and knead continuously, checking for smoothness and elasticity rather than judging by feel alone. The windowpane test, where a small piece of dough stretches thin without tearing, is a reliable indicator of readiness.
For rising issues, choose a naturally warm spot like near a sunny window or inside a turned-off oven with the light on, rather than applying direct heat.
Let the loaf rest fully on a wire rack for at least 20 minutes before slicing to allow the interior structure to set properly.
Nutritional Information (approx. per serving)
- Calories: 140 kcal
- Carbohydrates: 27g
- Protein: 4g
- Fat: 2g
- Fiber: 1g
- Sodium: 220mg
Homemade bread offers a distinct nutritional advantage over most store-bought loaves, primarily because you control exactly what goes into it. There are no preservatives, stabilizers, or added sugars beyond the small amount needed to activate the yeast, making each slice a cleaner, more honest source of carbohydrates for energy.
The fermentation process itself also plays a meaningful role. As the dough rises, natural fermentation begins breaking down some of the starches and gluten, which can make the final bread easier to digest for many people compared to mass-produced alternatives.
This bread pairs naturally with nutrient-dense toppings like avocado, eggs, or olive oil, allowing you to build genuinely balanced meals around it rather than empty calories.
Portion control is also simpler with a homemade loaf, since you know exactly how many slices you are getting and can adjust thickness to fit your dietary goals with far more precision than a packaged product allows.
Storage Instructions
Once fully cooled, store the loaf at room temperature in a paper bag or bread box for up to 3 days. Avoid plastic bags at room temperature, as trapped moisture softens the crust and encourages mold to develop faster than you would expect.
For slightly longer storage, wrap the cooled loaf tightly in plastic wrap followed by aluminum foil and refrigerate for up to one week. Keep in mind refrigeration can slightly dry out the crumb, so toasting refrigerated slices before serving restores much of the original texture.
For long-term storage, slice the entire loaf before freezing and place parchment paper between slices. Store in a freezer-safe bag with the air pressed out, and it will keep well for up to 3 months without significant quality loss.
When ready to eat frozen slices, thaw at room temperature for about 20 minutes or toast directly from frozen for a quicker option that still delivers a fresh-baked texture and aroma.
Suggestions
This bread shines as a base for open-faced sandwiches, particularly topped with smashed avocado, a fried egg, and a pinch of flaky salt for a satisfying breakfast option. The sturdy crumb holds up well without becoming soggy, even under juicier toppings.
For a savory dinner pairing, serve thick slices alongside soups, stews, or a simple olive oil and balsamic dip. The crackling crust provides excellent contrast against warm, brothy dishes and adds textural interest to the meal.
Leftover slices make outstanding French toast or bread pudding, transforming day-old bread into an entirely new dish rather than letting it go to waste. This is a practical way to stretch the recipe across multiple meals throughout the week.
If you enjoy experimenting, try folding in the optional herb or cheese add-ins for a flavored variation that pairs beautifully with pasta dinners or charcuterie boards for casual entertaining.
Seasonal Relevance
This bread is genuinely a year-round staple, but it takes on special meaning during the colder months when a warm oven and the smell of baking bread bring welcome comfort to a kitchen. Winter gatherings and holiday dinners benefit enormously from a fresh, homemade loaf on the table.
In spring and summer, this bread pairs wonderfully with lighter fare like fresh salads, grilled vegetables, and seasonal fruit spreads, making it just as relevant when the weather warms up and appetites shift toward brighter flavors.
During harvest season, the optional herb and cheese variations complement classic autumn dishes like squash soups and roasted root vegetables particularly well, adding a rustic, homemade element to seasonal menus.
Regardless of season, this recipe adapts easily to whatever is on your table, making it a dependable choice rather than something reserved for one specific time of year.
Final Words
Baking your own bread is one of the most rewarding kitchen skills you can develop, and this recipe proves it does not require professional training or specialized equipment to get genuinely excellent results. With just a handful of pantry staples and a little patience, you can produce bakery-quality loaves at home.
What makes this recipe particularly valuable is its consistency. Once you understand the fundamentals covered here, from yeast activation to proper kneading and rise times, you will be equipped to troubleshoot and adjust with confidence rather than guessing.
I encourage you to treat your first attempt as a learning experience rather than expecting perfection immediately. Bread baking rewards repetition, and each loaf teaches you something new about timing, texture, and technique.
Keep this recipe on hand as your reliable go-to, and do not be surprised when store-bought bread starts to feel unnecessary once you experience the difference homemade truly makes.
Frequently Asked Questions
Can I substitute whole wheat flour for all-purpose flour in this recipe?
Yes, but expect a denser loaf since whole wheat flour absorbs more liquid and has less gluten strength. Try substituting up to half the flour with whole wheat while keeping the rest all-purpose for better rise and texture.
Why did my bread turn out dense instead of light and airy?
Dense bread usually results from insufficient kneading, expired yeast, or a rushed rise time. Make sure your yeast is fresh, knead until the dough passes the windowpane test, and allow full doubling during both rise stages.
Is it necessary to score the top of the loaf before baking?
Scoring is not strictly required, but it allows controlled expansion during baking, preventing random tearing on the crust. A simple straight or crosshatch cut with a sharp blade gives a more professional, evenly shaped final loaf.