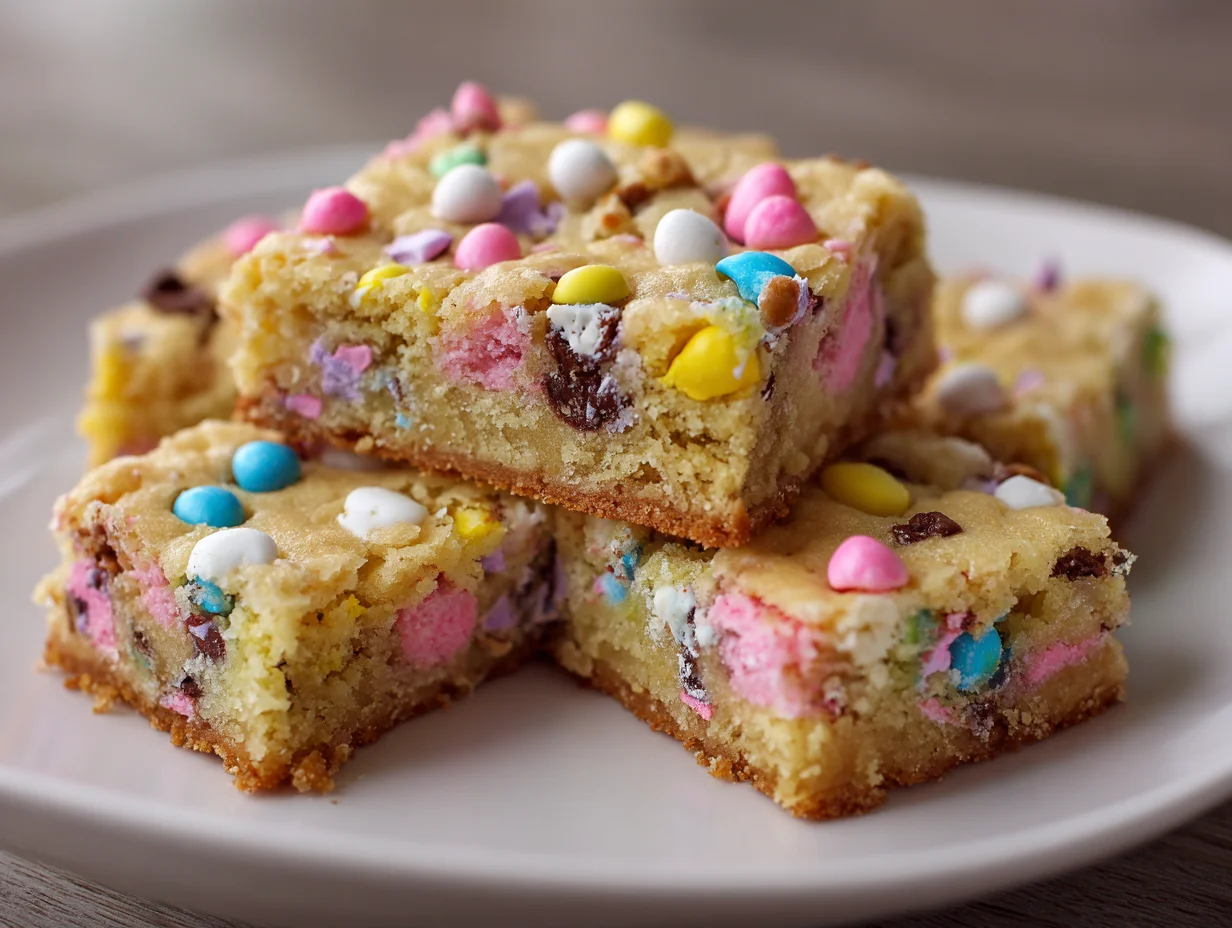
There’s something special about baking during Easter season, especially when the kitchen fills with the warm aroma of butter, vanilla, and melted chocolate. I created these Easter cookie bars for busy home bakers who want a dessert that feels festive, tastes bakery quality, and comes together without complicated steps.
Over the years, I’ve tested countless holiday dessert recipes, but these cookie bars remain one of my personal favorites because they consistently deliver soft centers, chewy edges, and colorful presentation in every batch.
Whether I’m baking for family brunches, spring gatherings, or casual weekend treats, this recipe never disappoints. The best part is how simple the process feels while still producing dessert bars that look professionally baked. If you enjoy easy Easter baking recipes with rich flavor and reliable texture, these cookie bars deserve a place in your seasonal dessert collection.
? If you love cookie-style desserts, you’ll also enjoy our Soft Sugar Cookie Bars Recipe.
The Baking Slip Up I Learned the Hard Way
When I first started making cookie bars, I made the same mistake many home bakers still make today: overbaking them. I used to wait until the center looked completely firm before removing the pan from the oven, thinking that meant the bars were fully baked.
Instead, I ended up with dry, crumbly bars that lacked the soft bakery style texture I wanted. Another issue I discovered was overmixing the dough after adding flour, which created dense and heavy bars instead of tender ones. I also learned that cold butter prevents proper creaming with sugar, affecting both texture and flavor.
Even measuring flour incorrectly can completely change the final result. After years of testing and adjusting, I realized that small baking habits have a major impact on achieving soft, chewy, and flavorful Easter cookie bars.
My Proven Method for Soft and Chewy Cookie Bars
Now, whenever I bake these Easter cookie bars, I remove them from the oven when the edges are lightly golden but the center still looks slightly soft. That small adjustment completely changed the texture and gave me the chewy consistency I wanted.
I always use room temperature butter because it blends smoothly and creates a lighter dough. Another technique I personally rely on is mixing the flour only until combined to avoid dense bars. Instead of scooping flour directly from the bag, I spoon it into the measuring cup and level it gently for accurate measurement.
I also line the baking pan with parchment paper because it prevents sticking and keeps the bottoms from overbrowning. These simple but important baking methods consistently help me create cookie bars that stay soft, rich, and bakery quality every single time.
Ingredients List
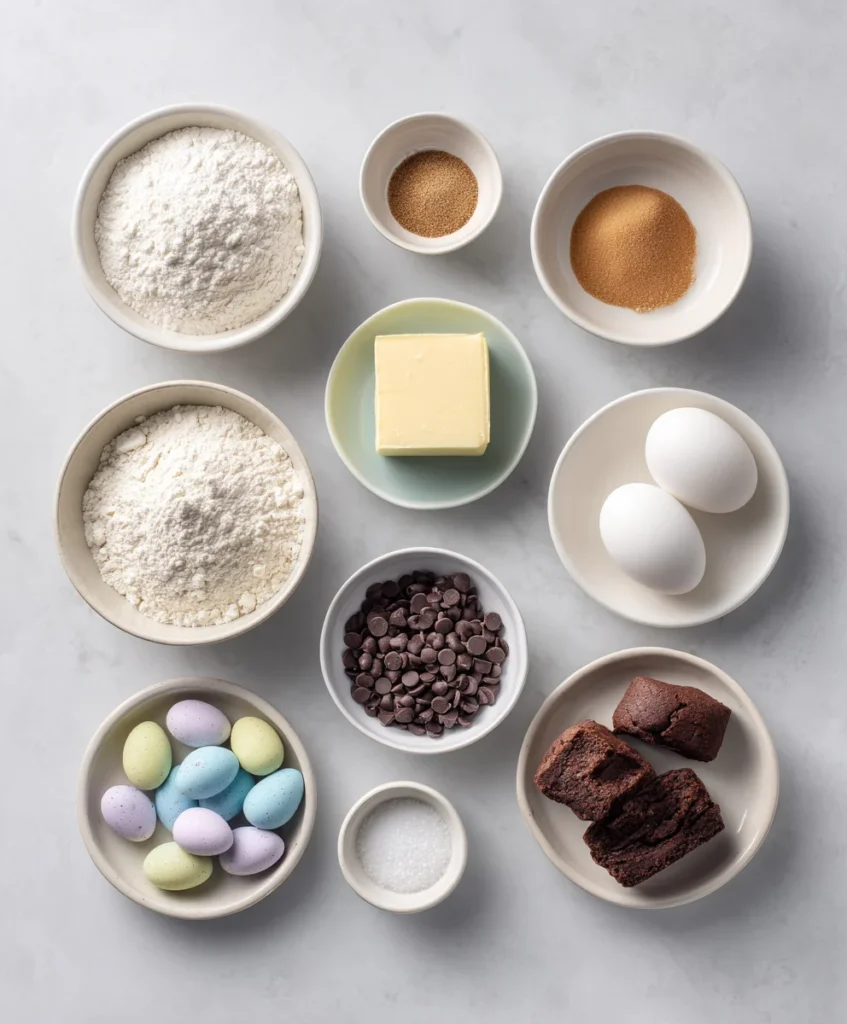
Base Ingredients:
- 2 ½ cups all purpose flour
- 1 teaspoon baking soda
- ½ teaspoon salt
- 1 cup unsalted butter, softened
- 1 cup brown sugar
- ½ cup granulated sugar
- 2 large eggs
- 2 teaspoons vanilla extract
- 1 cup chocolate chips
- 1 cup pastel Easter candies
- Non stick baking spray
Optional Add-ins:
- White chocolate chips
- Crushed mini eggs
- Rainbow sprinkles
- Chopped pecans
- Coconut flakes
- Caramel bits
- Peanut butter chips
- Sea salt flakes
Step-by-Step Instructions
How I Prepare the Baking Pan
I always begin by preheating the oven to 350 degrees Fahrenheit and preparing a 9×13 inch baking pan with parchment paper. Over time, I’ve learned that this simple step makes removing the cookie bars much easier and helps maintain clean edges after slicing. I prefer leaving extra parchment hanging over the sides because it allows me to lift the bars directly from the pan once cooled.
Before mixing anything, I measure and organize every ingredient because baking becomes smoother and more accurate when everything is ready beforehand. I also make sure my butter and eggs are at room temperature since cold ingredients never blend as evenly. From my experience, preparation may seem minor, but it plays a huge role in achieving soft texture, even baking, and consistent bakery style results every single time.
How I Make the Cookie Dough
To make the dough, I first whisk together the flour, baking soda, and salt in a separate bowl so everything distributes evenly. In another large bowl, I beat softened butter with brown sugar and granulated sugar until the mixture becomes light and fluffy. This is one of the most important stages because proper creaming creates the soft texture I love in cookie bars.
I then add the eggs one at a time, followed by vanilla extract for deeper flavor. Once the wet ingredients are smooth, I slowly mix in the dry ingredients on low speed. I never overmix at this stage because it can make the bars dense. Finally, I gently fold in chocolate chips and pastel Easter candies until evenly distributed throughout the thick and colorful dough mixture.
How I Spread and Decorate the Batter
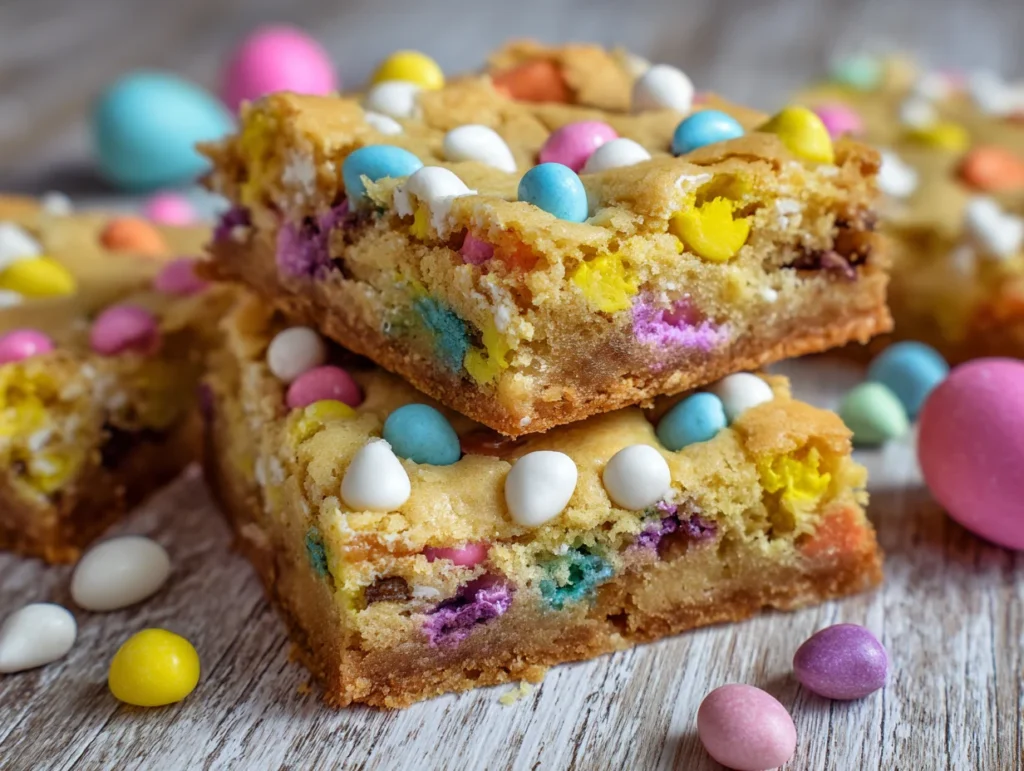
After preparing the dough, I spread it evenly into the lined baking pan using a spatula. I’ve found that uneven batter thickness often causes some areas to bake faster than others, so I always take a few extra moments to level the surface carefully. For a more bakery style appearance, I press additional Easter candies and chocolate chips on top before baking.
This step not only improves presentation but also creates colorful texture throughout the bars after slicing. Sometimes I finish the top with a light sprinkle of flaky sea salt because it balances the sweetness beautifully. Presentation matters just as much as flavor, especially for holiday desserts. I like making these bars look festive and inviting because a visually appealing dessert always stands out more on Easter tables and family dessert platters.
? For an easy no-bake option, don’t miss our Easy Easter Candy Recipe for Home.
How I Bake Them Perfectly Every Time
I bake the cookie bars on the center oven rack for about 24 to 28 minutes, but I rely more on appearance than exact timing. Through experience, I’ve learned that removing them too late dries out the texture very quickly. I watch for lightly golden edges while the center still looks slightly soft because the bars continue baking from residual heat after leaving the oven.
When a toothpick comes out with a few moist crumbs instead of wet batter, I know they are ready. I always let the bars cool completely inside the pan before slicing because warm bars can fall apart easily. Patience during cooling makes a huge difference in texture and structure. This method consistently gives me soft, chewy cookie bars with clean slices and rich buttery flavor every time.
How I Slice and Serve Them
Once the bars cool completely, I carefully lift them out using the parchment paper and place them on a cutting board. I use a sharp knife for slicing and wipe the blade clean between cuts to create neat bakery style squares. Personally, I love serving these Easter cookie bars with coffee or cold milk during spring gatherings because the flavors pair perfectly together.
If I’m preparing them for guests or dessert platters, I arrange them on a serving tray with extra pastel candies for a festive touch. One reason I continue making this recipe every Easter is how easy the bars are to transport and serve without losing their texture. They stay soft for days, making them ideal for parties, gifting, holiday brunches, and make ahead dessert preparation throughout the busy spring season.
Cook Time
Total: 40 minutes
Prep: 12 minutes
Bake: 28 minutes
Servings
This recipe usually gives me around 16 generous cookie bars, although I sometimes cut smaller squares when serving larger groups during Easter gatherings. I personally love this recipe because it feeds multiple people without requiring complicated preparation or individual cookie scooping. The bars are rich, buttery, and packed with chocolate and candies, so even smaller servings feel satisfying.
Whenever I prepare them for parties or family brunches, they disappear quickly because both children and adults enjoy the soft texture and festive appearance. Another reason I often return to this recipe is how well the bars hold their shape during serving and transport. Whether I’m making them for bake sales, classroom events, or casual spring weekends at home, the serving size works perfectly for sharing while still feeling indulgent and homemade.
Nutritional Information (approx. per serving)
- Calories: 320
- Carbohydrates: 42g
- Protein: 4g
- Fat: 15g
- Saturated Fat: 8g
- Sugar: 27g
- Fiber: 2g
- Sodium: 180mg
I believe desserts should feel enjoyable and comforting, especially during holidays and family celebrations. These Easter cookie bars offer rich flavor and satisfying texture while still being easy to portion and share. Since they are homemade, I can control ingredient quality better than many packaged desserts filled with preservatives.
Eggs provide structure and a small amount of protein, while optional nuts can add texture and healthy fats. I also sometimes use darker chocolate chips for slightly deeper flavor and balanced sweetness. One thing I appreciate about cookie bars is that they naturally encourage portion control because they are sliced individually before serving. When enjoyed in moderation, these festive dessert bars become a fun seasonal treat that combines homemade comfort, colorful presentation, and classic bakery style flavor for Easter celebrations.
? If you like creative seasonal treats, you’ll enjoy our Chocolate Easter Eggs Recipe.
Storage Instructions
Whenever I store these Easter cookie bars, I always wait until they cool completely because trapping heat creates moisture and ruins the texture. I place them in an airtight container with parchment paper between layers so the bars stay soft without sticking together. In my kitchen, they usually remain fresh at room temperature for about four days while maintaining their chewy consistency.
If I need to keep them longer, I refrigerate them for up to one week, although I prefer bringing them back to room temperature before serving because the texture becomes softer again. I also freeze them regularly for make ahead baking during busy holidays. I wrap each layer tightly before freezing, and they thaw beautifully without losing flavor or texture. Proper storage truly helps preserve freshness, softness, and overall bakery quality for several days.
Suggestions
One of my favorite ways to customize these Easter cookie bars is by combining different chocolates for extra depth of flavor. Sometimes I use white chocolate chips with semi sweet chocolate to create a richer and more balanced sweetness. If I want more crunch, I add crushed mini eggs or chopped pecans directly into the batter. For spring gatherings, I often decorate the tops with extra pastel candies because colorful presentation always makes the dessert table feel more festive.
I also recommend using flaky sea salt immediately after baking if you enjoy sweet and salty flavor combinations. When preparing these bars for photography or cleaner serving presentation, I chill them briefly before slicing. Over the years, I’ve learned that small presentation details can make homemade desserts feel even more professional, inviting, and bakery inspired for guests.
Seasonal Relevance
I always look forward to making these cookie bars during Easter because they perfectly capture the cheerful atmosphere of spring baking. The pastel candies, soft texture, and buttery flavor make them ideal for holiday dessert tables and family brunches. During Easter season, many people prefer desserts that feel festive without requiring complicated decorating techniques, and that’s exactly why I continue returning to this recipe every year.
The one pan method keeps preparation simple while still delivering impressive results that look beautiful when served. I’ve also noticed that colorful cookie bar recipes become especially popular during spring because they photograph well and appeal to both children and adults. Whether served at gatherings, school celebrations, or weekend family dinners, these Easter cookie bars bring warmth, convenience, and homemade comfort to seasonal baking traditions and spring holiday celebrations.
As someone who has tested countless dessert recipes over the years, I can confidently say these Easter cookie bars remain one of the easiest and most reliable holiday treats I make every spring. They combine everything I enjoy in a homemade dessert: soft texture, rich buttery flavor, colorful presentation, and simple preparation. I appreciate how versatile the recipe feels because it works equally well for family gatherings, bake sales, casual weekends, and festive Easter brunches.
The bars stay chewy for days, travel well, and can easily be customized with different candies or chocolate varieties depending on personal preference. Most importantly, they create the kind of comforting homemade experience that people genuinely remember and request again. If you want an Easter dessert recipe that feels both practical and bakery quality, these cookie bars are absolutely worth baking this season.
? For another fun holiday bake, try our Easter Cake Recipe Soft and Festive.
Frequently asked questions
Can I use salted butter instead of unsalted butter?
Yes, I have used salted butter before when unsalted butter was unavailable. If you choose salted butter, simply reduce the added salt in the recipe slightly to maintain balanced flavor. The texture remains soft and chewy, although unsalted butter still provides more control over the final taste and overall sweetness.
Which candies work best besides Easter chocolates?
I often experiment with different mix ins depending on the season or occasion. Peanut butter candies, caramel bits, mini marshmallows, and colorful chocolate pieces all work beautifully in this recipe. The key is avoiding overly large candies because heavy mix ins can affect baking consistency and make slicing more difficult afterward.
Can I bake these cookie bars in advance for parties?
Absolutely, and I actually prefer making them a day ahead for gatherings because the flavor develops even more after resting overnight. I store them in an airtight container at room temperature, which keeps them soft and chewy. This also saves preparation time during busy Easter hosting and holiday meal planning.
Why do my cookie bars become too hard after cooling?
From my experience, this usually happens because the bars stayed in the oven too long or too much flour was added accidentally. I always remove the pan when the center still looks slightly soft. Measuring flour carefully and avoiding overbaking helps maintain the soft bakery style texture readers usually want most.
Can I freeze leftover Easter cookie bars?
Yes, I freeze them regularly for future desserts and quick holiday treats. Once cooled, I wrap the bars tightly and place them in freezer safe containers. They stay fresh for about two months. Before serving, I let them thaw naturally at room temperature so the texture stays soft and enjoyable again.