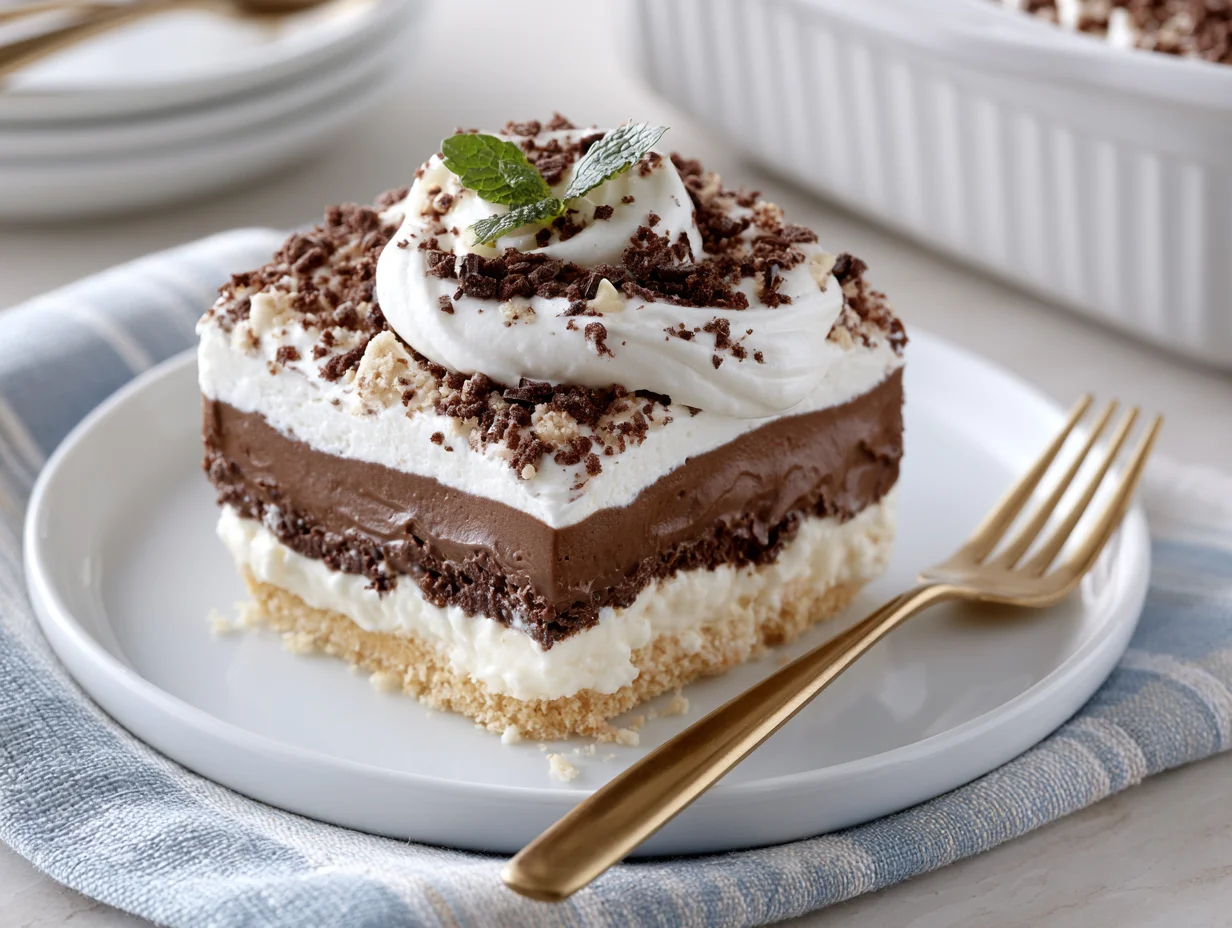
There are desserts you make to fill a table, and then there are desserts you make to stop a conversation. This is one of the latter. The Layered Chocolate Delight is the kind of recipe that earns you a reputation — the one people talk about on the drive home and text you about the next morning asking for the recipe.
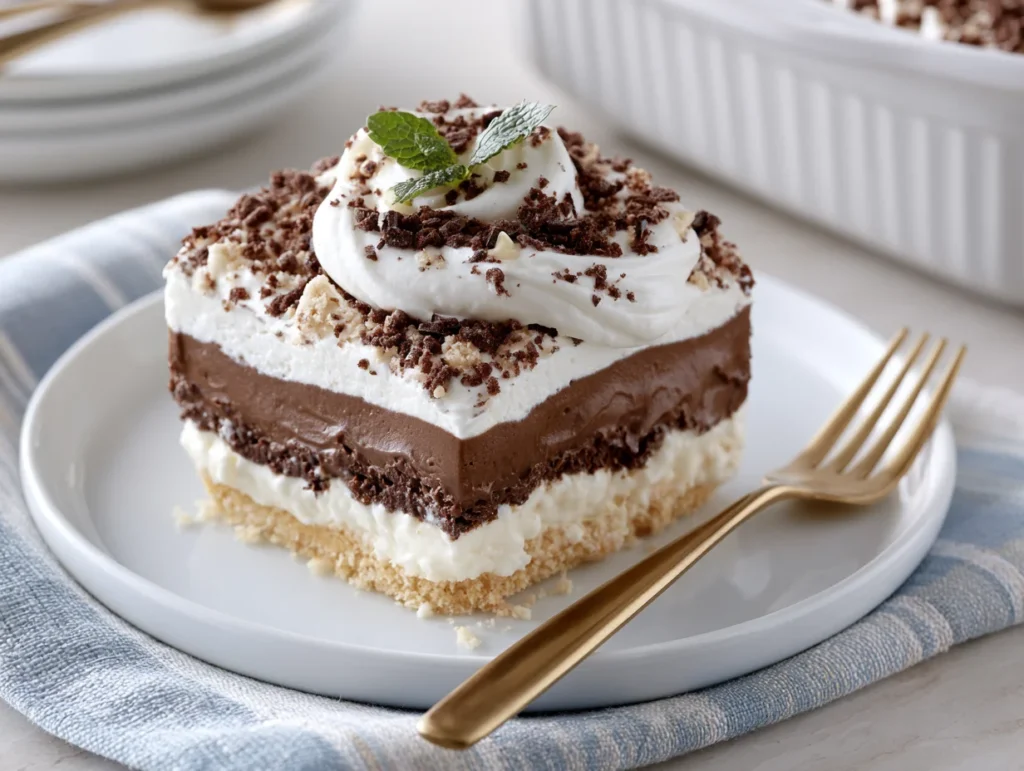
What makes this dessert so remarkable is not just its taste, but its architecture. Each layer brings something different to the plate: a buttery, crumbly base; a silky cream cheese cloud; a rich, velvety chocolate pudding; and a crowned finish of whipped topping that ties it all together. It is indulgent without being overwhelming, elegant without being complicated.
This is also the kind of recipe that works across every occasion. Potlucks, holiday tables, birthday gatherings, or a quiet Sunday when you simply deserve something extraordinary — this dessert never needs an excuse. It travels well, holds beautifully in the refrigerator, and manages to look stunning with minimal effort.
If you have been searching for a chocolate dessert that truly delivers on every level — texture, depth of flavor, and visual appeal — you have just found it. Let this be your signature dish.
Ingredients You’ll Need
Every great dessert starts before the oven even heats up — it starts at the ingredient list, and this one is going to make you very happy.
One of the things I love about this recipe is that it uses simple pantry ingredients. You probably already have most of them in your kitchen.
Base Ingredients:
- 1 cup all-purpose flour
- 1/2 cup unsalted butter, softened
- 1/2 cup finely chopped pecans or walnuts
- 8 oz cream cheese, softened
- 1 cup powdered sugar
- 2 cups whipped topping (such as Cool Whip), divided
- 2 packages (3.9 oz each) instant chocolate pudding mix
- 3 cups cold whole milk
- 1 tsp pure vanilla extract
- 1/4 tsp fine sea salt
Optional Add-ins:
- 1/2 cup mini chocolate chips, for topping
- 2 tbsp cocoa powder, for dusting the top layer
- 1/4 cup caramel drizzle, for added richness
- 1/2 tsp espresso powder, stirred into the pudding mix for a mocha depth
- 1/4 cup crushed chocolate sandwich cookies, for a crunchier base layer
Step-by-Step Instructions
Step 1: Prepare the Crust
Preheat your oven to 350°F (175°C). In a medium mixing bowl, combine the all-purpose flour, softened butter, and chopped pecans. Use clean hands or a fork to work the mixture together until it resembles coarse, sandy crumbs that hold together when pressed. Press the mixture firmly and evenly into the bottom of a 9×13-inch baking dish. Bake for 18 to 20 minutes or until the edges are lightly golden. Remove from the oven and allow the crust to cool completely before adding any layers. A warm crust will melt your next layer — patience here is everything.
Step 2: Make the Cream Cheese Layer
In a large bowl, beat the softened cream cheese with an electric mixer on medium speed until completely smooth and free of lumps — this usually takes about 2 minutes. Add the powdered sugar and vanilla extract, then continue beating until light and fluffy, approximately another 90 seconds. Gently fold in 1 cup of whipped topping using a rubber spatula, using slow, deliberate strokes to preserve the airy texture. Spread this mixture evenly over your fully cooled crust. Smooth the top with an offset spatula for a clean, polished finish before moving on to the next layer.
Step 3: Prepare the Chocolate Pudding Layer
In a separate large bowl, whisk together the instant chocolate pudding mixes and cold whole milk. Whisk vigorously for 2 full minutes until the pudding begins to thicken noticeably — do not rush this step. If using espresso powder for a mocha variation, stir it in during this stage. Let the pudding rest for 3 to 5 minutes so it firms up slightly before spreading. Pour and gently spread the chocolate pudding over the cream cheese layer, working carefully from the center outward to avoid disturbing the layer below. Use a light hand and an offset spatula for the cleanest results.
Step 4: Add the Whipped Topping and Finish
Spread the remaining 1 cup of whipped topping evenly over the set chocolate pudding layer. This final layer should be applied gently and smoothed into an even, cloud-like surface. Once complete, add your desired toppings — a dusting of cocoa powder, a scattering of mini chocolate chips, a caramel drizzle, or crushed chocolate cookies all work beautifully here. Cover the dish tightly with plastic wrap or an airtight lid and refrigerate for a minimum of 4 hours, though overnight chilling produces the best-defined layers and deepest flavor.
Step 5: Slice and Serve
When ready to serve, use a sharp knife dipped in warm water and wiped clean between each cut for the cleanest slices. Lift each portion with a flat spatula, starting from a corner piece to keep the layers intact and visible. Serve chilled directly from the refrigerator. If you are plating for guests, garnish each slice individually with a small curl of chocolate shavings or a light cocoa dusting for a polished, restaurant-quality presentation. This dessert does not need anything extra — but a little finishing touch never hurts.
Cook Time
Total:
4 hours 30 minutes (including chilling time)
Prep:
20 minutes
Bake:
18 to 20 minutes (crust only), plus 4 hours minimum refrigeration
Servings
This recipe is generously sized and designed to feed a crowd without compromise. Made in a standard 9×13-inch baking dish, it serves approximately 12 to 15 people when cut into reasonably sized squares. For larger gatherings or when serving alongside other desserts, you can stretch it comfortably to 18 portions.
Makes approximately 12 to 15 servings, depending on cut size.
Each serving is rich and satisfying, so smaller portions tend to go a long way. If you are serving this at a party or event, expect it to disappear quickly — it consistently outperforms more elaborate desserts on the table.
Common Mistakes in This Recipe
One of the most frequent errors bakers make with this recipe is skipping the cooling time for the crust. Placing the cream cheese layer over a warm base causes it to soften and slide, which ruins the distinct separation between layers. The crust must be fully cooled to room temperature before anything goes on top of it.
Another common pitfall is using warm or softened cream cheese straight from the microwave rather than naturally softened at room temperature. Over-softened or partially melted cream cheese results in a layer that is too loose to hold its shape, leading to layers that bleed into one another after chilling.
Many home bakers also under-whisk the pudding. Instant pudding requires a full two minutes of vigorous whisking to activate the setting agents properly. Under-mixed pudding remains thin and never firms up correctly, which causes the dessert to collapse when sliced.
Finally, insufficient chilling time is one of the biggest mistakes. Many people try to cut and serve after just an hour or two in the refrigerator. The layers need at least 4 full hours — and ideally overnight — to set firmly enough to hold their structure when sliced and lifted.
Solutions to Common Mistakes
The fix for an under-cooled crust is simple: plan ahead. After baking, set the crust aside for at least 45 minutes at room temperature before beginning the next layer. If you are in a hurry, place the baking dish on a wire rack to help it cool faster and more evenly.
For the cream cheese layer, allow the block to sit at room temperature for 30 to 45 minutes before beating. It should feel soft to the press but not greasy or melted. Beat it on its own first before adding sugar — this ensures any lumps are gone before you build the layer.
To solve the pudding issue, set a timer when you start whisking and commit to the full two minutes without stopping. The pudding should visibly thicken and leave a slight trail when you lift the whisk. If it still seems thin after two minutes, whisk for an additional 30 seconds and let it rest for 5 minutes before spreading.
For chilling, the simplest solution is to make this dessert the night before. Cover and refrigerate overnight and you will be rewarded with perfectly set layers that slice cleanly and hold their shape beautifully on the plate.
Nutritional Information (approx. per serving)
- Calories: 320 kcal
- Total Fat: 18g
- Saturated Fat: 10g
- Cholesterol: 40mg
- Sodium: 290mg
- Total Carbohydrates: 36g
- Dietary Fiber: 1g
- Sugars: 24g
- Protein: 4g
- Calcium: 90mg
- Iron: 1.2mg
Despite being a dessert, this recipe carries some genuinely nourishing qualities when enjoyed in balanced portions. The cream cheese layer contributes a meaningful source of calcium and fat-soluble vitamins, which support bone density and cellular function. Whole milk adds protein and essential minerals that most processed sweets lack entirely.
The pecan-based crust brings more to the table than just flavor. Pecans are rich in heart-healthy monounsaturated fats, magnesium, and antioxidants that support cardiovascular health and reduce inflammation. Choosing whole nuts over pre-packaged alternatives ensures you get the full nutritional benefit.
Dark chocolate pudding varieties contain trace amounts of flavonoids — plant-based compounds associated with improved blood flow and reduced oxidative stress. While this is a treat, not a health food, the cocoa component does carry some legitimate antioxidant value that distinguishes it from purely empty-calorie desserts.
Served in appropriate portions alongside a balanced meal, this dessert can absolutely fit into a mindful eating approach. The key is intentionality — savoring each layer slowly rather than rushing through it ensures greater satisfaction from a smaller serving.
Storage Instructions
This dessert is best stored tightly covered in the refrigerator and will remain fresh and structurally sound for up to 4 days after it is made. Use plastic wrap pressed gently against the surface of the whipped topping layer, followed by a secure lid or a second layer of foil to prevent the dessert from absorbing refrigerator odors.
Avoid storing this dessert at room temperature for extended periods. Because it contains cream cheese and dairy-based pudding, it should never sit out for more than 2 hours. When serving at an event, keep the dish on a bed of ice or return it to the refrigerator between servings.
Freezing is possible but not recommended for the full assembled dessert, as the whipped topping and cream cheese layers tend to separate and become watery upon thawing. If you must freeze it, wrap individual portions tightly in plastic wrap and place them in an airtight container. Thaw in the refrigerator overnight before serving.
For make-ahead convenience, you can bake the crust and prepare the cream cheese layer up to 24 hours in advance. Store the crust covered at room temperature and the cream cheese layer in the refrigerator. Assemble the remaining layers the following day for the freshest results.
Suggestions
This dessert is endlessly versatile, and small variations can make it feel entirely new each time you prepare it. For a mocha version, stir half a teaspoon of espresso powder directly into the pudding mixture before whisking. It deepens the chocolate flavor significantly without adding any coffee bitterness to the overall profile.
For a seasonal twist in warmer months, try swapping the chocolate pudding layer for a combination of chocolate and vanilla pudding, creating a marble effect. Fold them together loosely and let the pattern settle naturally as it chills. The visual contrast makes each slice look genuinely stunning with no extra effort.
If you are serving this at a holiday gathering, consider garnishing the whipped topping layer with shaved dark chocolate, a light dusting of edible gold luster, or scattered sugared cranberries during winter months. For a summer table, a scattering of fresh raspberries or sliced strawberries adds brightness and a beautiful color contrast against the dark chocolate layer.
Finally, for those who prefer a nut-free base, substitute the pecans with crushed graham crackers or crushed chocolate sandwich cookies in equal measure. The texture is slightly different — more crisp than crumbly — but the flavor pairing works exceptionally well with the chocolate and cream cheese layers above.
Seasonal Relevance
The Layered Chocolate Delight is a year-round recipe, but it truly comes into its own during the cooler months when the appetite naturally turns toward richer, more comforting desserts. In autumn and winter, the deep cocoa layers and creamy textures feel especially welcome alongside roasted dinners, holiday spreads, and cozy family gatherings where something decadent is not just expected — it is celebrated.
During spring and early summer, lighter versions of this dessert feel particularly appropriate. Reducing the richness slightly by using light whipped topping or a vanilla pudding variation keeps it seasonal without sacrificing the beloved layered structure. Pair it with fresh seasonal berries on the side for a dessert that straddles comfort and freshness beautifully.
The summer months are when this recipe shines as a no-fuss, make-ahead solution for outdoor events. Because it is served cold, it is genuinely refreshing on a warm afternoon. It requires no last-minute preparation, holds well through a few hours of warm weather when kept properly chilled, and is easy to transport and slice at a picnic or backyard gathering.
No matter the season, what makes this recipe universally relevant is its crowd-pleasing nature. It does not require exotic ingredients that are only available part of the year, and it adapts easily to whatever flavors, garnishes, or textures are most abundant and appropriate at the time of making.
Final Words
The Layered Chocolate Delight is one of those rare recipes that manages to be genuinely impressive without demanding advanced skill, expensive equipment, or hours of effort in the kitchen. It rewards patience — the chilling time, the careful layering, the restraint in letting each component set properly before building on top of it — and that patience shows in every single slice.
What makes this recipe worth returning to again and again is not just the flavor, although the flavor is exceptional. It is the reliability. When you follow the process correctly, the result is consistent: clean layers, perfect texture, and a taste that lands somewhere between childhood nostalgia and sophisticated dinner party dessert. That is a very rare and valuable thing in a home kitchen.
Share it freely. Bring it to the potluck, the holiday table, the birthday dinner, the Tuesday night when everyone needs something to look forward to. It is the kind of dessert that builds relationships — the kind where people ask you to make it again before they have even finished their first slice.
And when they do ask — because they will — just smile and tell them it is actually quite simple. Because once you have made it once, it truly is.
Frequently Asked Questions
Can I make this dessert without nuts in the crust?
Absolutely. Simply replace the chopped pecans with an equal amount of crushed graham crackers or finely crushed chocolate sandwich cookies. The base will be slightly crisper in texture but just as delicious and structurally sound once baked and cooled.
Can I use homemade whipped cream instead of store-bought whipped topping?
Yes, but with some caution. Homemade whipped cream can be used, but it is less stable and may begin to weep or deflate after 24 hours in the refrigerator. If using homemade, stabilize it with a teaspoon of unflavored gelatin or a tablespoon of powdered sugar, and consume the dessert within two days for the best texture and appearance.
Does this recipe work in individual serving cups instead of a large baking dish?
It works beautifully in individual portions. Use clear glass cups or mason jars to showcase the distinct layers. Crumble the baked crust into the bottom of each cup rather than pressing it flat, then layer the remaining components in the same order. This version requires no slicing and makes an elegant, presentation-ready single serving for dinner parties or dessert buffets.