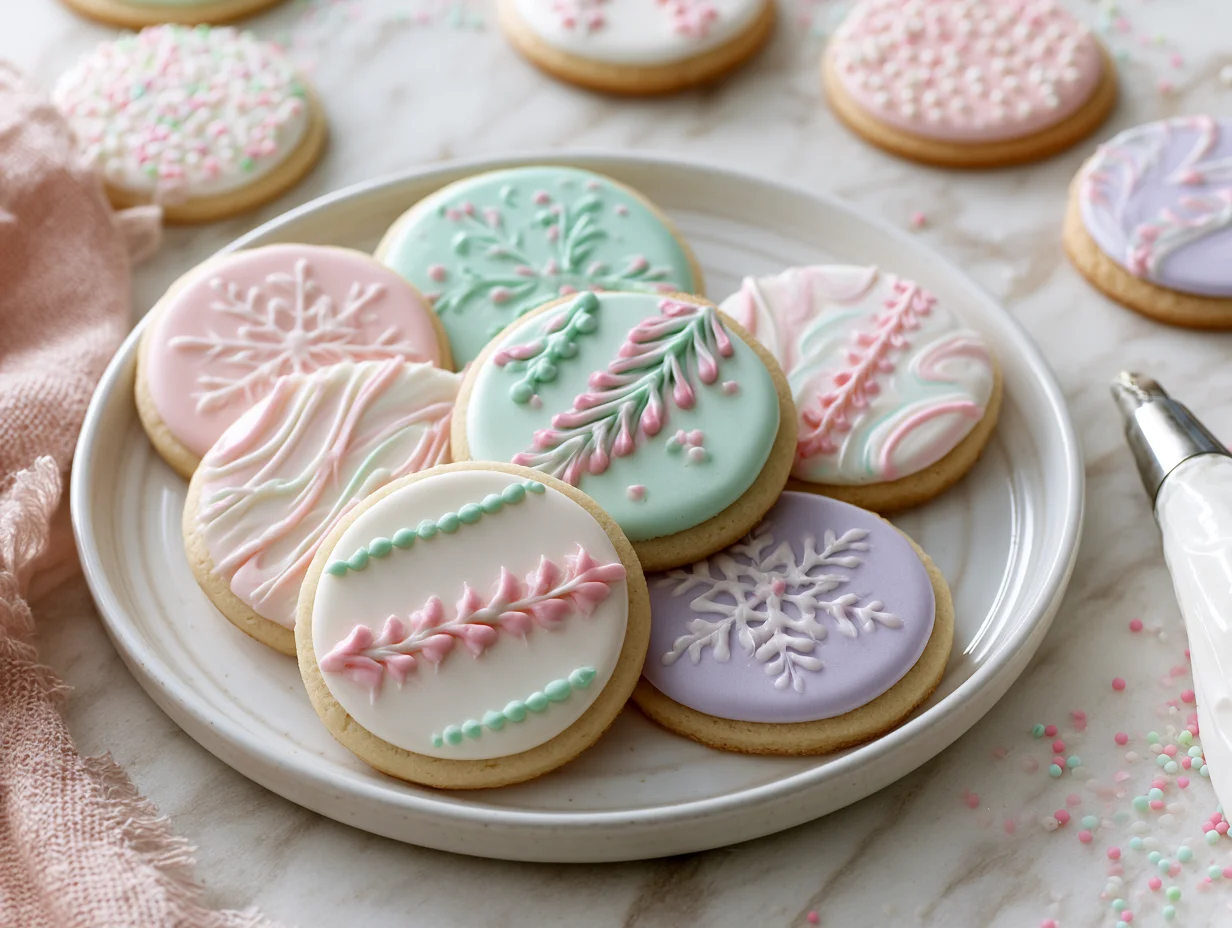
There is something deeply satisfying about a cookie that looks as good as it tastes. The kind of cookie that makes someone stop mid-reach and say, “Wait — did you actually make these?” That reaction is not reserved for professional bakers or people with a pastry degree. It is fully within your reach, and it starts with one thing: the right frosting.
Cookie frosting sounds simple, but it carries a recipe. Too thin, and it slides off. Too thick, and it cracks when you bite in. Get it right, and every cookie becomes a canvas — glossy, smooth, and stunning from the first outline to the final detail. This recipe has been tested and refined to hit that exact balance every single time.
What makes this frosting recipe stand apart is not just the texture or the finish — it is the versatility. Whether you are decorating holiday sugar cookies, birthday cutouts, or Valentine’s Day hearts, this frosting adapts to whatever you need. Flood it, pipe it, marble it, or layer it. The results will always look intentional and polished.
If you have ever felt intimidated by decorated cookies, this recipe is your starting point. Once you understand the consistency, the method, and the technique, you will find yourself reaching for the piping bag more often than you expected. Let’s make something pretty.
Ingredients You’ll Need
Every beautifully frosted cookie starts long before the piping bag comes out — it starts with what you measure and mix. These are the ingredients that make the difference between a flat, dull glaze and a frosting that sets with a clean snap and a gorgeous finish.
One of the things I love about this recipe is that it uses simple pantry ingredients. You probably already have most of them in your kitchen.
Base Ingredients:
- 3 cups powdered sugar, sifted
- 2 tablespoons meringue powder
- 5 to 6 tablespoons warm water (adjust for consistency)
- 1/2 teaspoon pure vanilla extract
- 1/4 teaspoon almond extract (optional but recommended)
- 1 tablespoon light corn syrup (for shine)
- Gel food coloring, as needed
Optional Add-ins:
- 1/2 teaspoon lemon extract (for a bright citrus note)
- 1 teaspoon clear vanilla (for a perfectly white base)
- 1/4 teaspoon cream of tartar (for extra stability)
- 1 to 2 drops flavored emulsion of your choice
Step-by-Step Instructions
Step 1: Sift the Powdered Sugar
Begin by sifting all three cups of powdered sugar into a large mixing bowl. This single step is non-negotiable. Unsifted powdered sugar carries tiny lumps that refuse to dissolve no matter how long you mix, and those lumps will clog your piping tips and create an uneven surface on your cookies. Sifting takes under two minutes and saves significant frustration later. Use a fine-mesh sieve and tap it gently to push the sugar through in an even, aerated layer.
Step 2: Add Meringue Powder
Add the meringue powder directly to the sifted sugar and whisk the two dry ingredients together before adding any liquid. Meringue powder is the backbone of royal frosting — it is what allows your decorated cookies to set firm, hold their shape under stacking, and develop that signature matte finish with a slight sheen. Whisking it into the dry sugar first ensures even distribution throughout the frosting and prevents clumping when the water is added.
Step 3: Add Water and Extracts
Add five tablespoons of warm water along with the vanilla extract and corn syrup to the dry mixture. Begin mixing on low speed using a stand mixer or hand mixer fitted with the whisk attachment. Once the ingredients start to combine, increase to medium-high speed and beat for four to five minutes until the frosting becomes thick, glossy, and holds stiff peaks. The corn syrup adds a beautiful sheen and makes the surface slightly flexible once dry, preventing cracking.
Step 4: Check and Adjust Consistency
This is the most critical step in the entire recipe. Royal frosting is used at two different consistencies — stiff for outlining and piping details, and flood consistency for filling. For outlining, your frosting should hold a firm peak and not settle when the bowl is tapped. For flooding, thin it down with water, adding just half a teaspoon at a time, until a line drawn through the frosting disappears in about ten seconds. Always test before you commit to a whole batch of cookies.
Step 5: Color the Frosting
Divide the frosting into separate bowls based on how many colors you plan to use. Add gel food coloring — not liquid — using a toothpick to control the amount precisely. Gel coloring is highly concentrated, meaning a tiny dot goes further than you think. Mix thoroughly until the color is fully incorporated and streak-free. Cover each bowl tightly with plastic wrap pressed directly onto the surface of the frosting. Royal frosting skins over within minutes when exposed to air.
Step 6: Pipe, Flood, and Dry
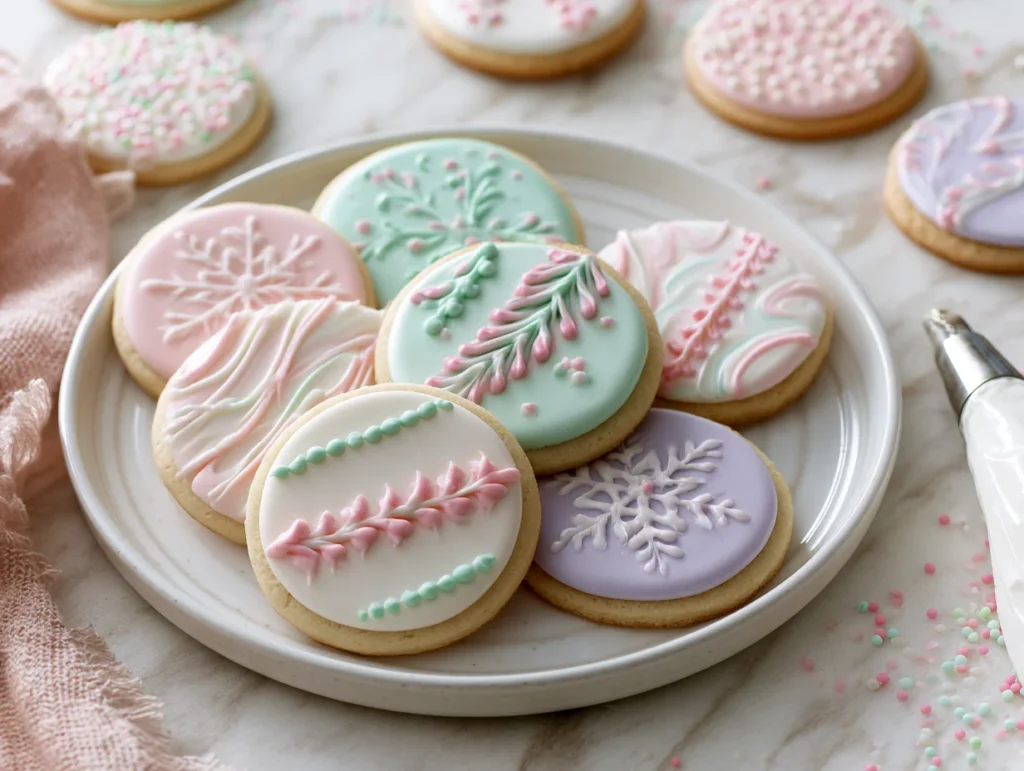
Outline each cookie first using a piping bag fitted with a number 2 or 3 round tip. Allow the outline to set for five minutes before flooding the interior. Use a squeeze bottle or offset spatula to fill the center with flood-consistency frosting, then use a toothpick to guide it into corners and pop any air bubbles. For multi-color designs, work wet-on-wet for blended effects or allow each color to dry fully before adding the next layer. Let decorated cookies dry uncovered at room temperature for six to eight hours or overnight.
Cook Time
Total:
6 hours 20 minutes (including drying time)
Prep:
20 minutes
Bake:
No bake — decorating and drying only (6 hours minimum dry time)
Servings
This recipe makes enough frosting to decorate a generous batch of cookies without running short mid-project. The yield depends on how heavily you frost and how many colors you divide the batch into, but as a reliable baseline, this single recipe comfortably covers a large decorating session.
Makes approximately 24 to 36 medium-sized decorated cookies, depending on size and design complexity. If you are working on intricate, multi-layer designs that require several coats of frosting, you may want to prepare a second half batch as a safety net.
For smaller projects — a dozen cookies or a single-color design — halving the recipe works perfectly well. The ratios hold up at any scale, which makes this one of the most flexible frosting formulas you can have in your baking rotation.
Common Mistakes in This Recipe
One of the most frequent issues decorators face is working with frosting that is the wrong consistency. Adding too much water too quickly turns a perfectly stiff frosting into something that cannot hold an outline, spreads uncontrollably, and bleeds into neighboring colors. The fix seems obvious after the fact but catches every beginner at least once.
Another mistake is skipping the drying time between layers. When you flood a cookie and immediately pipe detail work on top, the weight of the second layer sinks into the first. The result looks muddy and undefined rather than crisp and layered. Patience between stages is not optional — it is structural.
Using liquid food coloring instead of gel is a subtle but significant error. Liquid coloring adds water volume to the frosting, which throws off the carefully balanced consistency and often produces washed-out, pale hues that require so much coloring to deepen that the frosting becomes runny and unstable. Gel coloring is always the right choice.
Finally, many decorators fail to cover their frosting bowls between uses. Even a few minutes of air exposure creates a dry skin on the surface that, once mixed back in, introduces hard flecks into the frosting. These flecks clog piping tips and leave a lumpy texture across the cookie surface. Always keep your bowls covered with pressed plastic wrap during your entire decorating session.
Solutions to Common Mistakes
To avoid consistency disasters, always add water in half-teaspoon increments and test with the ten-second rule after each addition. Write down how many teaspoons you added — this turns guesswork into a repeatable process you can replicate across future batches without starting from scratch each time.
For clean layered designs, allow each stage to dry completely before adding the next. A good rule of thumb is twenty minutes between simple flood layers and a full hour before adding raised detail work. If you are working in a humid environment, give it longer. A small fan on low speed directed at the cookies speeds the process significantly.
Switch to gel food coloring and keep it in your permanent baking kit. A small set of quality gel colors will last for years, require almost no quantity to achieve deep, vivid hues, and will not alter your frosting’s consistency at all. This one ingredient swap resolves two common mistakes at once.
Keep every bowl covered. Full stop. A square of plastic wrap pressed flat against the frosting surface between uses costs you nothing and saves the entire batch. For the piping bags themselves, twist the open end closed or seal it with a rubber band to prevent the tip from drying out between cookies.
Nutritional Information (approx. per serving)
- Calories: 95 kcal
- Total Carbohydrates: 23g
- Sugars: 22g
- Total Fat: 0g
- Saturated Fat: 0g
- Protein: 0.5g
- Sodium: 5mg
- Cholesterol: 0mg
Cookie frosting made with meringue powder is egg-free, making it a safe option for guests with certain dietary sensitivities. Unlike egg-white-based royal frosting, this version carries no risk from raw eggs, which matters especially when serving children, pregnant guests, or anyone with a compromised immune system.
The absence of fat in this recipe also means it dries harder and cleaner than buttercream-based alternatives. Hard-set frosting holds its structure under modest pressure, making decorated cookies stackable and giftable — a practical advantage for anyone packaging cookies in boxes or bags as gifts.
Powdered sugar provides quick-release energy, which makes these decorated cookies a genuinely joyful treat at celebrations and events. While they are clearly a dessert rather than a health food, enjoying a beautifully decorated cookie as part of a balanced occasion is entirely reasonable.
Because this recipe relies on such clean, minimal ingredients, it is also easier to scale and control than many commercial frostings that contain artificial stabilizers and preservatives. What you see in the ingredient list is exactly what goes into the cookies — no fillers, no mystery additives, just pure, classic confection.
Storage Instructions
Once decorated cookies are fully dry — at least six to eight hours after the final frosting layer — they can be stored in an airtight container at room temperature. Layer them between sheets of parchment or wax paper to prevent the frosted surfaces from sticking or smudging against each other. Stored this way, they will keep well for up to two weeks at room temperature.
For longer storage, decorated cookies can be frozen. Place them in a single layer on a baking sheet and freeze until solid, about one hour. Then transfer to an airtight freezer-safe container with parchment between layers. Frozen decorated cookies keep well for up to three months without significant quality loss.
To thaw, remove cookies from the freezer and leave them sealed inside the container while they come to room temperature. This prevents condensation from forming directly on the frosted surface, which can cause the frosting to become tacky, develop water spots, or lose its shine. Allow two to three hours for full thawing at room temperature.
Unfrosted royal frosting can be stored separately. Press plastic wrap directly onto the surface, seal the bowl tightly, and refrigerate for up to one week. Before using, bring it back to room temperature and re-whip briefly to restore its consistency. Add a few drops of water if needed to bring it back to your preferred working thickness.
Suggestions
If you are new to decorated cookies, start with a single color and a simple design. A solid flood in one shade with a contrasting piped border looks polished and professional without requiring advanced skills. Once you are comfortable with the consistency and drying times, you can move into more complex work like wet-on-wet flooding, two-tone designs, and hand-painted details.
For gifting, consider packaging your decorated cookies in clear cellophane bags tied with a ribbon that matches the frosting color palette. A set of four or six cookies in a coordinating color scheme makes a genuinely impressive homemade gift for any occasion. Adding a small handwritten tag elevates the presentation even further.
If you are decorating with children, simplify the palette to two or three colors and use squeeze bottles instead of piping bags. Squeeze bottles offer more control for small hands and reduce mess considerably. The flood consistency is especially forgiving for younger decorators since it self-levels and covers any imprecision in application.
This frosting also takes well to food-safe paint applied over a fully dried base. Once the flood layer has set completely, mix gel coloring with a tiny amount of clear alcohol-based extract and use a fine brush to paint details, lettering, or shading directly onto the surface. The technique opens up a level of precision and artistry that piping alone cannot achieve.
Seasonal Relevance
Few kitchen projects feel as connected to the calendar as decorated cookies. In winter, cookie decorating becomes a centerpiece activity — snowflakes, ornaments, and holiday-themed cutouts frosted in red, green, white, and gold feel both nostalgic and festive. This frosting holds up beautifully in the dry winter air, setting faster and with a cleaner finish than it would in summer humidity.
Spring and early summer are peak cookie decorating seasons for celebrations. Easter eggs, flower shapes, graduation caps, and wedding-themed cutouts all benefit from clean, bright frosting colors that this recipe delivers consistently. Pastel gel colors mixed into this base produce soft, elegant shades that feel perfectly seasonal without any effort at color theory.
Fall brings its own dedicated palette — warm oranges, deep burgundies, chocolate browns, and muted golds translate beautifully through gel coloring. Pumpkin cutouts, maple leaves, and apple shapes decorated with this frosting make a stunning seasonal spread for harvest gatherings, classroom parties, or Thanksgiving dessert tables.
Even outside of holidays, this recipe earns its place as a year-round staple. Birthday cookies, personalized name cookies, baby shower sets, and custom corporate gifts can all be built from this single frosting formula. Once you have it in your repertoire, you will find reasons to use it across every month of the year.
Final Words
Decorated cookies have a way of making people feel remembered. When someone takes the time to pipe a person’s name onto a cookie or match the frosting to the colors of a party, it communicates care in a way that a store-bought dessert simply cannot replicate. This recipe gives you the foundation to do exactly that, consistently and confidently.
The learning curve with royal frosting is real but short. Your first batch may not look like the photos in professional food blogs, and that is completely normal. What matters is that you understand the mechanics — consistency, timing, and coverage — because once those click, the results improve rapidly with every session.
Keep your expectations calibrated to your experience level and allow yourself the pleasure of improvement over perfection. Even a slightly uneven flood on a sugar cookie looks a thousand times more charming than anything that came out of a package. The handmade quality is the point, not a flaw to hide.
Come back to this recipe whenever you need it. Bookmark it, save it, share it with the friend who always asks how you made your cookies look so good. The answer is always the same: a good recipe, the right technique, and a genuine love for making something beautiful from scratch.
Frequently Asked Questions
Can I make this frosting ahead of time and store it before using it?
Yes. Store it in an airtight container with plastic wrap pressed directly onto the surface to prevent a skin from forming. It keeps well in the refrigerator for up to one week. Before using, bring it to room temperature and re-whip briefly to restore smoothness. Add water a few drops at a time if needed.
Why is my royal frosting not setting firm even after several hours?
The most common cause is too much water in the mix, which prevents the meringue powder from setting properly. Humidity also significantly slows drying time. Make sure your work area is well-ventilated, avoid refrigerating freshly frosted cookies, and double-check that your meringue powder is fresh and was properly measured before mixing.
Can I substitute meringue powder with something else in this recipe?
Meringue powder can be replaced with pasteurized dried egg whites at a 1:1 ratio. Aquafaba works as a vegan alternative but produces a softer, slightly less stable result. Avoid using fresh raw egg whites unless you are certain of the safety for your guests, particularly for children and at-risk individuals.