Rustic Apple Tart Recipe
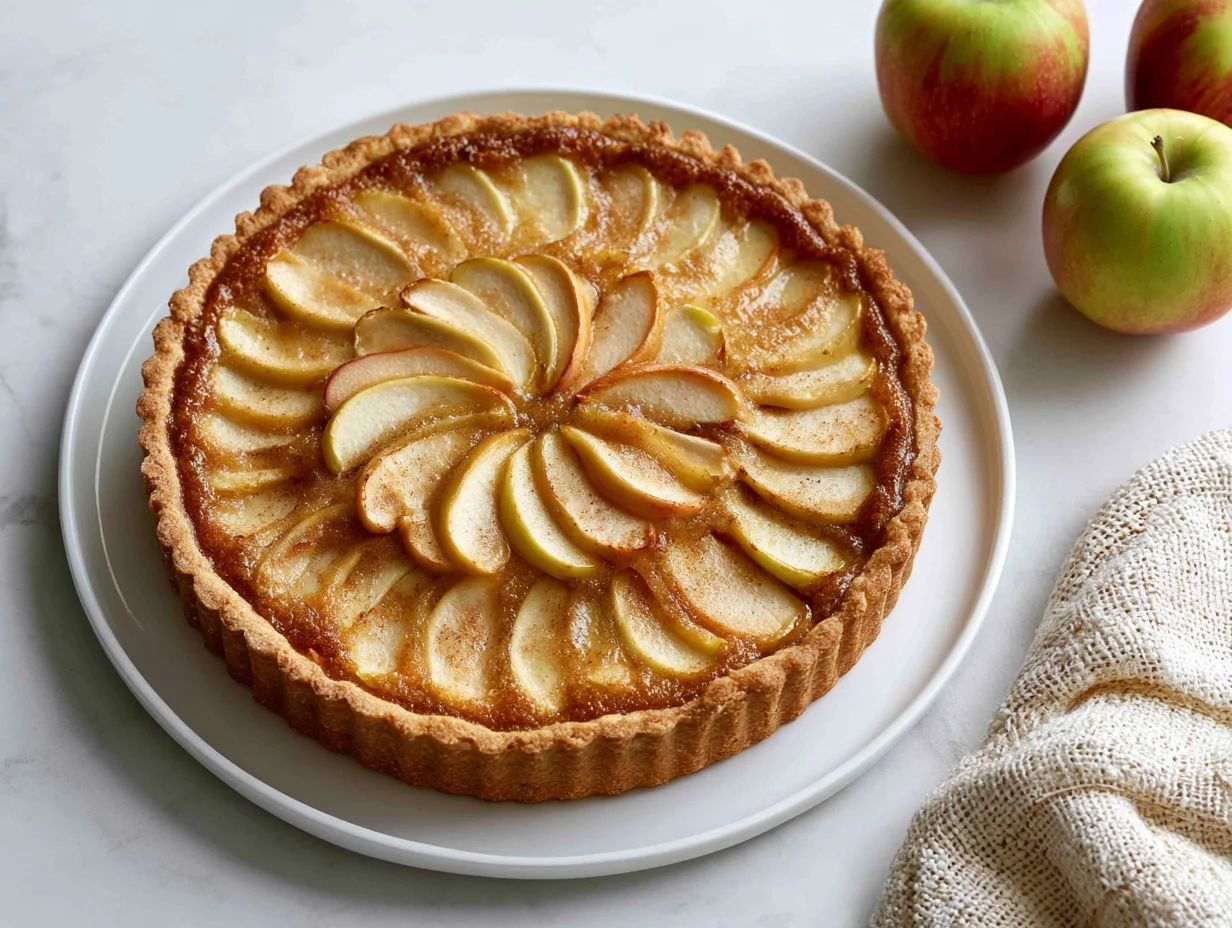
There is something quietly beautiful about a tart that does not try too hard. The Rustic Apple Tart is one of those rare recipes that sits at the intersection of elegance and ease — golden, buttery pastry folded over spiced apples, edges rough and imperfect in exactly the right way.
This is not the kind of dessert that demands pastry school precision. It welcomes home bakers who want real flavor without the fuss of a formal pie shell or a structured tarte tatin. What you get instead is something deeply honest — a tart that smells like autumn, tastes like nostalgia, and looks like it came out of a French farmhouse kitchen.
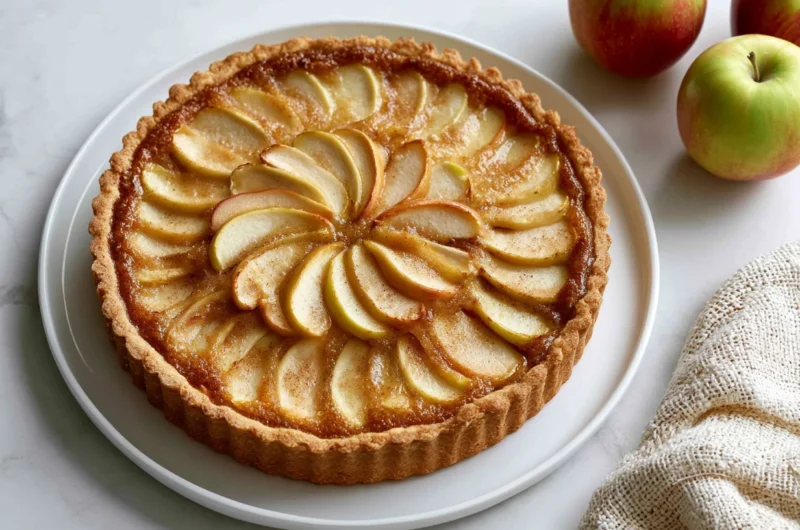
The beauty of this recipe lies in its texture contrasts. The crust shatters at the fork, yielding to soft, cinnamon-kissed apples that hold just enough bite. A brush of apricot glaze over the top brings a subtle shine and a whisper of sweetness that ties everything together.
Whether you are baking it for a Sunday dinner, a holiday table, or simply because the week calls for something warm and wonderful, this recipe delivers every single time. Let’s walk through it properly, so yours comes out perfect.
Ingredients You’ll Need
Not every great recipe starts with a long grocery list — and this one proves it beautifully. Everything you need is already waiting in your kitchen.
One of the things I love about this recipe is that it uses simple pantry ingredients. You probably already have most of them in your kitchen.
Base Ingredients:
- 1 ¼ cups all-purpose flour
- ½ cup unsalted butter, cold and cubed
- 3 tablespoons ice water
- 1 tablespoon granulated sugar
- ¼ teaspoon salt
- 3 medium apples (Granny Smith or Honeycrisp), peeled, cored, and thinly sliced
- 3 tablespoons brown sugar
- 1 teaspoon ground cinnamon
- ¼ teaspoon ground nutmeg
- 1 tablespoon lemon juice
- 2 tablespoons unsalted butter, cut into small pieces (for dotting)
- 2 tablespoons apricot jam (for glaze)
- 1 tablespoon warm water (to thin the glaze)
- 1 egg (for egg wash)
- 1 tablespoon milk (for egg wash)
Optional Add-ins:
- ¼ teaspoon ground cardamom (for warmth and depth)
- 1 tablespoon maple syrup (drizzled over apples before baking)
- ¼ cup chopped walnuts or pecans (scattered over apple layer)
- 1 teaspoon vanilla extract (mixed into apple filling)
- 1 tablespoon almond flour (dusted onto pastry base to absorb juices)
- ½ teaspoon orange zest (brightens the filling beautifully)
- A pinch of ground cloves (for a more complex spice profile)
Step-by-Step Instructions
Step 1: Make the Pastry Dough
In a large mixing bowl, combine the flour, granulated sugar, and salt. Add the cold, cubed butter and work it into the flour using your fingertips or a pastry cutter until the mixture resembles coarse breadcrumbs with a few pea-sized pieces of butter still visible. Those small butter pockets are what create flaky layers in the finished crust. Drizzle in the ice water one tablespoon at a time, mixing gently after each addition, until the dough just comes together. Do not overwork it. Shape it into a flat disc, wrap in plastic wrap, and refrigerate for at least 30 minutes.
Step 2: Prepare the Apple Filling
While the dough chills, prepare your apples. Peel, core, and slice them into thin, even pieces — roughly ¼ inch thick. Consistent slicing ensures even cooking throughout. Place the apple slices in a bowl and toss them with the brown sugar, cinnamon, nutmeg, and lemon juice. Mix well so every slice is coated. Let the mixture sit for about 10 minutes. This short rest draws out a little moisture from the apples and allows the sugar to begin dissolving, creating a light, natural syrup that flavors the tart from within.
Step 3: Roll Out the Dough
Preheat your oven to 375°F (190°C) and line a baking sheet with parchment paper. Remove the chilled dough from the refrigerator and place it on a lightly floured surface. Roll it out into a rough circle, approximately 12 to 13 inches in diameter. It does not need to be perfectly round — in fact, the slightly uneven edges are part of its rustic charm. Carefully transfer the rolled dough to the prepared baking sheet. If it tears slightly at any point, simply press it back together with your fingers. The crust is forgiving, and imperfections add character.
Step 4: Assemble the Tart
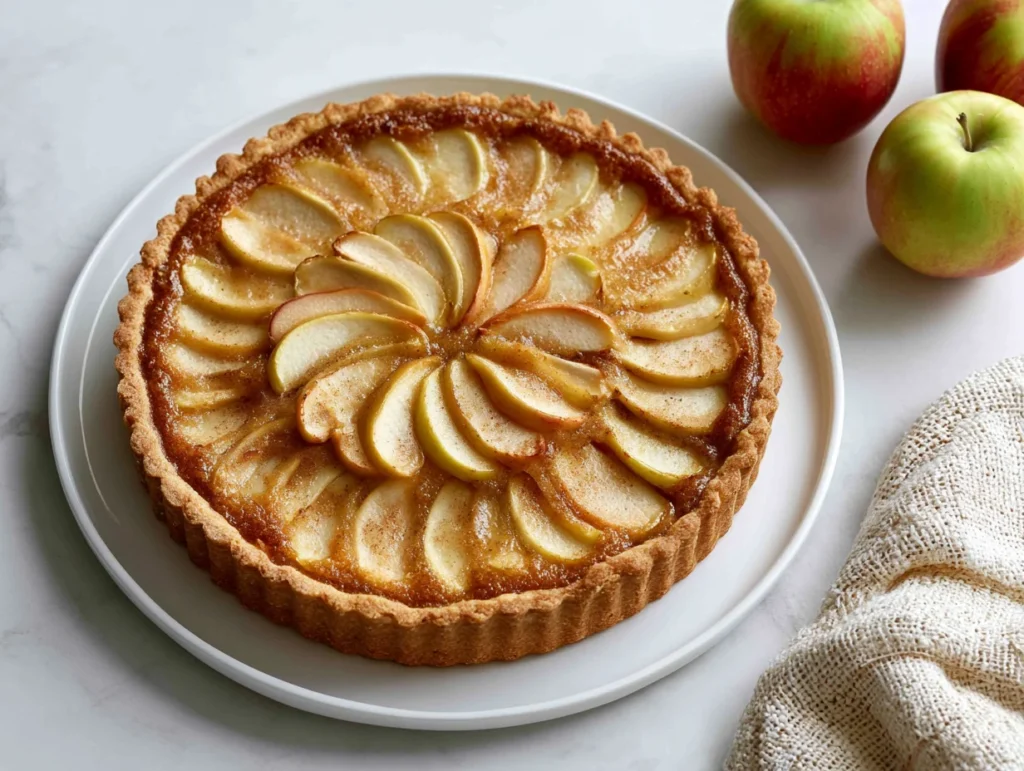
Arrange the apple slices on the dough, leaving a 2-inch border around the edges. You can fan them out in neat overlapping rows for a more organized look, or layer them loosely for a more relaxed, rustic feel — both work equally well. Scatter the small pieces of butter evenly over the apples. This adds richness and helps the filling caramelize gently during baking. Fold the pastry border up and over the outer edge of the apple filling, pleating as you go. The pleated edges will hold the filling in place while adding that signature handmade look.
Step 5: Apply the Egg Wash and Bake
In a small bowl, whisk together the egg and milk to make an egg wash. Brush this mixture lightly over the folded pastry border. The egg wash gives the crust its deep golden color and a slight sheen that makes the tart look bakery-worthy. Slide the baking sheet into the preheated oven and bake for 35 to 40 minutes, or until the crust is a rich golden brown and the apple filling is tender and slightly caramelized around the edges. The kitchen will smell absolutely extraordinary at this point.
Step 6: Glaze and Serve
As soon as the tart comes out of the oven, prepare the apricot glaze. Stir together the apricot jam and warm water until smooth. Using a pastry brush, apply a light, even layer of glaze over the warm apple filling. This step adds a professional finish — a subtle glossy sheen that makes the apples look vibrant and appealing. Let the tart rest on the baking sheet for at least 10 to 15 minutes before slicing. This resting period allows the juices to settle and makes for cleaner, more defined slices. Serve warm, at room temperature, or chilled with a dollop of crème fraîche or a scoop of vanilla ice cream.
Cook Time
Total:
Approximately 1 hour 15 minutes (including chilling time)
Prep:
30 minutes (plus 30 minutes chill time for the dough)
Bake:
35 to 40 minutes at 375°F (190°C)
Servings
This recipe yields a beautifully sized tart that works well for a family dessert or a small dinner party setting. Sliced into generous portions, it serves comfortably without anyone feeling shortchanged — which is exactly what a good homemade tart should do.
Makes approximately 6 to 8 servings, depending on how you slice it. Thinner slices work well when paired with accompaniments like ice cream or whipped cream, while thicker cuts are perfect for standalone serving.
If you are baking for a larger gathering, this recipe scales well. Simply double the ingredients and bake two tarts side by side. The dough handles doubling gracefully, and having a second tart on the table never feels like too much — it disappears quickly.
Common Mistakes in This Recipe
Many home bakers rush the chilling step, pulling the dough from the refrigerator too soon. Warm dough is far more difficult to handle — it sticks to the rolling surface, tears easily, and loses the cold butter pockets that create a flaky texture in the oven. This is perhaps the single most common reason a rustic tart ends up with a dense, tough crust.
Another frequent mistake is using the wrong variety of apples. Very sweet apples, like Red Delicious, break down too quickly and turn mushy during baking. The filling loses structure, and the tart becomes soggy and flat rather than tender and defined. Apple selection genuinely matters here.
Overloading the filling is a tempting error. More apples feels like more tart, but excess fruit releases too much liquid, which seeps through the pastry and prevents the base from crisping up properly.
Finally, skipping the resting period after baking is a mistake many impatient bakers make. Cutting into the tart too soon causes the juices to run out, the filling to collapse, and the slices to fall apart. That brief rest makes a meaningful difference in both presentation and texture.
Solutions to Common Mistakes
Always chill your dough for a full 30 minutes before rolling, and return it to the refrigerator briefly if it softens too much during assembly. Cold dough handles beautifully, rolls evenly, and produces a crust with proper layers and texture. If your kitchen is warm, work quickly and do not hesitate to chill again between steps.
Choose apples with structure and balanced flavor. Granny Smith holds its shape exceptionally well and provides a pleasant tartness. Honeycrisp is another excellent choice — slightly sweeter with firm flesh that does not collapse under heat. A blend of the two gives you the best of both worlds.
For the filling, use a measured amount of apples and toss them with lemon juice, which also helps control moisture. If your apples release a lot of liquid during the 10-minute rest, drain off the excess before arranging them on the dough.
After the tart exits the oven, resist the urge to cut it immediately. Set a timer for 10 to 15 minutes and let it rest properly. The filling will firm up just enough to hold beautiful, clean slices that look as good as they taste.
Nutritional Information (approx. per serving)
- Calories: 290 kcal
- Total Fat: 14g
- Saturated Fat: 8g
- Cholesterol: 55mg
- Sodium: 105mg
- Total Carbohydrates: 38g
- Dietary Fiber: 2.5g
- Total Sugars: 18g
- Protein: 3.5g
- Vitamin C: 5% DV
- Calcium: 2% DV
- Iron: 6% DV
- Potassium: 150mg
Apples are a genuinely underappreciated nutritional powerhouse. They are a rich source of dietary fiber — particularly pectin — which supports healthy digestion, promotes a sense of fullness, and has been associated with improved gut microbiome diversity. A single serving of this tart contributes meaningfully to your daily fiber intake.
Cinnamon, one of the key spices in this recipe, contains potent antioxidants and has been studied for its potential role in supporting healthy blood sugar levels. Used consistently in cooking, it adds far more than flavor — it brings real functional value to everyday dishes.
The moderate use of butter in the crust provides fat-soluble vitamins, including Vitamin A, which supports vision and immune function. When consumed as part of a balanced diet, quality butter in baked goods is not something to fear — it is an ingredient that contributes both flavor and nutritional substance.
Lemon juice, used here to season the apples, supplies Vitamin C and acts as a natural antioxidant. It also prevents the apple slices from browning and helps balance the sweetness in the filling, making each bite taste cleaner and more vibrant.
Storage Instructions
Once the tart has cooled completely, cover it loosely with plastic wrap or transfer it to an airtight container. Stored at room temperature, it will stay fresh for up to two days. Because the crust can soften slightly over time, room temperature storage is best for preserving its texture in the short term.
For longer storage, refrigerate the tart. It keeps well in the refrigerator for up to four days. When ready to eat, allow it to come to room temperature naturally, or warm individual slices in a 300°F (150°C) oven for about 8 to 10 minutes to restore some of the crust’s original crispness.
This tart also freezes well. Once fully cooled, wrap individual slices or the entire tart tightly in plastic wrap and then in aluminum foil. Freeze for up to two months. Thaw overnight in the refrigerator and reheat gently in the oven before serving — never microwave, as this makes the pastry soft and chewy.
Avoid storing the tart in a sealed container while still warm, as trapped steam will soften the crust and make the pastry base soggy. Always allow it to cool fully on a wire rack before wrapping or storing.
Suggestions
This tart pairs beautifully with a generous scoop of good-quality vanilla ice cream. The warm tart against cold, creamy ice cream is one of those classic combinations that never gets old. For something slightly more refined, serve it with a dollop of lightly whipped crème fraîche — its gentle tang is a perfect counterpoint to the sweet filling.
If you want to elevate the presentation for a dinner party, dust the tart lightly with powdered sugar just before serving. Add a few fresh thyme sprigs alongside it on the plate for a simple but elegant visual. A drizzle of salted caramel sauce over the top also works extraordinarily well with the cinnamon-spiced apples.
For a more indulgent variation, swap the apricot glaze for a light honey glaze infused with a splash of brandy or calvados. This deepens the flavor profile significantly and gives the tart a more grown-up, sophisticated edge that works particularly well at autumn dinner gatherings.
Beverage pairings worth considering include a warm cup of spiced chai, a glass of light Riesling, or a simple cup of dark roast coffee. Each of these brings out different notes in the tart — the spice, the fruit, and the buttery pastry — making the experience feel considered and complete.
Seasonal Relevance
The Rustic Apple Tart is most naturally associated with autumn, and for good reason. Late September through November brings the finest apple harvest of the year, when varieties like Honeycrisp, Fuji, Braeburn, and Granny Smith are at their peak — crisp, flavorful, and perfectly sweet-tart. Baking with seasonal apples makes a noticeable difference in the final result.
During the fall months, this tart belongs on every table. It suits Thanksgiving gatherings as a lighter alternative to traditional pie, and it works equally well as a weekend baking project when the air turns cool and the kitchen feels like the best place to be.
That said, this recipe is not limited to a single season. A late-spring version using a mix of apples and sliced pears is quietly wonderful. In winter, the warm spice profile of cinnamon and nutmeg feels deeply comforting, and the tart adapts beautifully to a holiday dessert spread alongside richer offerings.
Summer calls for a lighter hand — consider replacing half the apples with fresh stone fruit like nectarines or plums for a seasonal twist that feels bright, fruity, and unexpected. The same dough, the same technique, a completely different character that feels exactly right for warmer months.
Final Words
The Rustic Apple Tart is the kind of recipe that earns a permanent place in your baking repertoire. It is not difficult, it does not require specialty equipment, and it delivers results that feel genuinely special every time. That combination — simple to make, impressive to serve — is rarer than it sounds.
What makes this tart stand out is its honesty. There is no elaborate construction hiding behind it, no complicated technique to master before you can succeed. There is just good dough, good apples, and the kind of patient, unhurried baking that produces something truly worth sharing.
As you make this recipe your own over time, you will find your preferred apple blend, your ideal spice ratio, your favorite accompaniment. These small personal adjustments are what turn a recipe from the page into something that belongs to you — something that your family and guests will come to recognize and request.
So preheat the oven, pull out the mixing bowl, and take your time with it. Some recipes deserve to be made slowly and enjoyed fully. This is one of them.
Frequently Asked Questions
Can I make the pastry dough ahead of time?
Yes, absolutely. The dough can be made up to two days in advance and kept wrapped in plastic wrap in the refrigerator. You can also freeze it for up to one month. Thaw it overnight in the fridge before rolling it out, and allow it to soften slightly at room temperature for about five minutes so it rolls without cracking.
What is the best way to prevent a soggy bottom crust?
The most effective approach is a combination of techniques. First, do not skip the chilling step — cold dough bakes more evenly and crisps up better. Second, if your apples release a lot of juice during resting, drain off the excess liquid before arranging them on the dough. Sprinkling a thin layer of almond flour or fine breadcrumbs on the pastry base before layering the apples also helps absorb excess moisture during baking.
Can I use store-bought pie crust instead of making the dough from scratch?
You can, and it works reasonably well if you are short on time. A good-quality refrigerated pie crust will still produce a pleasant tart. However, the homemade version offers noticeably better flavor and texture — it is flakier, richer, and more tender. If you have the 30 extra minutes, the scratch dough is worth the effort and is genuinely one of the simplest pastry recipes you will make.
Rustic Apple Tart Recipe
6
servings30
minutes40
minutes290
kcal1
hour10
minutesA golden, buttery pastry folded over cinnamon-spiced apples — effortlessly rustic and deeply satisfying. This classic free-form tart delivers bakery-quality results at home with simple pantry staples and minimal fuss.
Ingredients
Base Ingredients
1¼ cups all-purpose flour
½ cup unsalted butter, cold and cubed
3 tablespoons ice water
1 tablespoon granulated sugar
¼ teaspoon salt
3 medium apples (Granny Smith or Honeycrisp), peeled, cored, and thinly sliced
3 tablespoons brown sugar
1 teaspoon ground cinnamon
¼ teaspoon ground nutmeg
1 tablespoon lemon juice
2 tablespoons unsalted butter, cut into small pieces (for dotting)
2 tablespoons apricot jam (for glaze)
1 tablespoon warm water (to thin the glaze)
1 egg (for egg wash)
1 tablespoon milk (for egg wash)
Optional Add-ins
¼ teaspoon ground cardamom
1 tablespoon maple syrup
¼ cup chopped walnuts or pecans
1 teaspoon vanilla extract
1 tablespoon almond flour (for pastry base)
½ teaspoon orange zest
A pinch of ground cloves
Directions
- Combine flour, sugar, and salt. Work in cold, cubed butter until mixture resembles coarse crumbs. Add ice water one tablespoon at a time until dough just comes together. Shape into a disc, wrap, and refrigerate for 30 minutes.
- Peel, core, and thinly slice apples to ¼-inch thickness. Toss with brown sugar, cinnamon, nutmeg, and lemon juice. Let sit for 10 minutes to draw out natural juices.
- Preheat oven to 375°F (190°C). Line a baking sheet with parchment paper.
- On a lightly floured surface, roll the chilled dough into a rough 12–13-inch circle. Transfer carefully to the prepared baking sheet.
- Arrange apple slices on the dough, leaving a 2-inch border. Scatter small butter pieces evenly over the apple layer.
- Fold and pleat the pastry border up and over the outer edge of the filling, pressing gently to hold its shape.
- Whisk together the egg and milk. Brush lightly over the folded pastry border.
- Bake for 35–40 minutes, until the crust is deep golden brown and the apples are tender and lightly caramelized.
- Stir apricot jam with warm water until smooth. Brush the glaze over the warm apple filling for a professional shine.
- Rest on the baking sheet for 10–15 minutes before slicing. Serve warm, at room temperature, or chilled with crème fraîche or vanilla ice cream.
Recipe Video
Notes
- Always use cold butter and ice water for the dough. Warm butter prevents the flaky layers from forming and results in a dense, tough crust.
- Granny Smith and Honeycrisp are the best apple choices — both hold their shape during baking. Avoid Red Delicious, which turns mushy under heat.
- If the apples release excess liquid during the 10-minute rest, drain it off before arranging on the dough to prevent a soggy pastry base.
- Do not skip the post-bake resting period. Slicing too soon causes the filling to run and the tart to fall apart. Ten minutes makes a real difference.
- Store at room temperature for up to 2 days, refrigerated for up to 4 days, or frozen (well-wrapped) for up to 2 months. Reheat in a 300°F oven, never a microwave.
- Dusting a thin layer of almond flour on the pastry base before adding apples helps absorb excess moisture and keeps the bottom crisp throughout baking.