Soft Chocolate Chip Cookie Recipe
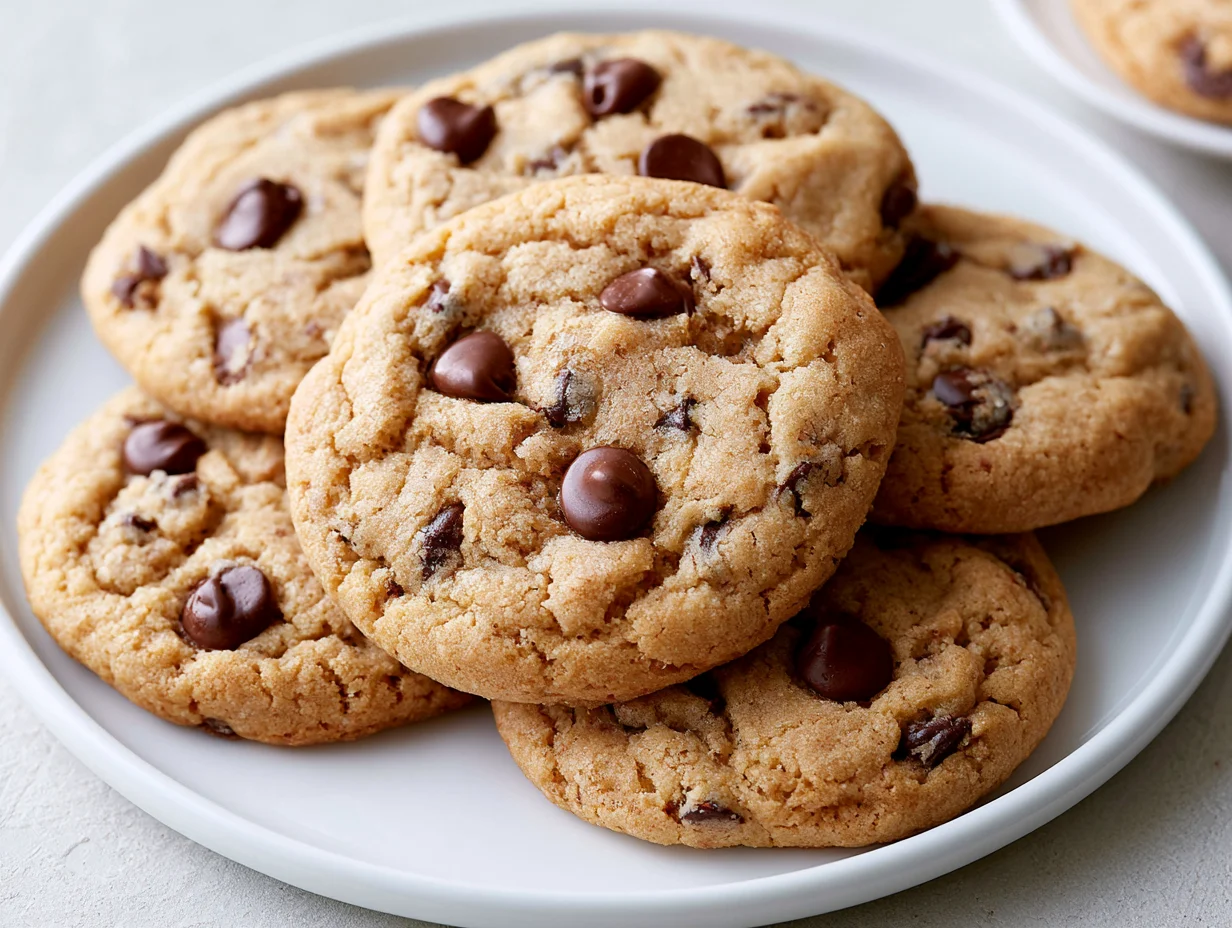
There is a particular kind of joy that only a truly soft chocolate chip cookie can deliver. Not crispy, not cakey, but that perfect middle ground where the edges hold just enough structure while the center stays pillowy, warm, and slightly underdone in the most deliberate way possible. That texture is not an accident. It is the result of understanding a handful of key baking principles that make all the difference.
Most chocolate chip cookie recipes promise softness and fail to deliver it past the first hour out of the oven. This recipe is built differently. Every ingredient has been chosen with purpose, and every step is designed to give you cookies that stay soft and chewy not just when they are warm, but the next day and the day after that.
What you are going to make here is the kind of cookie that stops a conversation. The kind that gets texted about, requested at every gathering, and quietly earns you a reputation as someone who genuinely knows their way around a kitchen. The flavor is deep, buttery, and rich, with melted chocolate in every single bite.
Whether you are baking for a celebration, a gift box, a school event, or simply a quiet evening at home, this soft chocolate chip cookie recipe is the only one you will ever need to reach for. Let me show you exactly how to make it right, every single time.
Ingredients You’ll Need
Every great cookie starts before the mixer is even turned on — with the right ingredients lined up, measured, and ready to work together.
One of the things I love about this recipe is that it uses simple pantry ingredients. You probably already have most of them in your kitchen.
Base Ingredients
- 2¼ cups all-purpose flour
- 1 tsp baking soda
- 1 tsp fine sea salt
- 1 cup unsalted butter, softened to room temperature
- ¾ cup granulated white sugar
- ¾ cup packed light brown sugar
- 2 large eggs, room temperature
- 2 tsp pure vanilla extract
- 2 cups semi-sweet chocolate chips
Optional Add-ins
- ½ cup chopped walnuts or pecans
- ½ tsp espresso powder (deepens chocolate flavor)
- ¼ tsp ground cinnamon
- ½ cup dark chocolate chunks (in addition to chips)
- 1 tbsp cornstarch (for extra chewiness)
- Flaky sea salt, for topping before baking
Step-by-Step Instructions

Step 1: Prepare Your Ingredients and Preheat the Oven
Before you begin mixing, make sure your butter and eggs are fully at room temperature. Cold butter will not cream properly and cold eggs can cause the batter to break. Preheat your oven to 375°F (190°C) and line two large baking sheets with parchment paper. Do not use greased pans without parchment, as direct heat on the pan base causes the cookies to spread too quickly and lose their soft, thick centers before the tops have a chance to set.
Step 2: Whisk the Dry Ingredients
In a medium bowl, whisk together the all-purpose flour, baking soda, and salt until evenly combined. This step matters more than most people realize. Distributing the baking soda and salt evenly through the flour before it ever touches the wet ingredients ensures that every cookie rises and flavors consistently. Set this bowl aside. If you are adding cornstarch for extra chewiness or cinnamon for warmth, whisk those into the flour mixture at this stage so they blend in completely and evenly.
Step 3: Cream the Butter and Sugars
In a large mixing bowl, beat the softened butter with both the granulated and brown sugars using a hand mixer or stand mixer fitted with the paddle attachment. Beat on medium-high speed for 3 to 4 full minutes until the mixture is noticeably pale, light, and fluffy. This step is where softness begins. The creaming process creates air pockets in the fat and sugar that give the cookies lift and a tender crumb. Do not rush this step by cutting the time short — undermixed butter and sugar is one of the leading causes of flat, dense cookies.
Step 4: Add the Eggs and Vanilla
Add the eggs one at a time, beating well after each addition before adding the next. Once both eggs are incorporated, add the pure vanilla extract and beat for another 30 seconds until the batter is smooth, glossy, and uniform. The batter should look cohesive at this point, not curdled or separated. If it looks slightly broken, the eggs may have been too cold. Continue beating and it will usually come together. Room temperature eggs emulsify far more easily and give the dough a smoother, more consistent texture from the start.
Step 5: Combine Wet and Dry Ingredients
Reduce the mixer speed to low and gradually add the flour mixture to the butter mixture in three additions, mixing just until no dry flour streaks remain after each addition. Overmixing the dough once flour is added develops gluten, which leads to tough, dense cookies instead of soft, tender ones. As soon as the last addition of flour is incorporated and the dough looks uniform, stop the mixer completely. Fold in the chocolate chips and any optional add-ins by hand using a rubber spatula, distributing them evenly throughout the dough.
Step 6: Scoop, Rest, and Bake
Scoop the dough into rounded balls using a medium cookie scoop or a heaped tablespoon, placing them at least 2 inches apart on the prepared baking sheets. For the softest, thickest results, refrigerate the shaped dough balls for 30 minutes before baking. This resting period firms the fat, slows spread, and deepens flavor significantly. Bake for 10 to 12 minutes, until the edges are just set and lightly golden but the centers still look slightly underdone. They will continue cooking on the hot pan after you remove them from the oven.
Cook Time
Total
55 to 60 minutes (including optional chilling time)
Prep
15 minutes
Bake
10 to 12 minutes per batch
Servings
This recipe makes a generous batch of cookies that is perfectly suited to sharing, gifting, or storing for the week ahead. The yield varies slightly depending on the size of your cookie scoop, but using a standard medium scoop produces consistent, bakery-sized rounds. Makes approximately 36 cookies per batch, giving you plenty to go around without needing to double the recipe immediately.
If you are baking for a smaller household, the raw dough freezes exceptionally well. Scoop the dough into balls, freeze them on a lined tray until solid, and then transfer them to a zip-lock bag. You can bake directly from frozen with just 2 to 3 extra minutes added to the bake time.
For a larger gathering or cookie exchange, the recipe doubles without any issues. Simply scale the ingredients proportionally and bake in the same way. Each serving is considered one cookie for nutritional reference, though no one has ever stopped at just one.
Common Mistakes in This Recipe
The single most damaging mistake in chocolate chip cookie baking is using butter that is too soft or partially melted. Butter that has gone beyond the soft, pliable stage loses its ability to hold air during creaming, which leads directly to cookies that spread too thin and bake up flat, greasy, and chewy in the wrong way. Proper room temperature butter should leave a slight indent when pressed but still hold its shape.
Another mistake that undermines softness is overbaking. Many home bakers pull cookies from the oven only when they look fully done, but by that point they are already overdone. Cookies continue to bake from residual heat on the pan for several minutes after being removed from the oven, so pulling them while the center still looks soft is not a mistake — it is the technique.
Measuring flour incorrectly is another consistent problem. Scooping the measuring cup directly into the flour bag compacts the flour and leads to significantly more than the recipe intends, resulting in a stiff, dry dough that produces dense cookies with a crumbly, dry texture. This issue is responsible for far more failed cookie batches than most people suspect.
Skipping the resting period for the shaped dough is also a common shortcut that costs you quality. Chilling the dough allows the fat to resolidify and the flour to fully hydrate, both of which contribute to a thicker, more flavorful cookie with better texture and a more developed flavor profile than dough baked straight from mixing.
Solutions to Common Mistakes
To get your butter to the correct temperature without risking it going too far, take it out of the refrigerator 30 to 45 minutes before you begin baking. If you are in a hurry, cut it into small cubes and let it sit for 15 minutes. It should feel cool to the touch but yield gently when pressed. Never microwave butter to soften it for cookie dough — even a few seconds too long changes its structure entirely.
Train yourself to pull the cookies when the edges look set and lightly golden but the centers still appear soft and slightly glossy. They will look underdone and that is exactly right. Let them cool on the pan for 5 minutes before transferring to a wire rack. That resting time on the hot pan finishes the job without drying the cookies out.
For accurate flour measurement, spoon the flour into your measuring cup using a separate spoon and then level it off with a straight edge. Better still, use a kitchen scale and measure by weight. One cup of all-purpose flour should weigh approximately 120 to 125 grams. This small habit eliminates one of the most common sources of inconsistency in home baking.
Do not skip the chill. Even 30 minutes in the refrigerator makes a measurable difference to thickness, spread, and flavor. If you have time, chilling the dough overnight produces even better results. The flavor deepens considerably after a longer rest, and the cookies bake up thicker and more caramel-like in the best possible way.
Nutritional Information (approx. per serving)
- Calories: 185 kcal
- Protein: 2g
- Total Fat: 9g
- Saturated Fat: 5g
- Carbohydrates: 25g
- Dietary Fiber: 1g
- Sugars: 15g
- Sodium: 95mg
- Cholesterol: 30mg
- Iron: 6% DV
- Calcium: 2% DV
- Vitamin A: 4% DV
Dark and semi-sweet chocolate contains flavonoids, a class of plant-based antioxidants that have been associated with improved circulation and reduced inflammation when consumed in moderate amounts. The chocolate chips in this recipe contribute a small but meaningful amount of these compounds alongside the pleasure they deliver in every bite.
Eggs provide complete protein and are one of the most bioavailable sources of choline, a nutrient essential for brain function, liver health, and cell membrane integrity. Each cookie contains a small contribution of egg-derived nutrition that goes beyond simply binding the dough together.
Butter, when used in reasonable quantities as part of a balanced diet, supplies fat-soluble vitamins including vitamin A and vitamin E. These vitamins support immune function and skin health and are more easily absorbed by the body when consumed alongside dietary fat, making butter a more functional ingredient than its reputation sometimes suggests.
Walnuts, if added as an optional ingredient, introduce omega-3 fatty acids and magnesium into each cookie. Magnesium plays a role in muscle function, sleep quality, and stress regulation, and most people do not consume enough of it through their regular diet. A cookie that delivers even a small amount is worth noting.
Storage Instructions
Once your cookies have cooled completely to room temperature, store them in an airtight container at room temperature. They will stay soft and fresh for up to 5 days. To maintain the soft texture throughout storage, place a small slice of white bread in the container alongside the cookies. The cookies draw moisture from the bread and remain soft for longer without any change in flavor.
Avoid storing cookies in the refrigerator unless absolutely necessary. The cold environment dries them out significantly and makes them harder and less pleasant to eat. If you do need to refrigerate them, bring them back to room temperature before eating or warm them briefly in the microwave for 10 to 12 seconds with a small glass of water beside them to reintroduce moisture.
For longer storage, these cookies freeze beautifully both baked and unbaked. Baked cookies should be fully cooled before freezing. Arrange them in a single layer in a freezer-safe container separated by sheets of parchment paper to prevent sticking. Frozen baked cookies keep well for up to 3 months and thaw at room temperature within 20 to 30 minutes.
Unbaked dough balls can also be frozen directly from the shaped stage, before any resting or baking. Store them in a labeled zip-lock freezer bag and bake directly from frozen at 375°F, adding 2 to 3 extra minutes to the standard bake time. This is one of the most practical baking habits you can develop for consistent fresh cookies on demand.
Suggestions
These cookies are wonderful on their own, but pairing them with a cold glass of whole milk is one of those combinations that never needs reinvention. The fat in the milk softens the sweetness of the chocolate and balances the richness of the butter in a way that feels deeply familiar. Serve them warm from the oven with milk on the side and the experience is simply unbeatable.
For a more indulgent dessert application, sandwich two cookies around a scoop of vanilla bean or salted caramel ice cream. The warmth of a freshly baked cookie against cold, creamy ice cream creates a contrast that is genuinely hard to improve upon. Press the sandwich gently so the ice cream reaches the edges and then roll the sides in mini chocolate chips or crushed pretzels for texture.
If you are packaging these as a gift or for a cookie exchange, stack five or six cookies and wrap them in parchment paper tied with kitchen twine. Add a small handwritten card with the recipe name and a note about storage. This presentation is simple and thoughtful, and it elevates what is already a generous gift into something that feels considered and personal.
For a holiday variation, press a few red and green M&Ms into the tops of the dough balls before baking in place of some of the chocolate chips. Alternatively, stir a half teaspoon of peppermint extract into the dough and use dark chocolate chips for a mint chocolate version that works beautifully during the winter season.
Seasonal Relevance
Chocolate chip cookies are one of the few baked goods that carry no real seasonal limitation, but they reach a particular kind of perfection in the cooler months. There is something about the smell of butter and brown sugar warming in an oven that feels especially right when the temperature drops and the days get shorter. Autumn and winter are peak cookie season, and this recipe belongs at the center of it.
During the holiday season, this recipe becomes even more relevant as a base for gifting, cookie swaps, and holiday baking traditions. The dough can be made ahead of time and stored in the refrigerator for up to 72 hours, which makes it an ideal recipe to prep the day before a holiday event and bake fresh on the day so guests receive warm cookies straight from the oven.
In spring and summer, these cookies still hold their own but tend to be served at room temperature rather than warm. For warmer months, lean into the ice cream sandwich variation mentioned in the Suggestions section, or bake smaller, thinner cookies by using less dough per ball and skipping the chill. The result is a slightly crispier, lighter version that suits the season better.
Year-round, these cookies serve as the foundation for dozens of variations. Swap the semi-sweet chips for white chocolate and macadamia, add dried cranberries for a festive autumn version, or fold in toasted coconut for a summer-appropriate riff. The base recipe is solid enough to carry any direction you take it, regardless of what month the calendar shows.
Final Words
This soft chocolate chip cookie recipe is the result of understanding what actually makes a cookie worth baking twice. It is not about exotic ingredients or complicated methods. It is about respecting a handful of key principles — proper butter temperature, accurate flour measurement, the right bake time, and a little patience with the chill — and executing them consistently every single time.
What I hope you take away from this recipe is confidence. Cookie baking has a reputation for being finicky, but it does not have to be. When you understand why each step matters, the process stops feeling unpredictable and starts feeling reliable. And reliable is exactly what a go-to recipe should be — something you can make without stress and trust completely.
The first time you pull a tray of these from the oven and watch the centers settle into that perfect soft, slightly underdone finish, you will understand what all the attention to detail was for. That texture is not luck. It is the payoff of doing things the right way, and it is entirely repeatable every single time you make this recipe.
Keep this one close. Share it, adapt it, make it your own over time. The best recipes are the ones that become part of your kitchen story, and this soft chocolate chip cookie recipe has all the qualities to earn that place in yours. I hope it delivers the same joy in your home that it has in every kitchen where it has been made.
Frequently Asked Questions
Why do my chocolate chip cookies come out flat every time I bake them?
Flat cookies are almost always caused by butter that is too warm or partially melted before creaming. Make sure your butter is at true room temperature — cool to the touch but soft enough to indent. Chilling the shaped dough balls for 30 minutes before baking also prevents excessive spreading during baking.
Can I substitute bread flour for all-purpose flour in this recipe?
Yes, bread flour works well and produces a slightly chewier cookie due to its higher protein content. Use it as a direct one-to-one substitution. The texture will be a little denser and more substantial, which many people actually prefer. The flavor remains the same, and the softness is not significantly affected.
How do I know when the cookies are done if the center still looks raw?
Look at the edges rather than the center. When the outer edges are set and just beginning to turn golden while the center still appears soft and glossy, the cookies are done. Remove them from the oven immediately and let them rest on the hot pan for 5 minutes. The residual heat finishes baking the center without drying it out.
Soft Chocolate Chip Cookie Recipe
36
servings15
minutes10
minutes185
kcal25
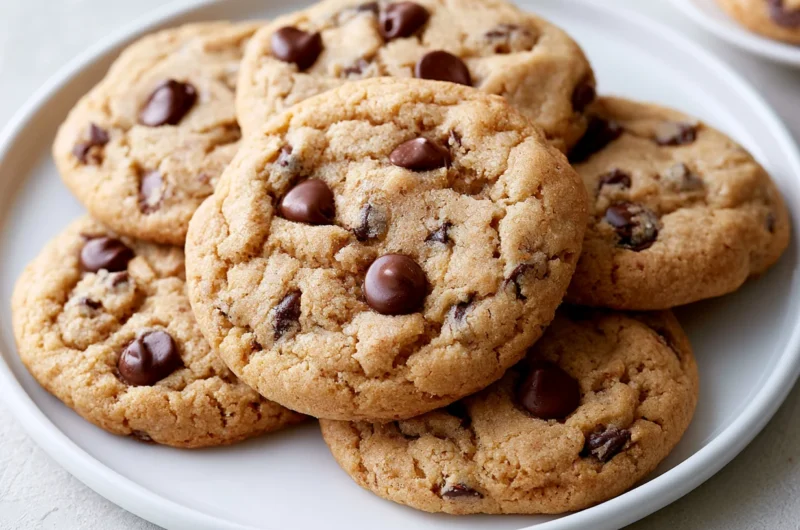
minutesThick, chewy, and irresistibly soft, these bakery-style chocolate chip cookies are made with simple pantry staples. Golden on the edges, pillowy in the center, and loaded with melted chocolate in every single bite.
Ingredients
Base Ingredients:
2¼ cups all-purpose flour
1 tsp baking soda
1 tsp fine sea salt
1 cup unsalted butter, softened to room temperature
¾ cup granulated white sugar
¾ cup packed light brown sugar
2 large eggs, room temperature
2 tsp pure vanilla extract
2 cups semi-sweet chocolate chips
Optional Add-ins:
½ cup chopped walnuts or pecans
½ tsp espresso powder
¼ tsp ground cinnamon
½ cup dark chocolate chunks
1 tbsp cornstarch
Flaky sea salt, for topping before baking
Directions
- Preheat your oven to 375°F (190°C) and line two large baking sheets with parchment paper. Make sure your butter and eggs are fully at room temperature before you begin.
- In a medium bowl, whisk together the flour, baking soda, and salt until evenly combined. Set the bowl aside.
- In a large mixing bowl, beat the softened butter with both sugars on medium-high speed for 3 to 4 minutes until the mixture is pale, light, and fluffy.
- Add the eggs one at a time, beating well after each addition. Add the vanilla extract and beat for another 30 seconds until the batter is smooth and glossy.
- Reduce the mixer to low speed and add the flour mixture in three additions, mixing just until no dry flour streaks remain after each addition. Do not overmix.
- Fold in the chocolate chips and any optional add-ins by hand using a rubber spatula until evenly distributed throughout the dough.
- Scoop the dough into rounded balls using a medium cookie scoop and place them at least 2 inches apart on the prepared baking sheets.
- Refrigerate the shaped dough balls for 30 minutes before baking for thicker, chewier results with a more developed flavor.
- Bake for 10 to 12 minutes until the edges are set and lightly golden but the centers still appear soft and slightly underdone.
- Remove from the oven and let the cookies rest on the hot pan for 5 minutes before transferring to a wire rack to cool completely.
Recipe Video
Notes
- Use butter that is softened to true room temperature — cool to the touch but soft enough to indent. Never use melted or overly warm butter, as it causes cookies to spread flat.
- Do not overbake. Pull the cookies when the centers still look soft and glossy. They will continue to set from residual heat on the pan after coming out of the oven.
- Spoon flour into the measuring cup and level it off with a straight edge rather than scooping directly from the bag, to avoid packing in too much flour.
- Chilling the dough for 30 minutes before baking is strongly recommended. It firms the fat, reduces spread, and produces a thicker, more flavorful cookie.
- For overnight prep, the shaped dough balls can be refrigerated for up to 72 hours before baking. The longer the rest, the deeper the flavor.
- Unbaked dough balls freeze well for up to 3 months. Bake directly from frozen at 375°F, adding 2 to 3 extra minutes to the standard bake time.
- Store baked cookies in an airtight container at room temperature for up to 5 days
- Place a slice of white bread in the container to keep them soft throughout storage.
- For a holiday variation, add a pinch of peppermint extract and swap to dark chocolate chips, or press seasonal M&Ms into the tops before baking.